This is How I Built a Real-time Chat Application with Socket.io & Node.js [Added Automated Testing]
![This is How I Built a Real-time Chat Application with Socket.io & Node.js [Added Automated Testing]](/_next/image?url=https%3A%2F%2Fcdn.hashnode.com%2Fres%2Fhashnode%2Fimage%2Fupload%2Fv1681709527211%2Ffde84202-e495-4ba0-8258-05288d138179.png&w=3840&q=75)
Tech Storyteller | Developer Advocate | Guest Writer | Speaker. #DevOps
In this tutorial, let's learn how to use Socket.IO and Node.js and create a simple chat application. We will set up a basic Node.js app and install the necessary dependencies. With a basic chat interface and add a simple feature where users can easily send and receive messages with the help of the Socket.IO connection. Socket.io is a widely used library that helps with real-time communication between web clients and servers. Finally, we will write a simple test with the Mocha framework and automate it through Harness CI.
Prerequisites
Node.js installed
Npm installed
Free Harness CI account to automate testing
Tutorial
Install Node.js on your machine: You can download and install the latest version of Node.js from the official website: https://nodejs.org/
Create a new Node.js project: Open a terminal window and create a new directory for your project. Navigate into the new directory and run the following command to create a new package.json file for your project:
npm init -y
- Install Socket.io: Run the following command to install Socket.io in your project:
npm install socket.io
- Create a new Node.js server: Create a new file named
server.jsin your project directory and add the following code:
const express = require('express');
const app = express();
const http = require('http').Server(app);
const io = require('socket.io')(http);

app.use(express.static(__dirname + '/public'));

io.on('connection', (socket) => {
  console.log('A user connected');

  socket.on('disconnect', () => {
    console.log('A user disconnected');
  });

  socket.on('message', (message) => {
    console.log('Received message:', message);
    io.emit('message', message);
  });
});

http.listen(3001, () => {
  console.log('Server started on port 3001');
});
This code adds an event listener for the message event, which is emitted by the client when the user clicks the send button. The server logs the message to the console and then emits a message event to all connected clients using the io.emit() method.
- Create a new HTML file: Create a new file named
index.htmlin the public directory and add the following code. It adds an input field and a button to the index.html file to allow users to send messages to the server. Here's an example:
<!DOCTYPE html>
<html>
<head>
<title>Socket.io Tutorial</title>
</head>
<body>
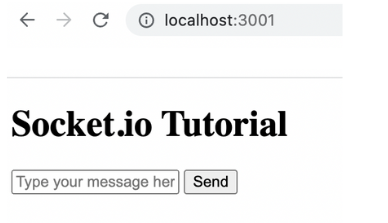
<h1>Socket.io Tutorial</h1>
<div id="messages"></div>
<input id="message-input" type="text" placeholder="Type your message here">
<button id="send-button">Send</button>
<script src="/socket.io/socket.io.js"></script>
<script>
const socket = io();
socket.on('connect', () => {
console.log('Connected to server');
});
socket.on('disconnect', () => {
console.log('Disconnected from server');
});
const messages = document.getElementById('messages');
const messageInput = document.getElementById('message-input');
const sendButton = document.getElementById('send-button');
sendButton.addEventListener('click', () => {
const message = messageInput.value;
socket.emit('message', message);
messageInput.value = '';
});
socket.on('message', (message) => {
const messageElement = document.createElement('div');
messageElement.innerText = message;
messages.appendChild(messageElement);
});
</script>
</body>
</html>
- Start the server: Run the following command in your terminal to start the server:
node server.js
You should see the output on your terminal below, Server started on port 3001
And when you open the 3001 on your local, you should see your chat app running.
Add a Test Case to the Chat Application
Since Socket.io is a real-time framework, it can be a bit challenging to write automated tests for it. However, we can write a simple test to verify that the client and server can communicate with each other and send/receive messages.
Install the mocha testing framework and the chai assertion library by running the following command:
npm install mocha chai --save-dev
[Note: Run the above command in the root of your app]
Make a new folder named test and add a file named test.js in it with the following code.
const assert = require('chai').assert;
const io = require('socket.io-client');
const serverUrl = 'http://localhost:3000';

describe('Socket.io test', function() {
  let client1, client2;

  before(function(done) {
    // Connect to the server
    client1 = io.connect(serverUrl);
    client2 = io.connect(serverUrl);
    done();
  });

  after(function(done) {
    // Disconnect from the server
    client1.disconnect();
    client2.disconnect();
    done();
  });

  it('Should be able to send and receive messages', function(done) {
    client1.emit('message', 'Hello, world!');
    client2.on('message', function(msg) {
      assert.equal(msg, 'Hello, world!');
      done();
    });
  });
});
Now make sure your app is running.
In another terminal open the application and run the following command to test the application.
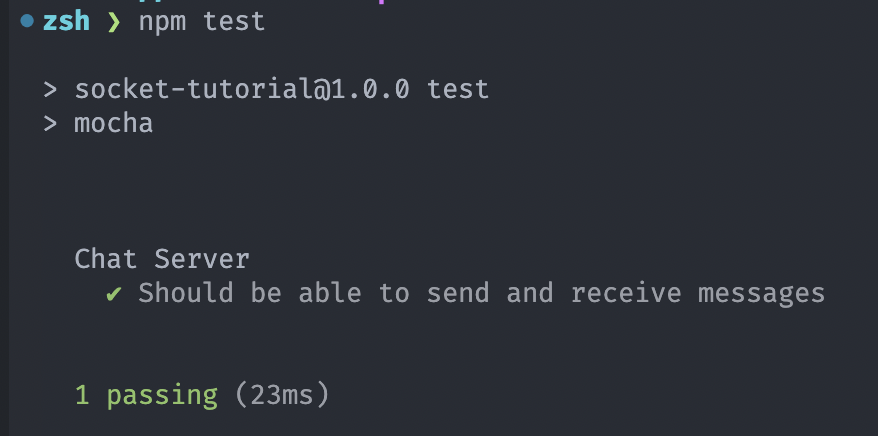
npm test
You should see a successful test passing message.
Push your application code to a source control management system such as GitHub.
My application code is here - chat-app-tutorial
You can fork it or use your own (the one you pushed to your GitHub) to setup automated tests using a CI tool. We are going to extend this tutorial to show you how you can automate tests.
Automate Tests using a CI tool
Here, we will be using the fastest CI tool, Harness.
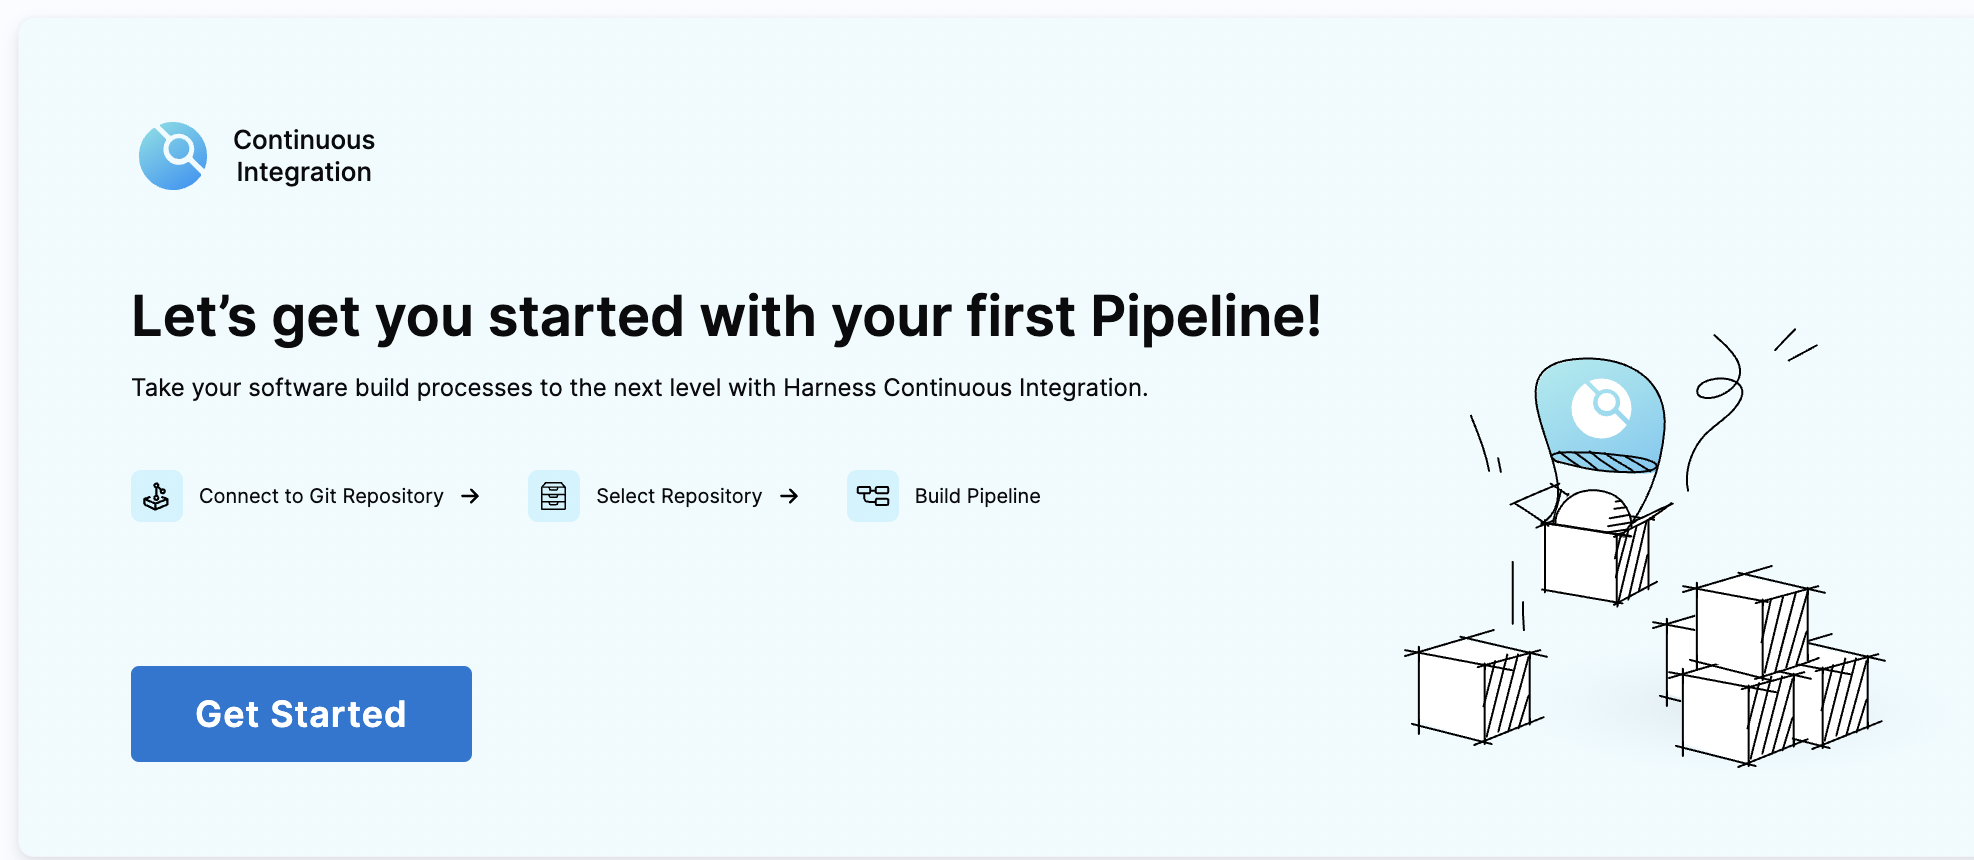
Sign in to your free Harness CI module.
Get started with creating your first pipeline
Authenticate with your GitHub account as your application code is present there.
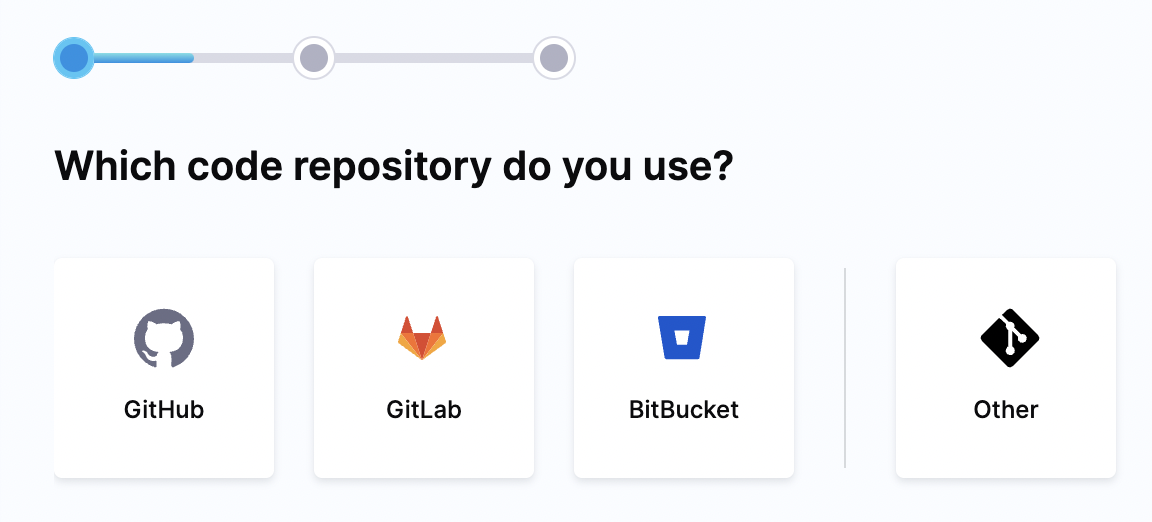
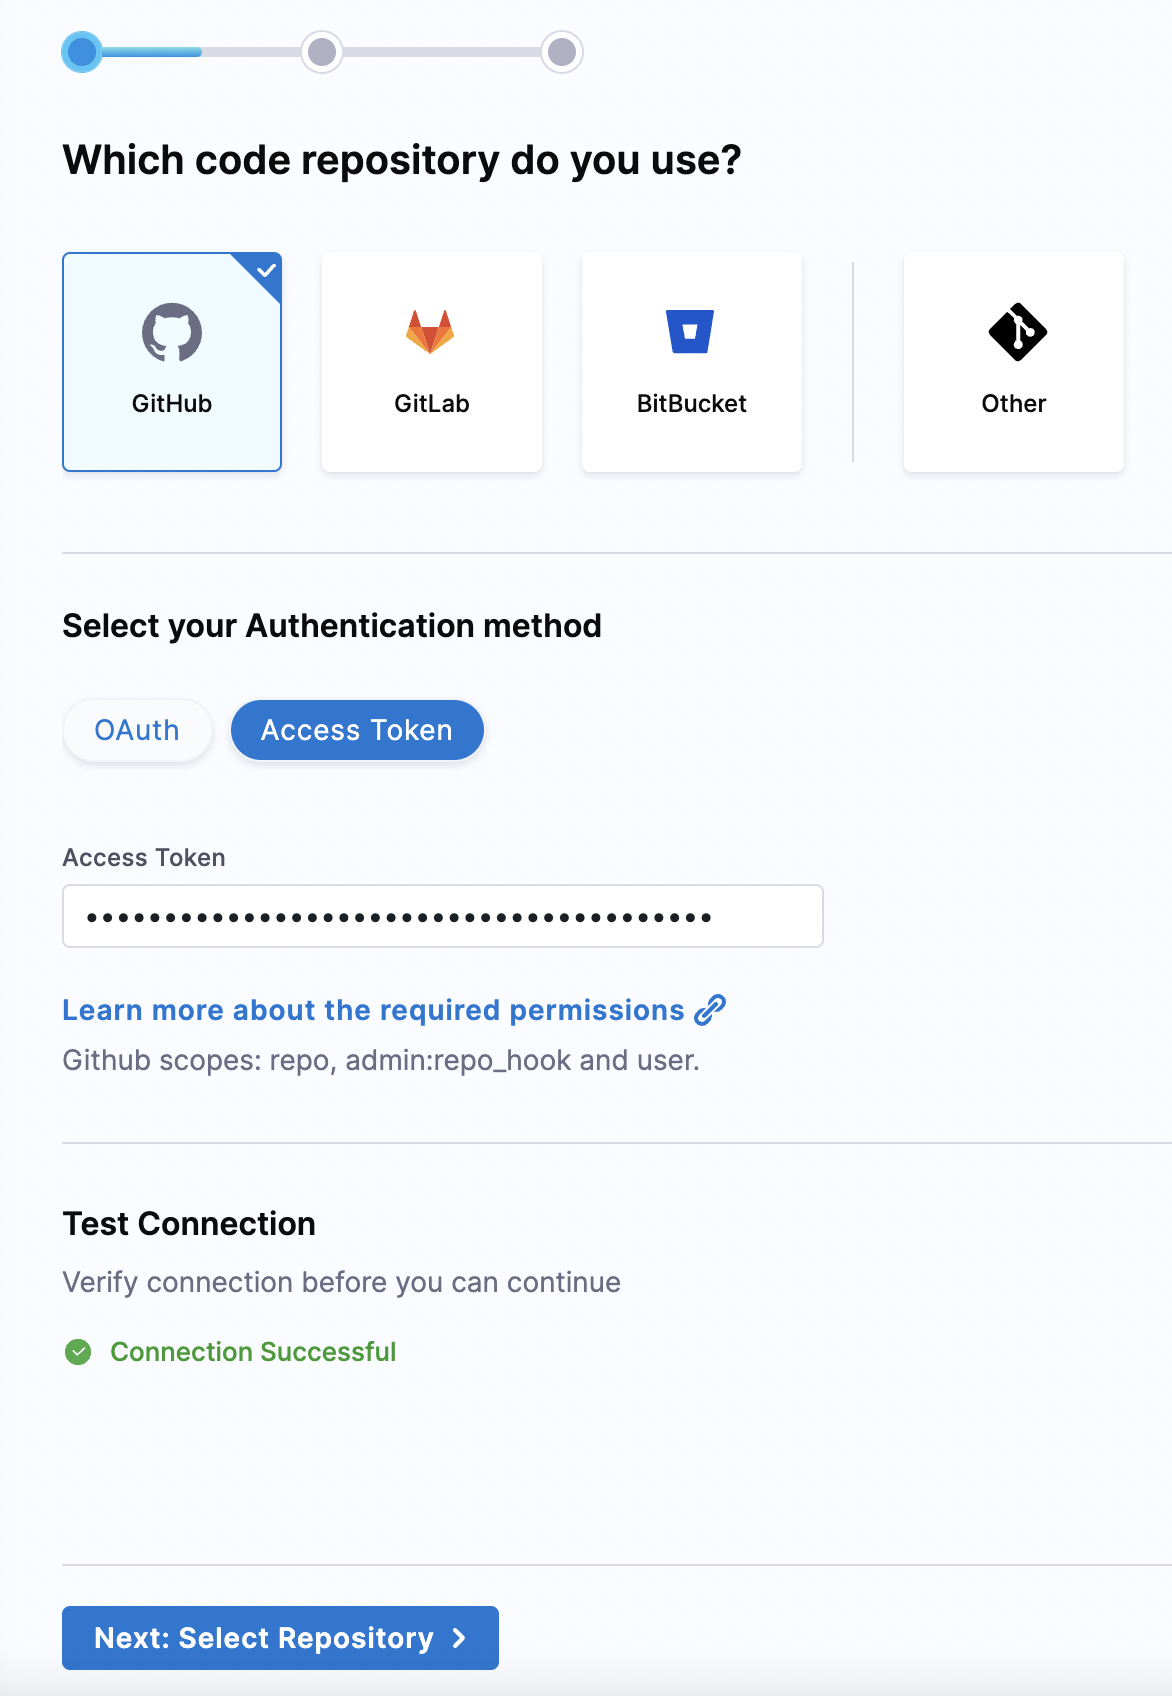
Select your application repository.
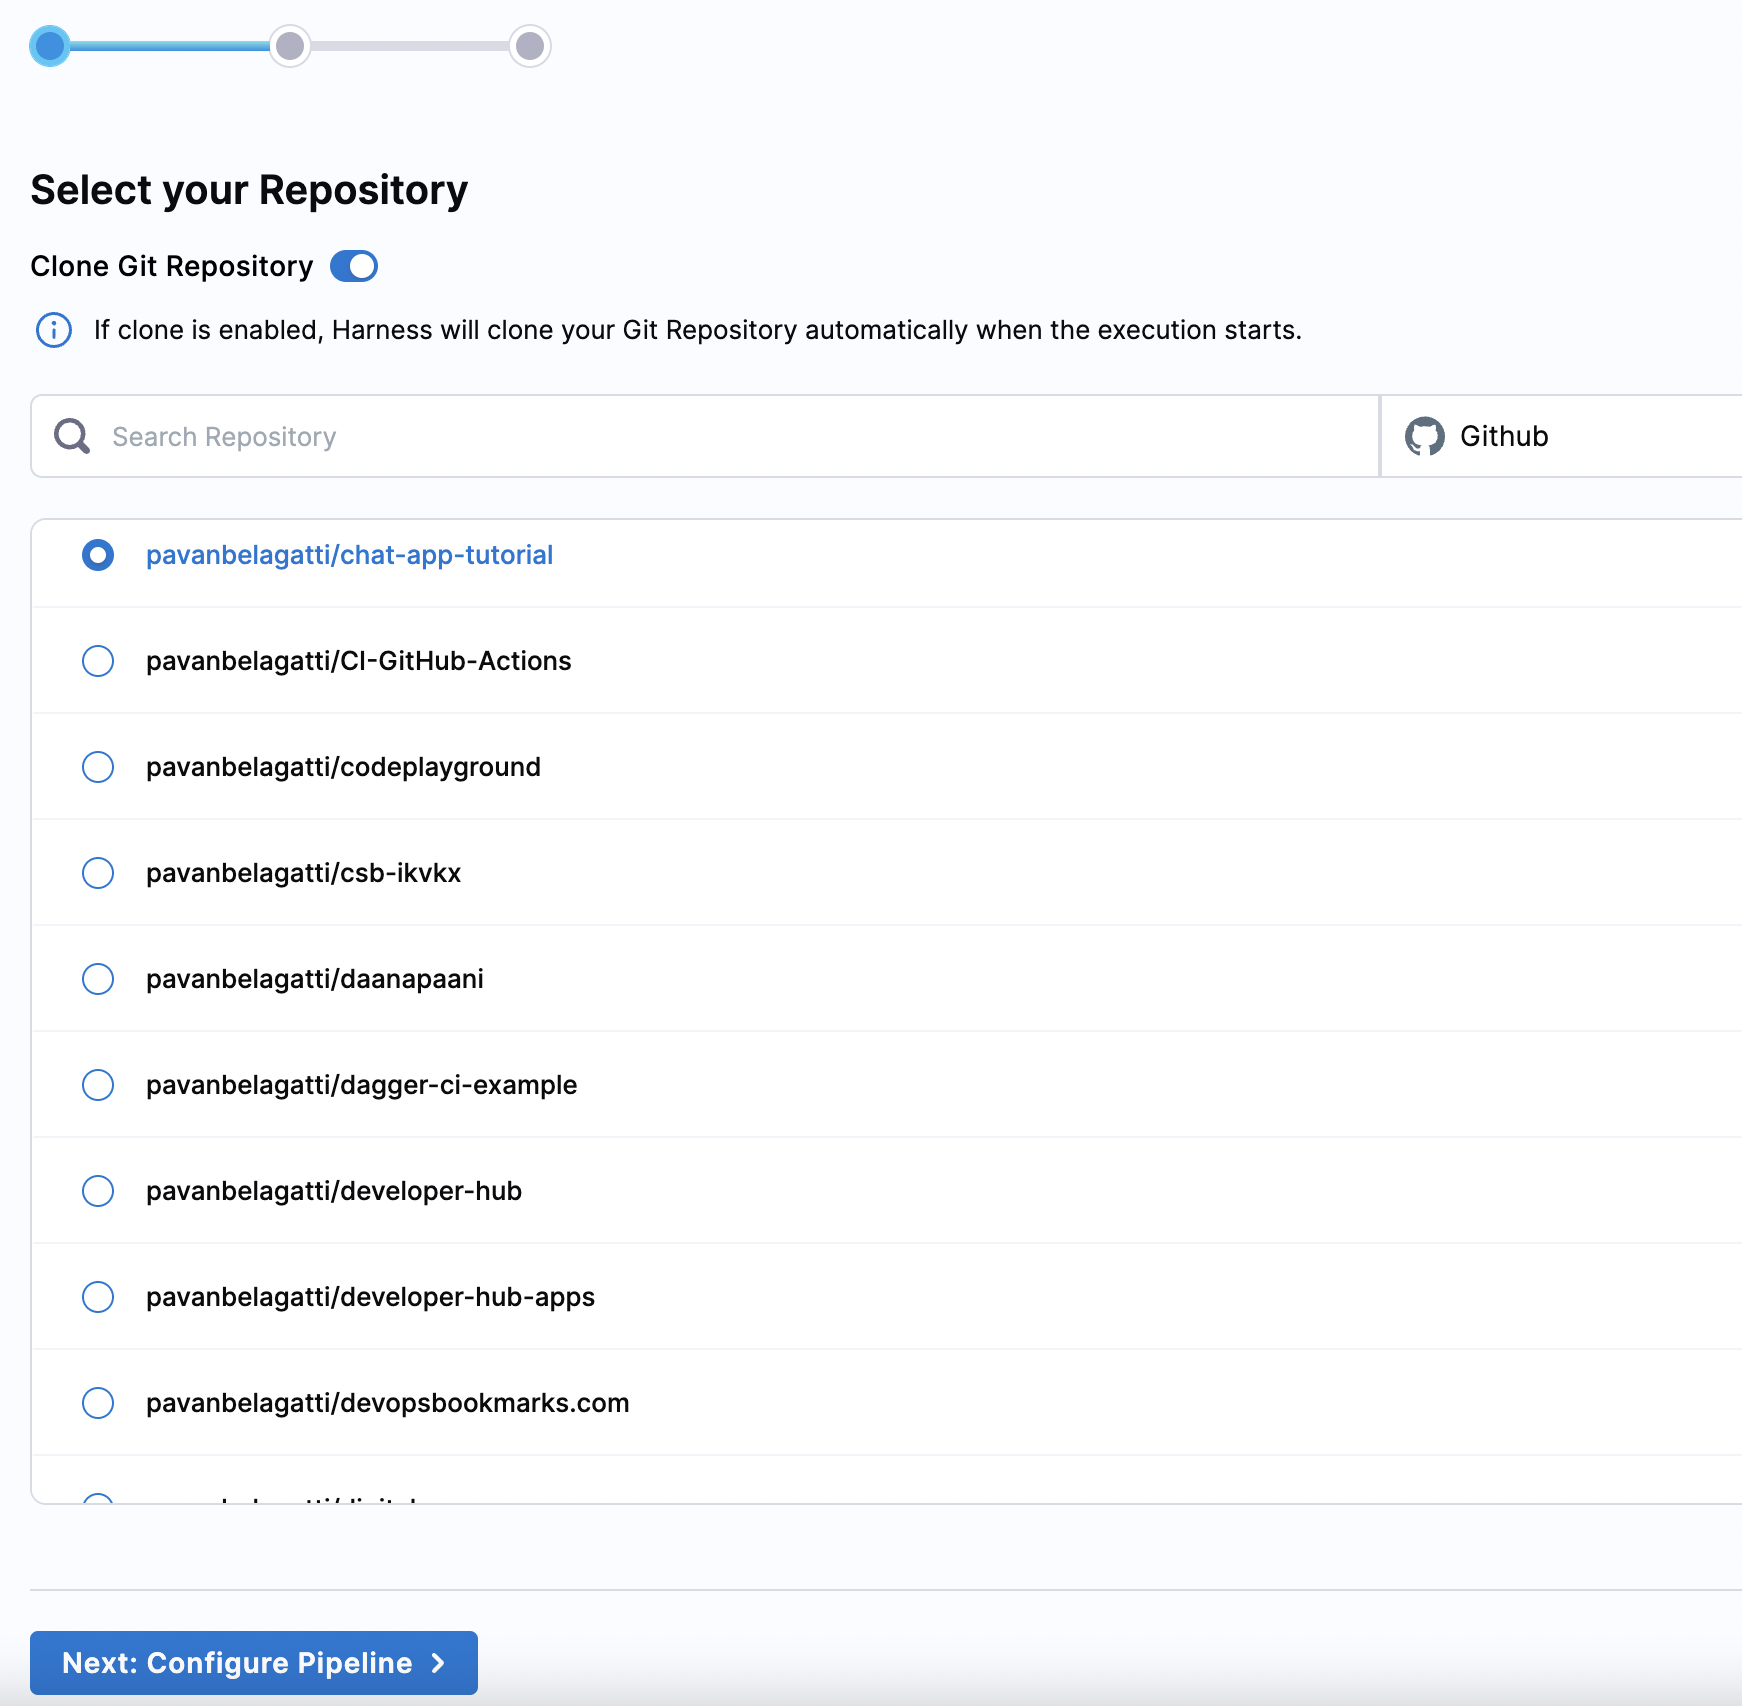
Next, start configuring the pipeline.
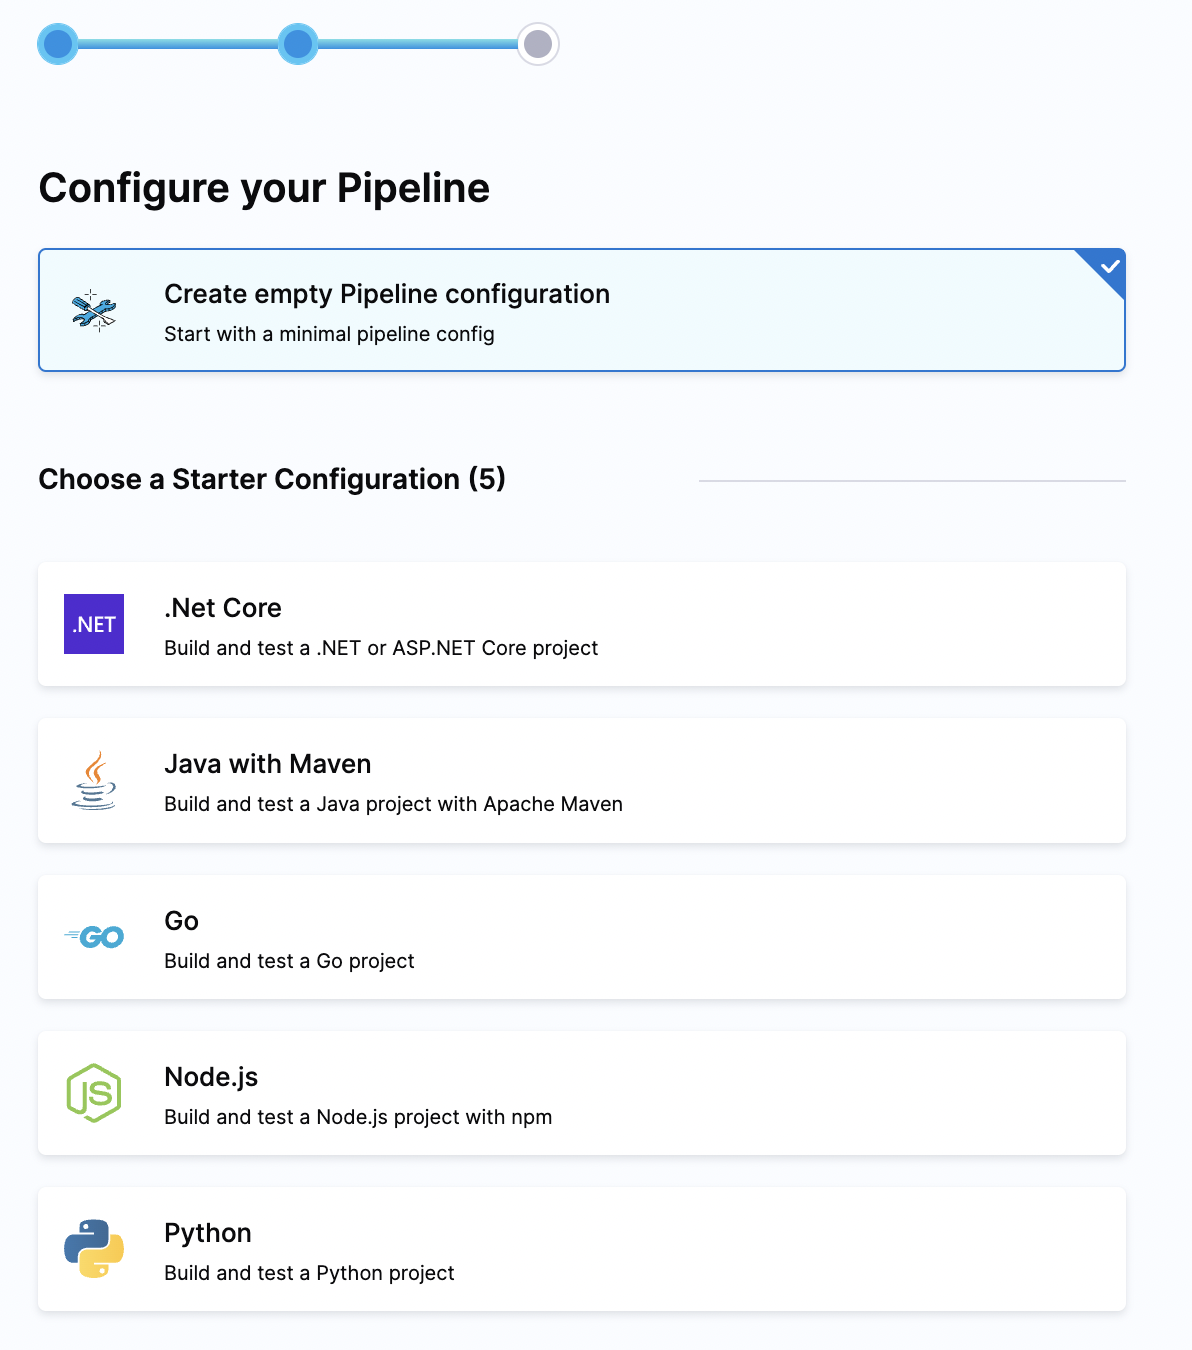
Select Node.js from the list as our application is written in Node.js. What you will then see is a default yaml configuration for your Node.js application.
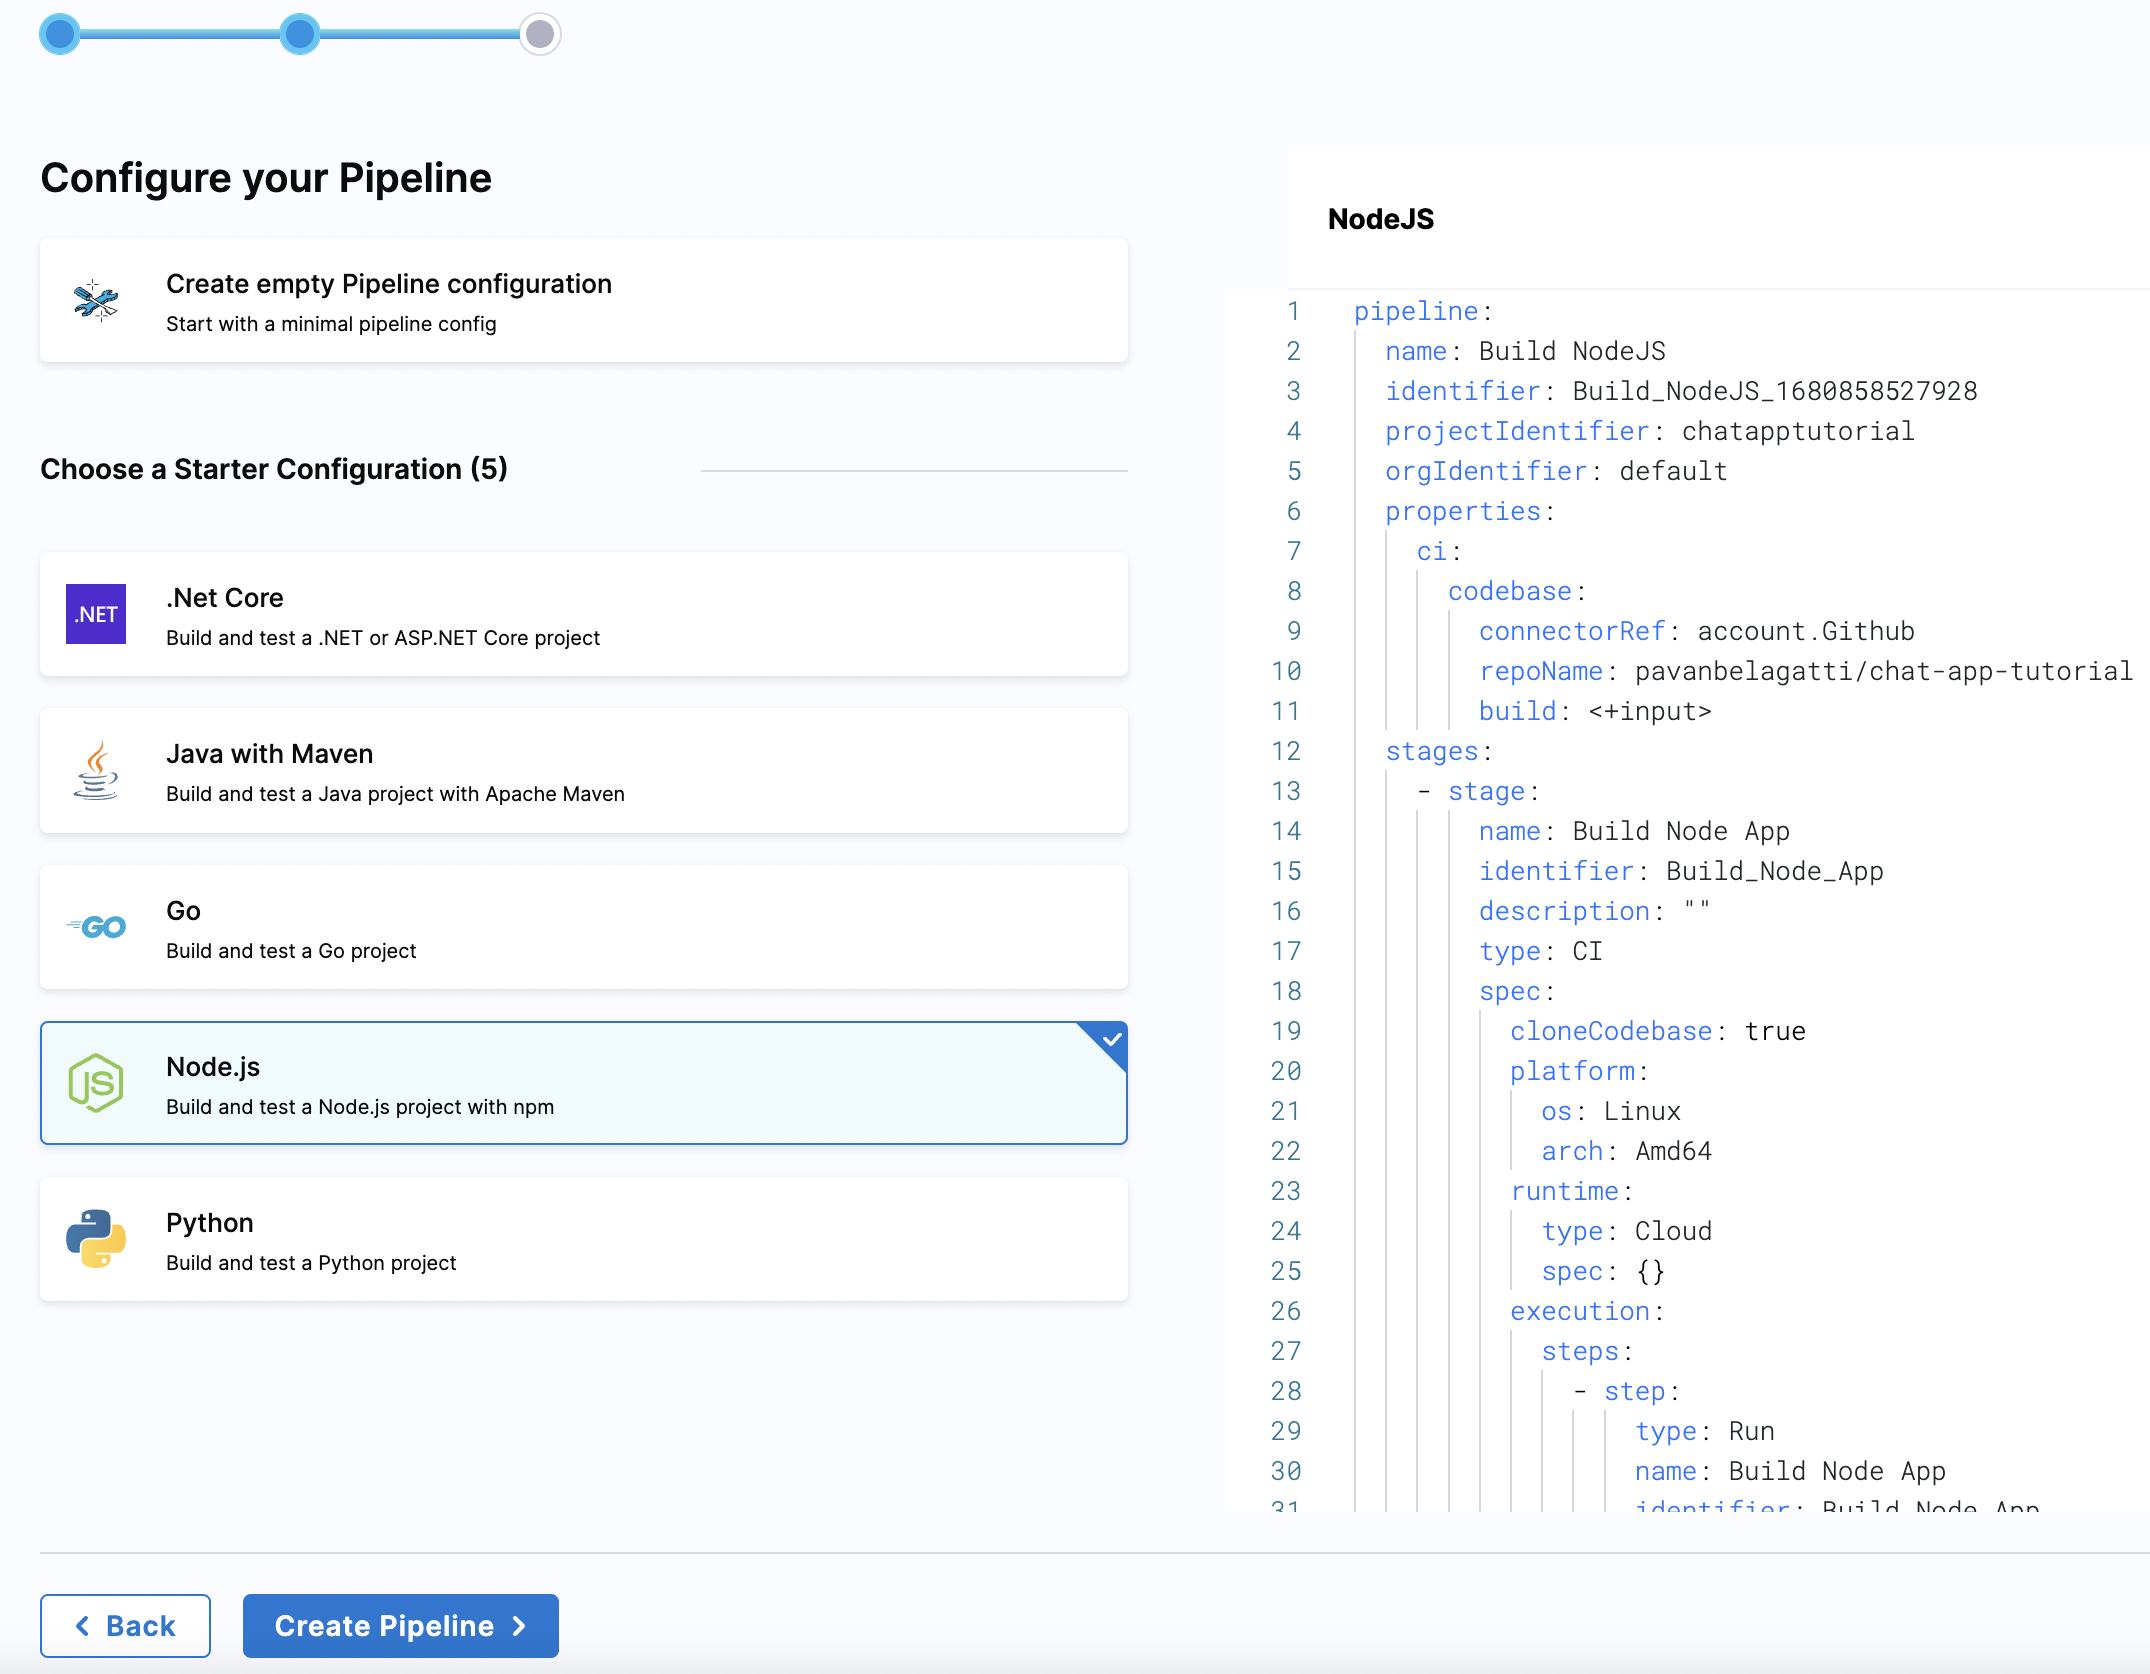
Continue and click the 'Create the pipeline' button. You will the pipeline dashboard.
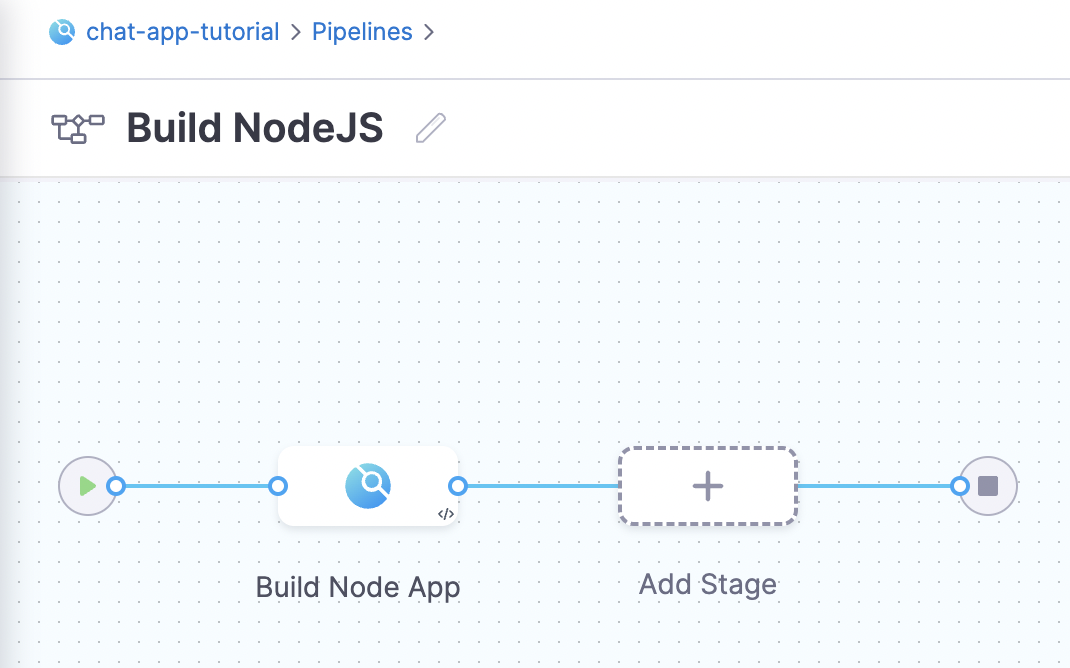
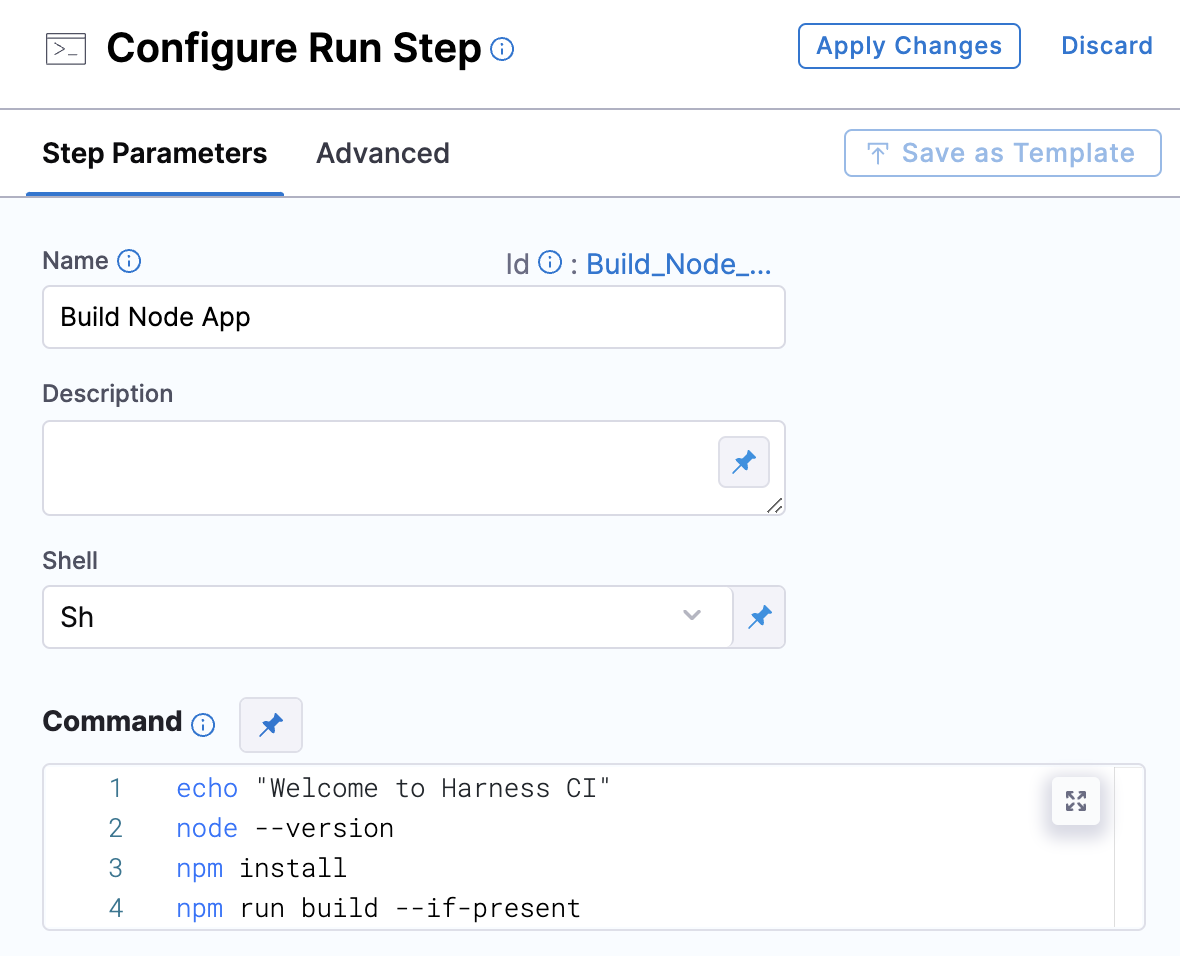
Click on the 'Build Node App' stage, you should see the run step added by default with pre-configurations.
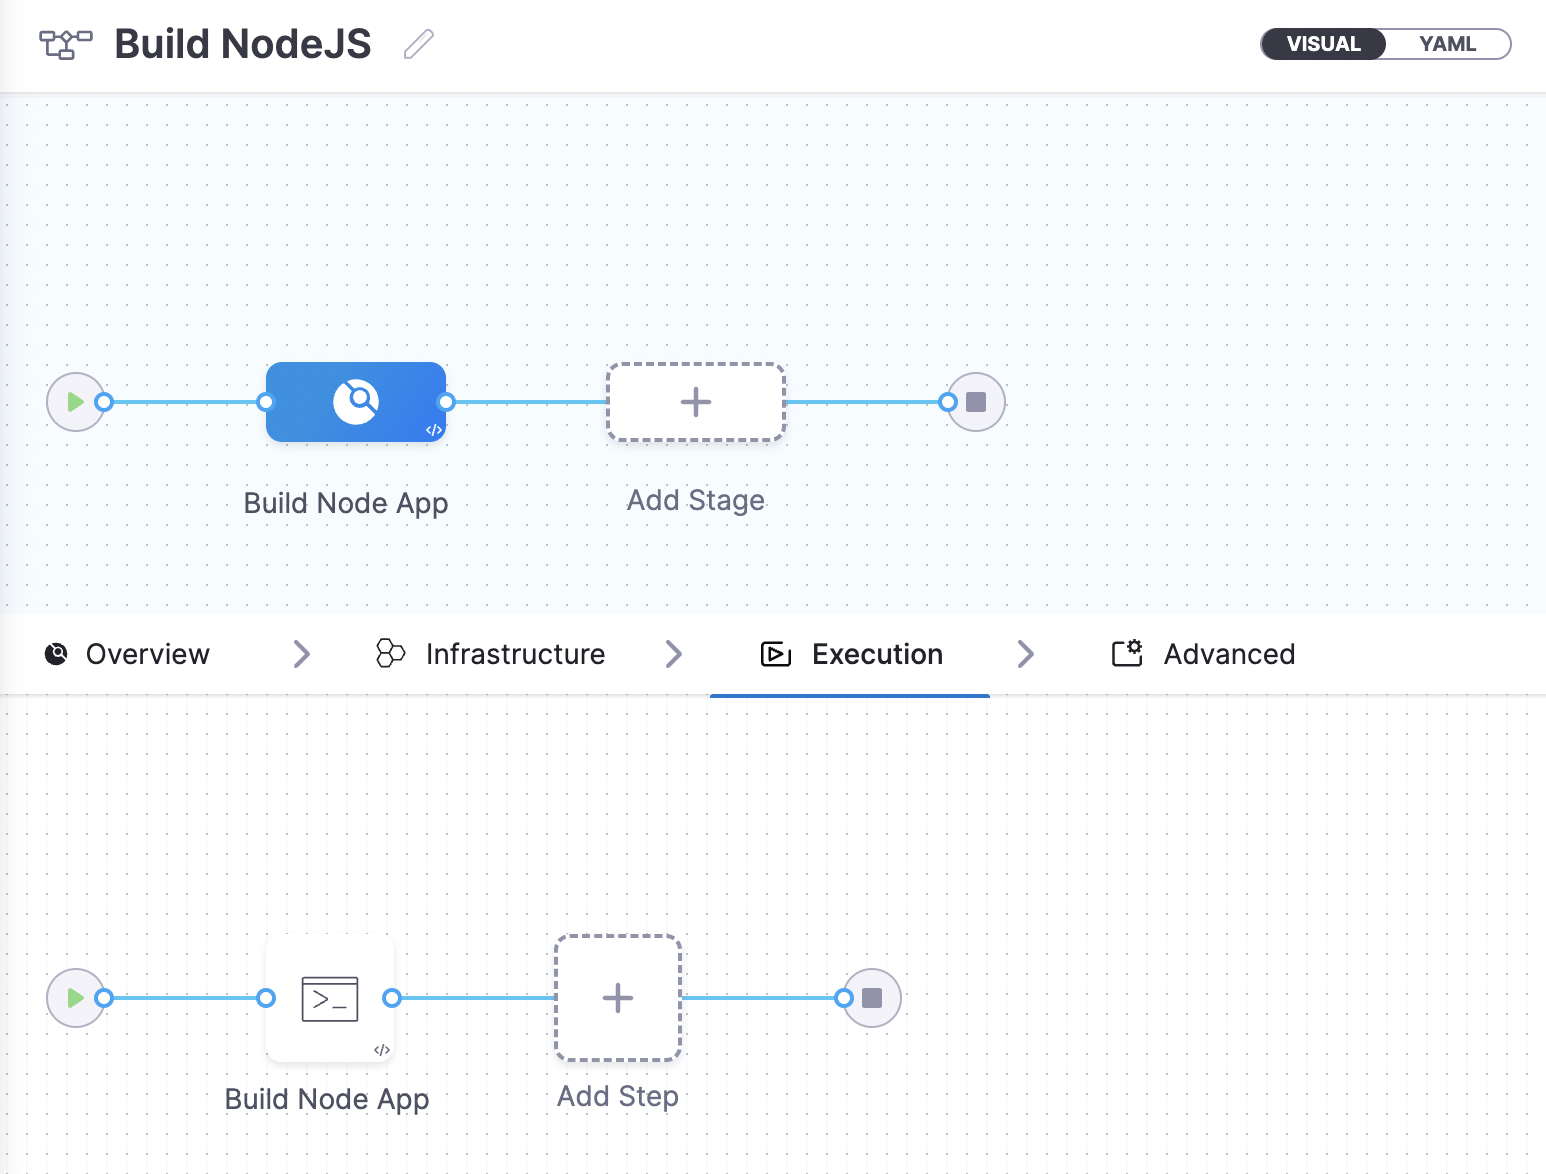
Click the 'Build Node App' step, that is under execution and you will see the default configurations.
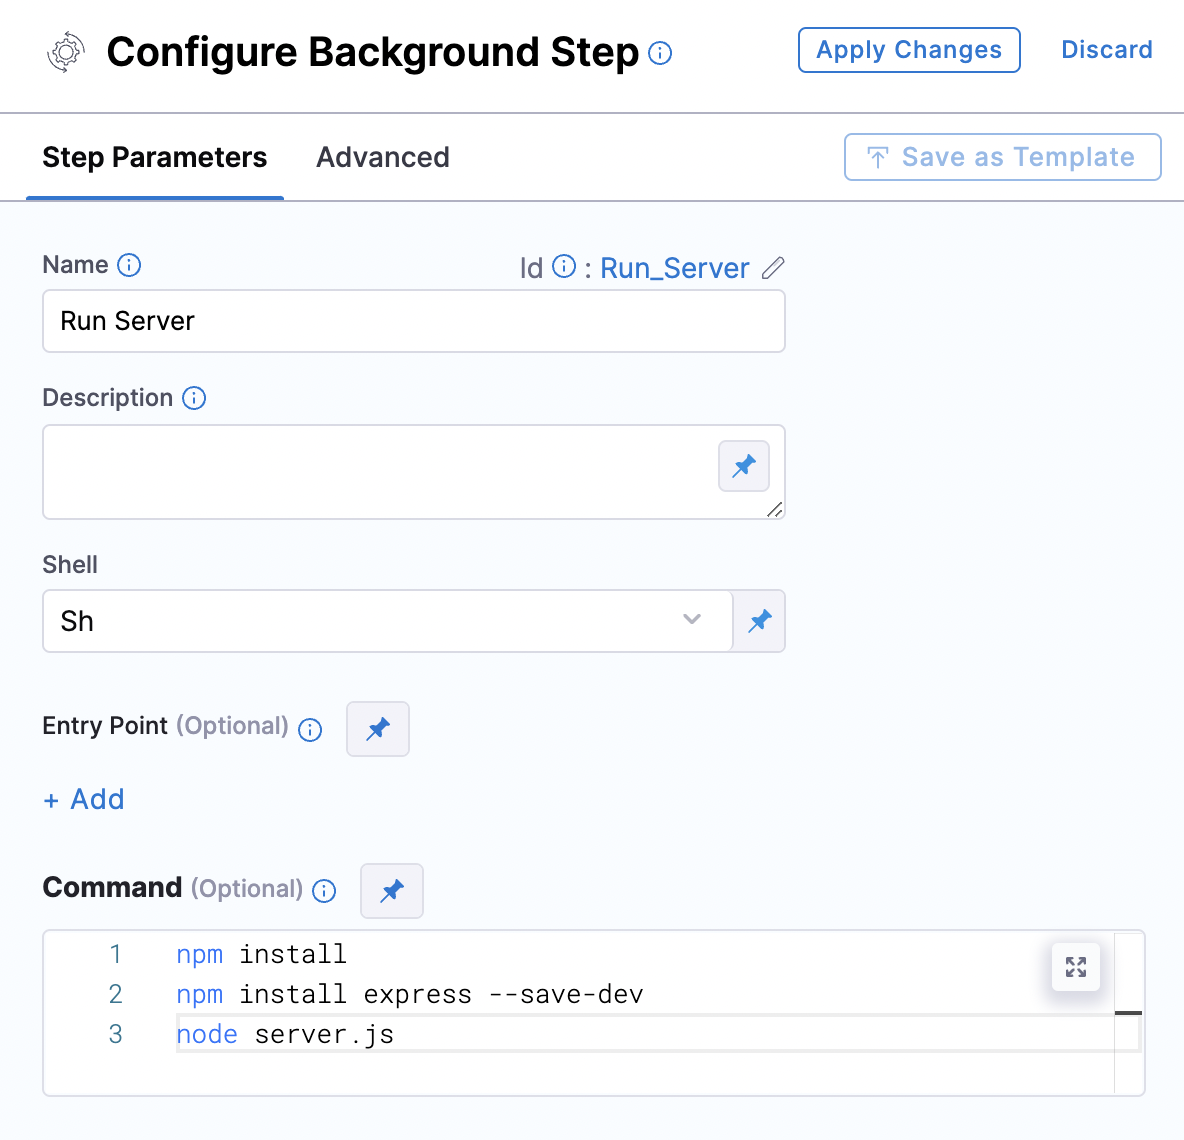
We want the application to be running before testing it. How to make the application run? We will add a background step to run the server.
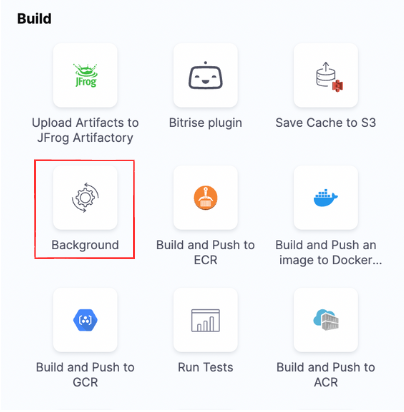
Configure the Background step with the commands shown below.
npm install
npm install express --save-dev
node server.js
The screenshot of the same step is shown below
Apply changes and add another step to test the application.
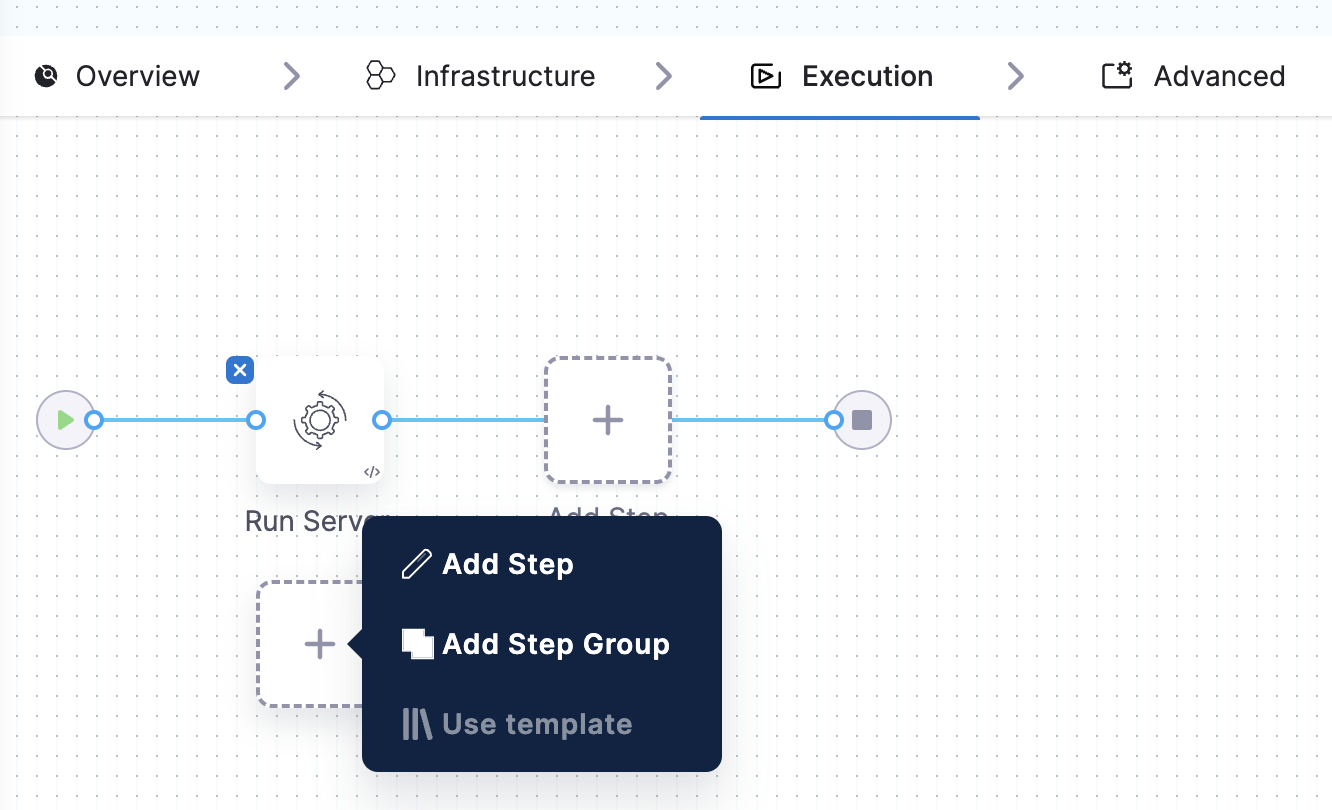
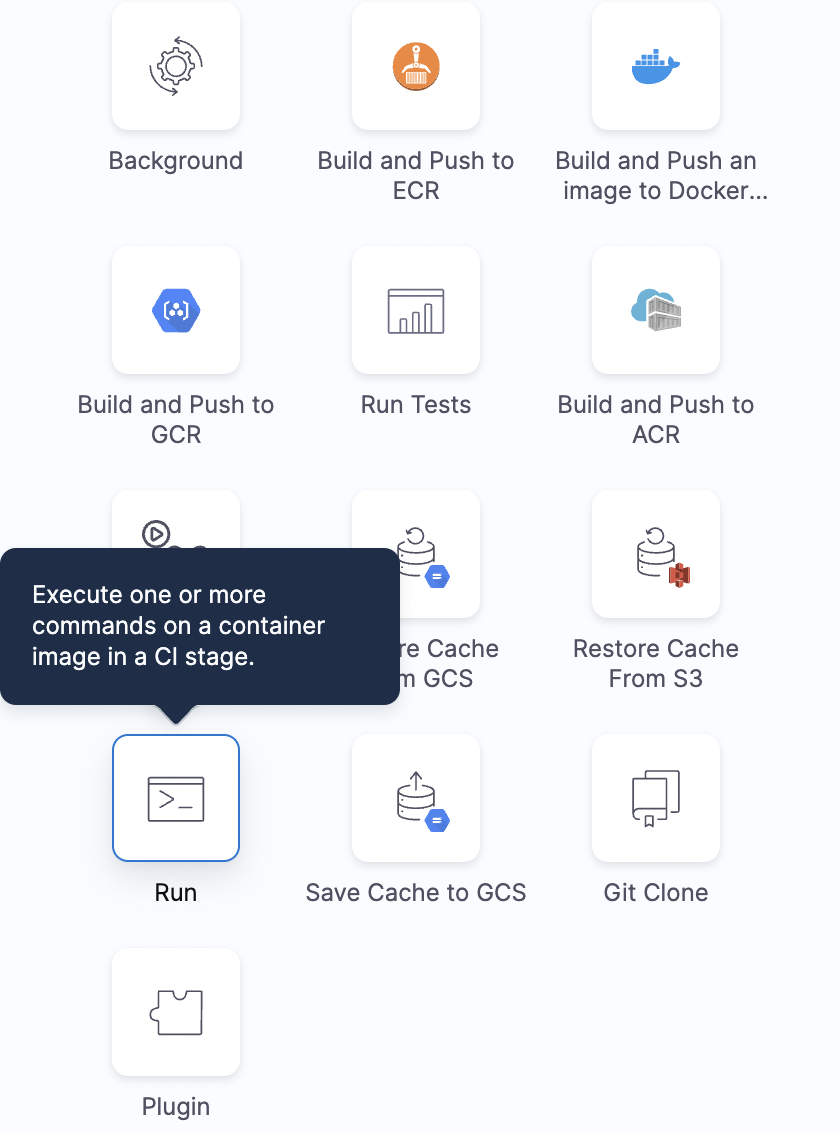
Choose the Run step from the step library.
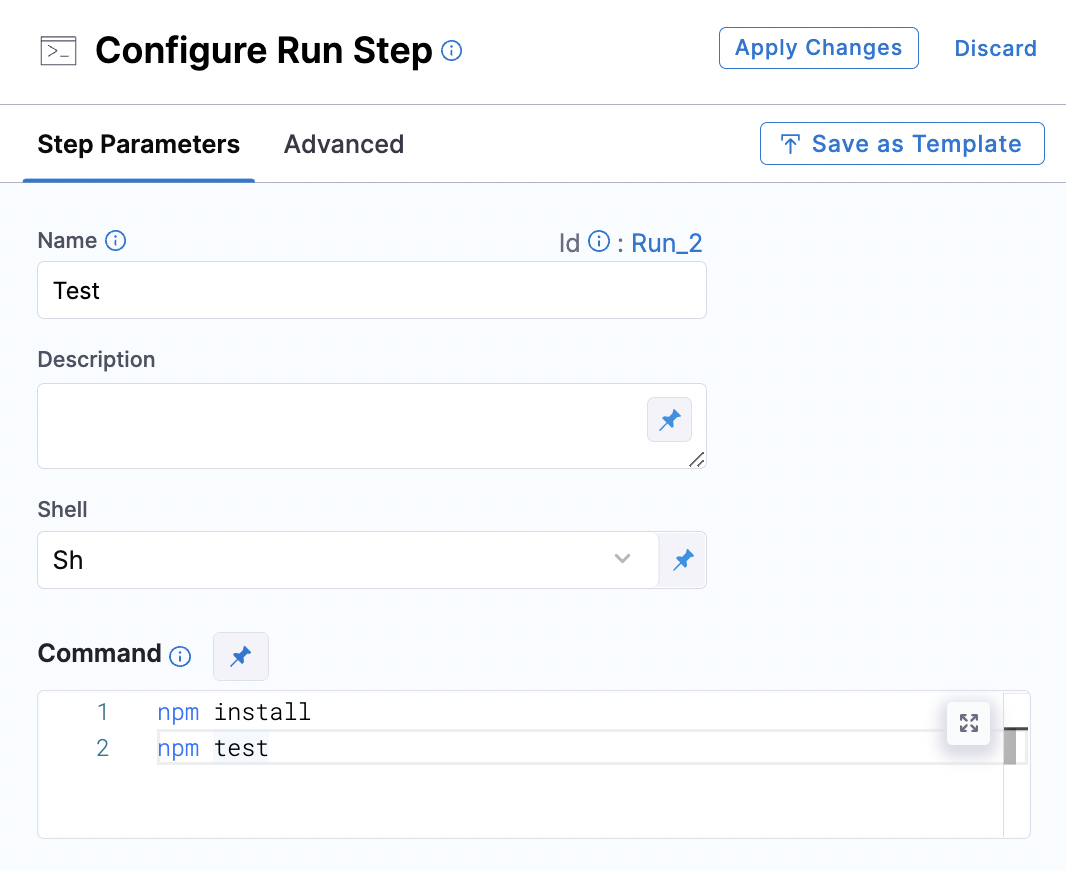
Add the following commands to the run step.
npm install
npm test
You can see the screenshot of the run step with commands added.
Apply changes and save the pipeline.
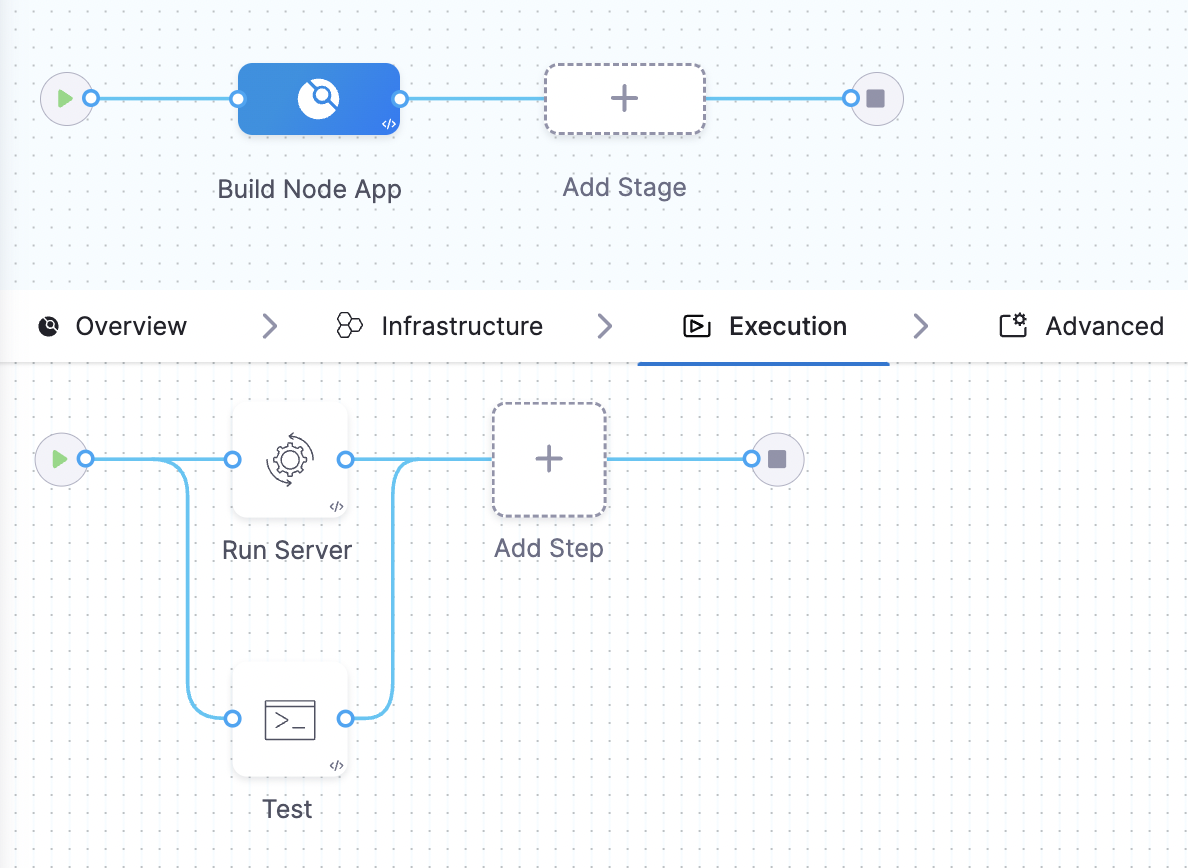
At this point, this is how your pipeline should look like.
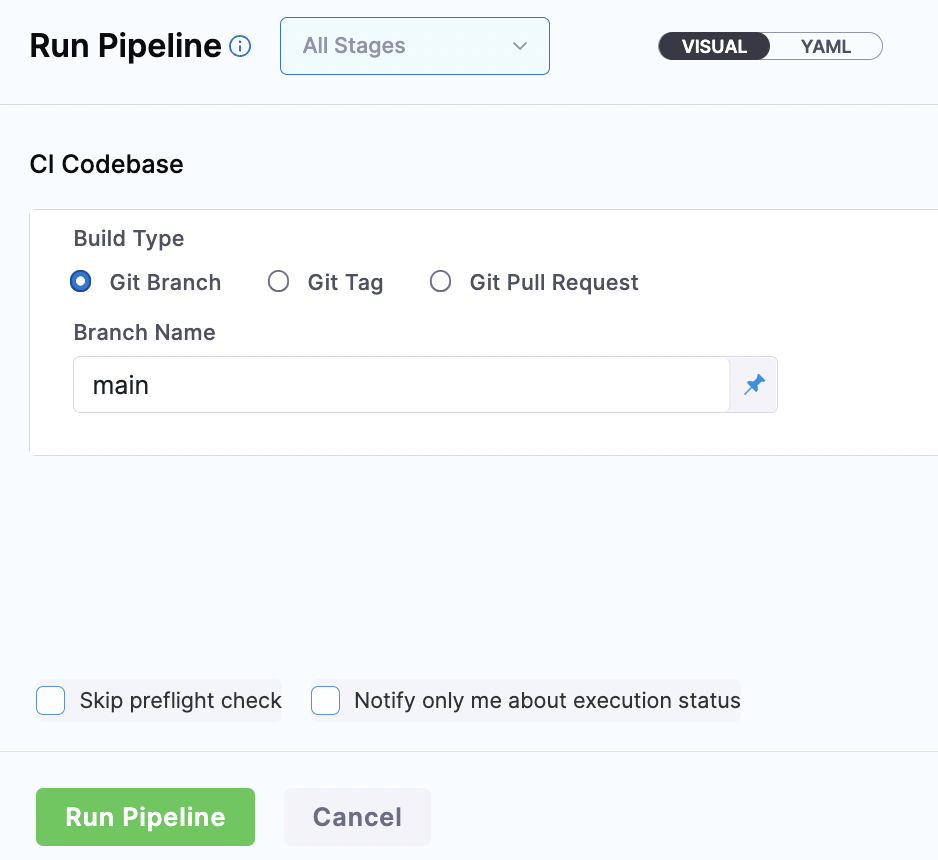
Save everything and run the pipeline.
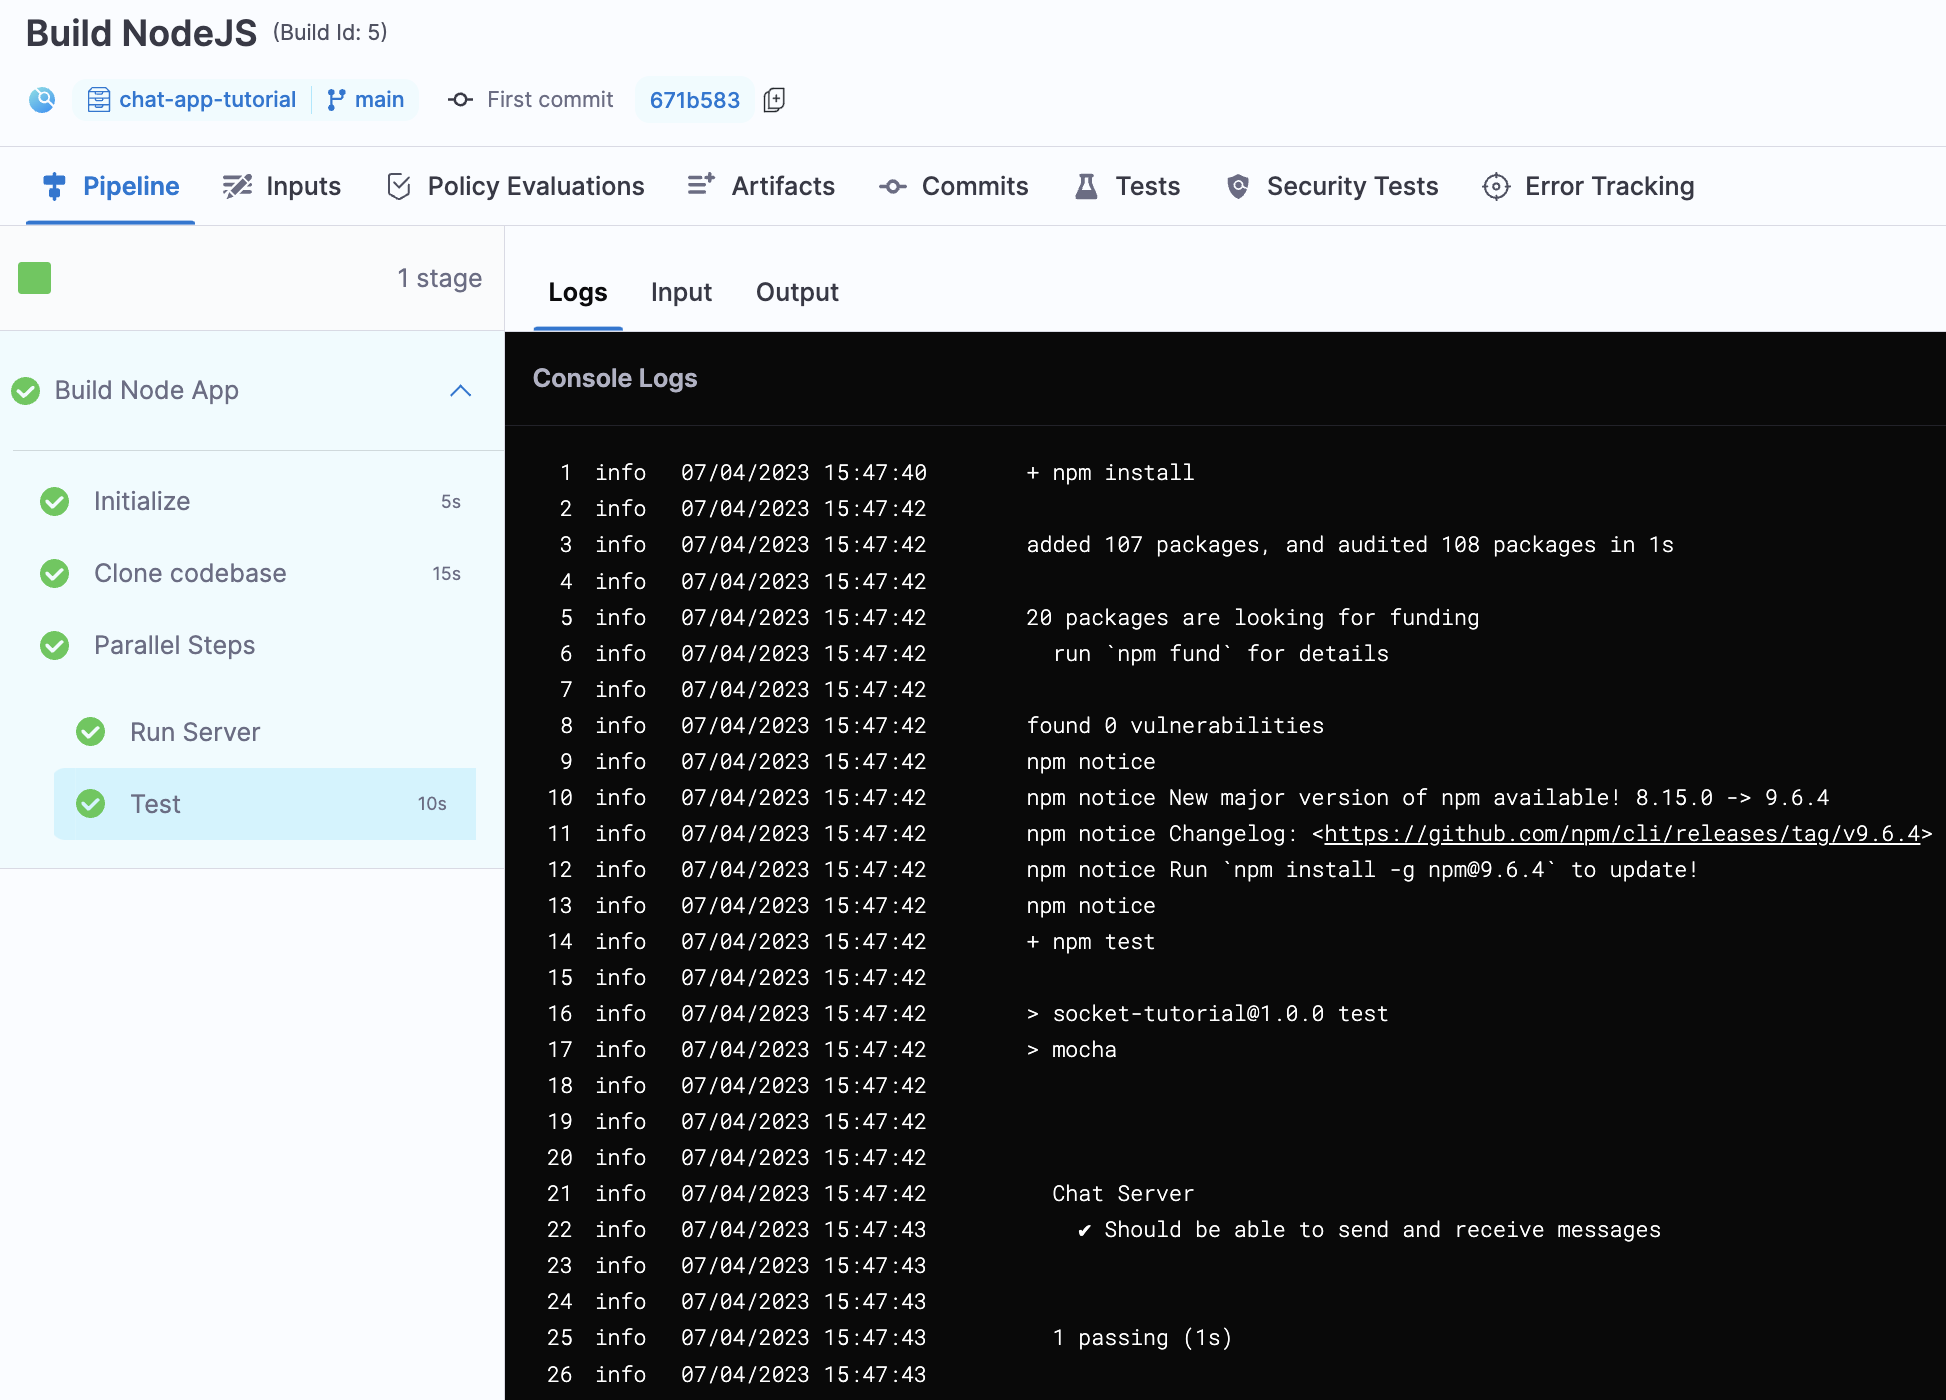
You should see a successful pipeline execution with test passing.
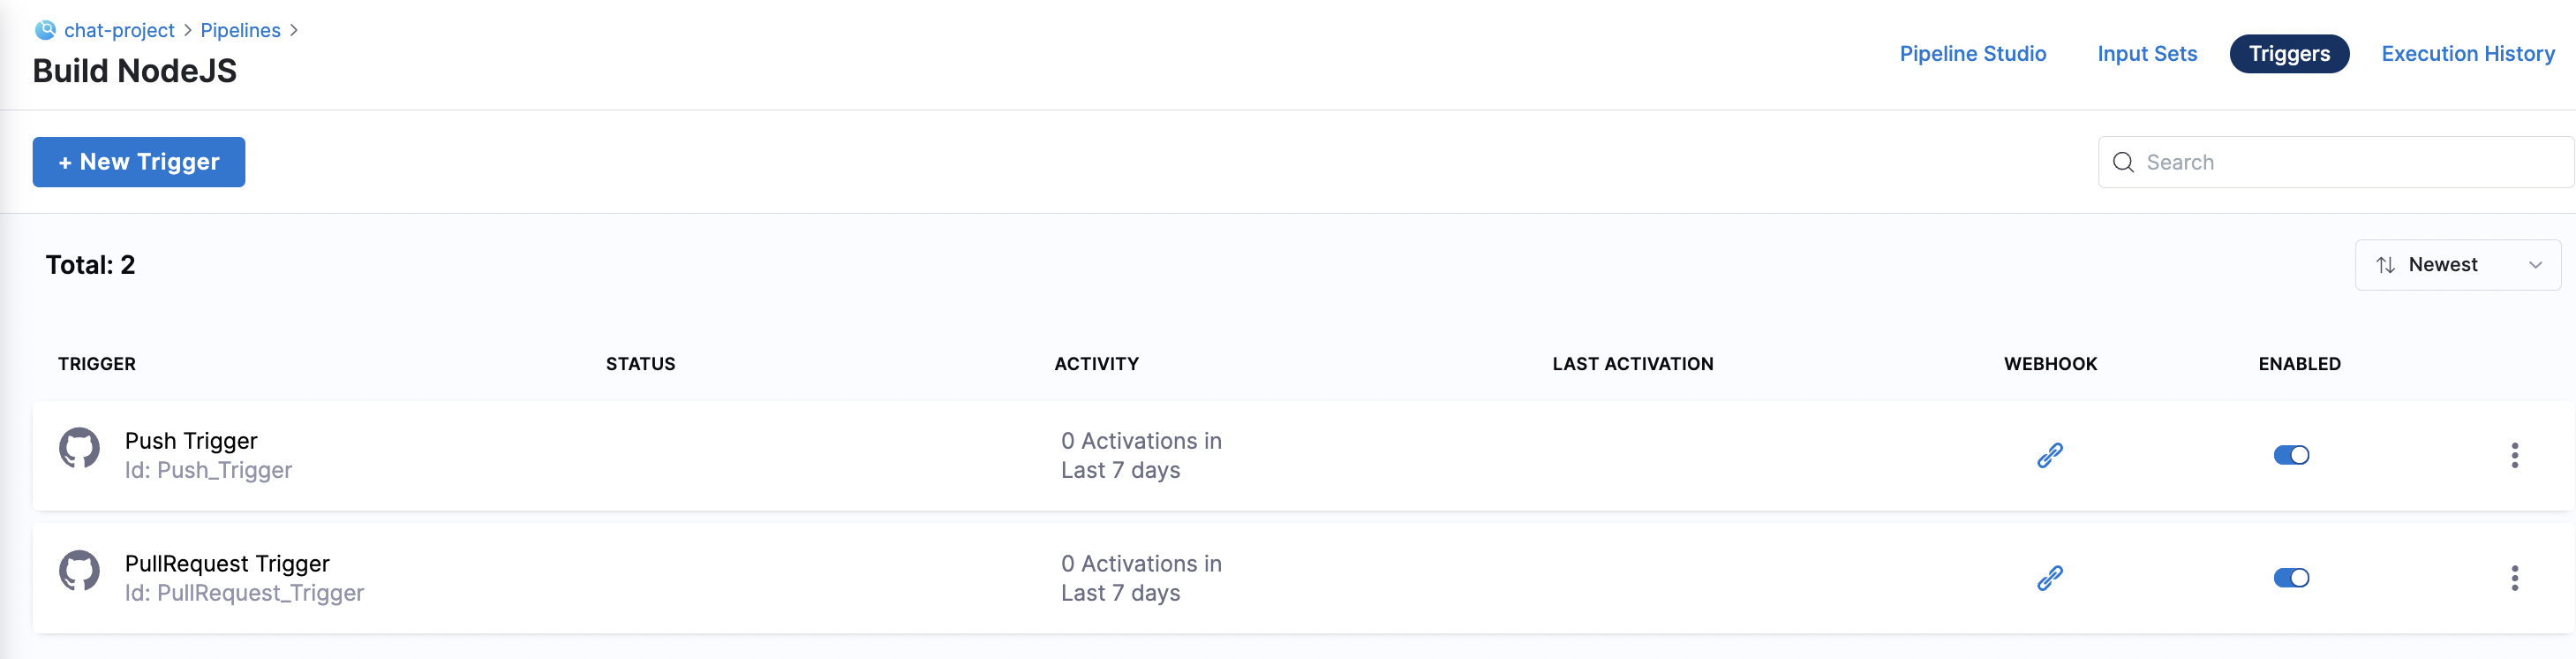
You have the pull and push triggers already enabled by default.
So when any developer pushes code to your main branch, the pipeline gets triggered and runs the test. This way the tests can be automated easily.
If you like to learn CI/CD from scratch, I have another tutorial you might like. Take a look. https://pavanbelagatti.hashnode.dev/devops-continuous-integration-and-delivery-cicd-tutorial-for-developers


