Must-Have Docker Extensions For Developers

Tech Storyteller | Developer Advocate | Guest Writer | Speaker. #DevOps
The world of software development is changing faster than ever. The need for faster release cycle times has led to a proliferation of virtualization technologies. Virtual machines (VMs) have been around for many years, but containers have recently overshadowed them. The reason is that VMs are slower and not as lightweight as containers. With the popularity of microservices, containers have emerged as an excellent alternative to virtual machines for developing, testing and deploying applications in a lightweight environment.
There comes Docker, an open-source technology that uses Linux containers to virtualize apps and other software processes so they can run independently and more securely in another container as if they were separate computer programs on the same device.
Docker packages software applications in virtual containers so they can be shipped, deployed, and run quickly and efficiently. These containers are like virtual lockers for your application. They package your application and its dependencies so that it can be shipped and run anywhere transparently. That means you can have the same user experience from your development, testing, staging, or production systems.
Docker Extensions
 Docker announced Docker extensions at DockerCon 2022. The idea of Docker extensions is to help developers expand their capabilities by using third-party tools, just like plugins. You can enable the extensions available from the extensions tab on the Docker desktop with a single click. The extensions improve developer productivity and smoothen the workflows. Developers can use their favourite tools from a centralized place, i.e. Docker desktop.
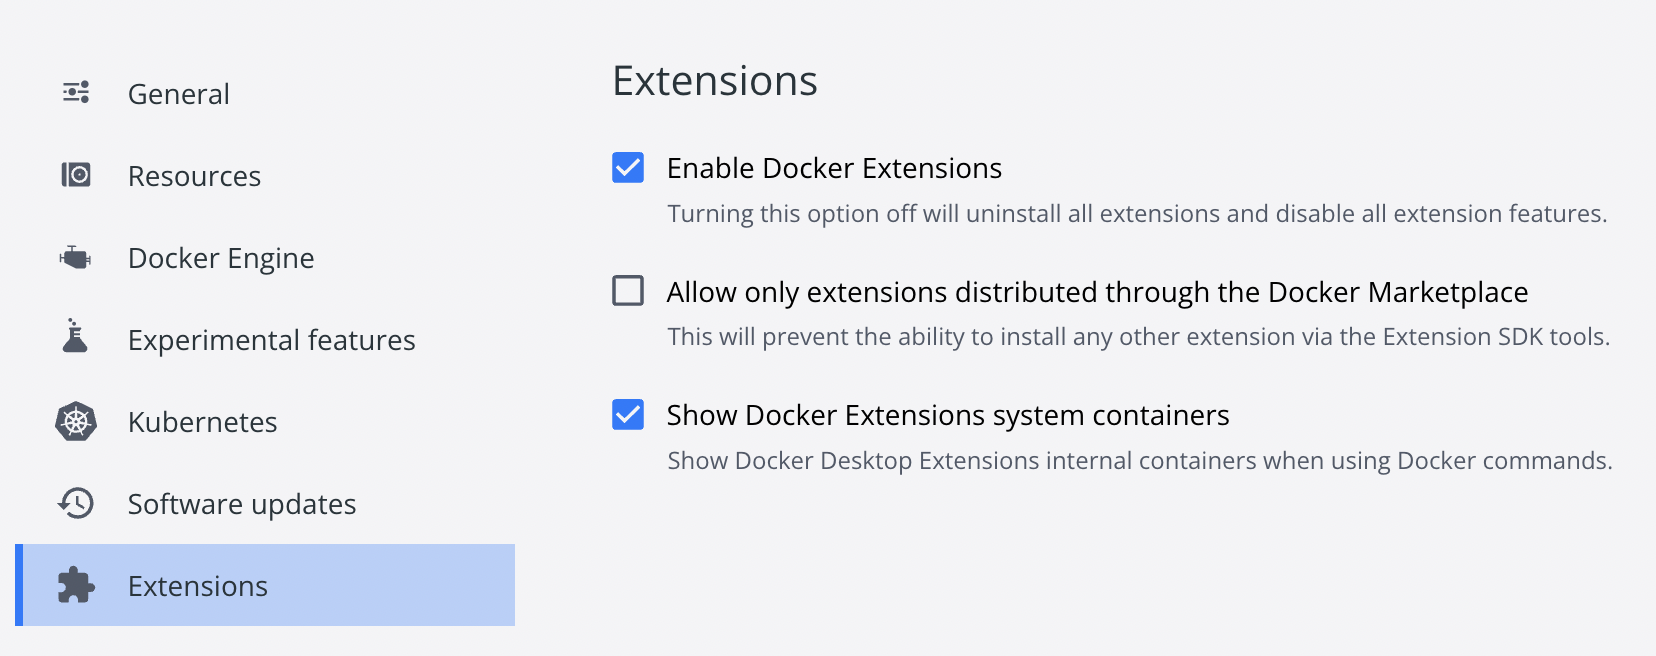
Before exploring the various interesting extensions, go to your Docker desktop and enable extensions from the preferences.
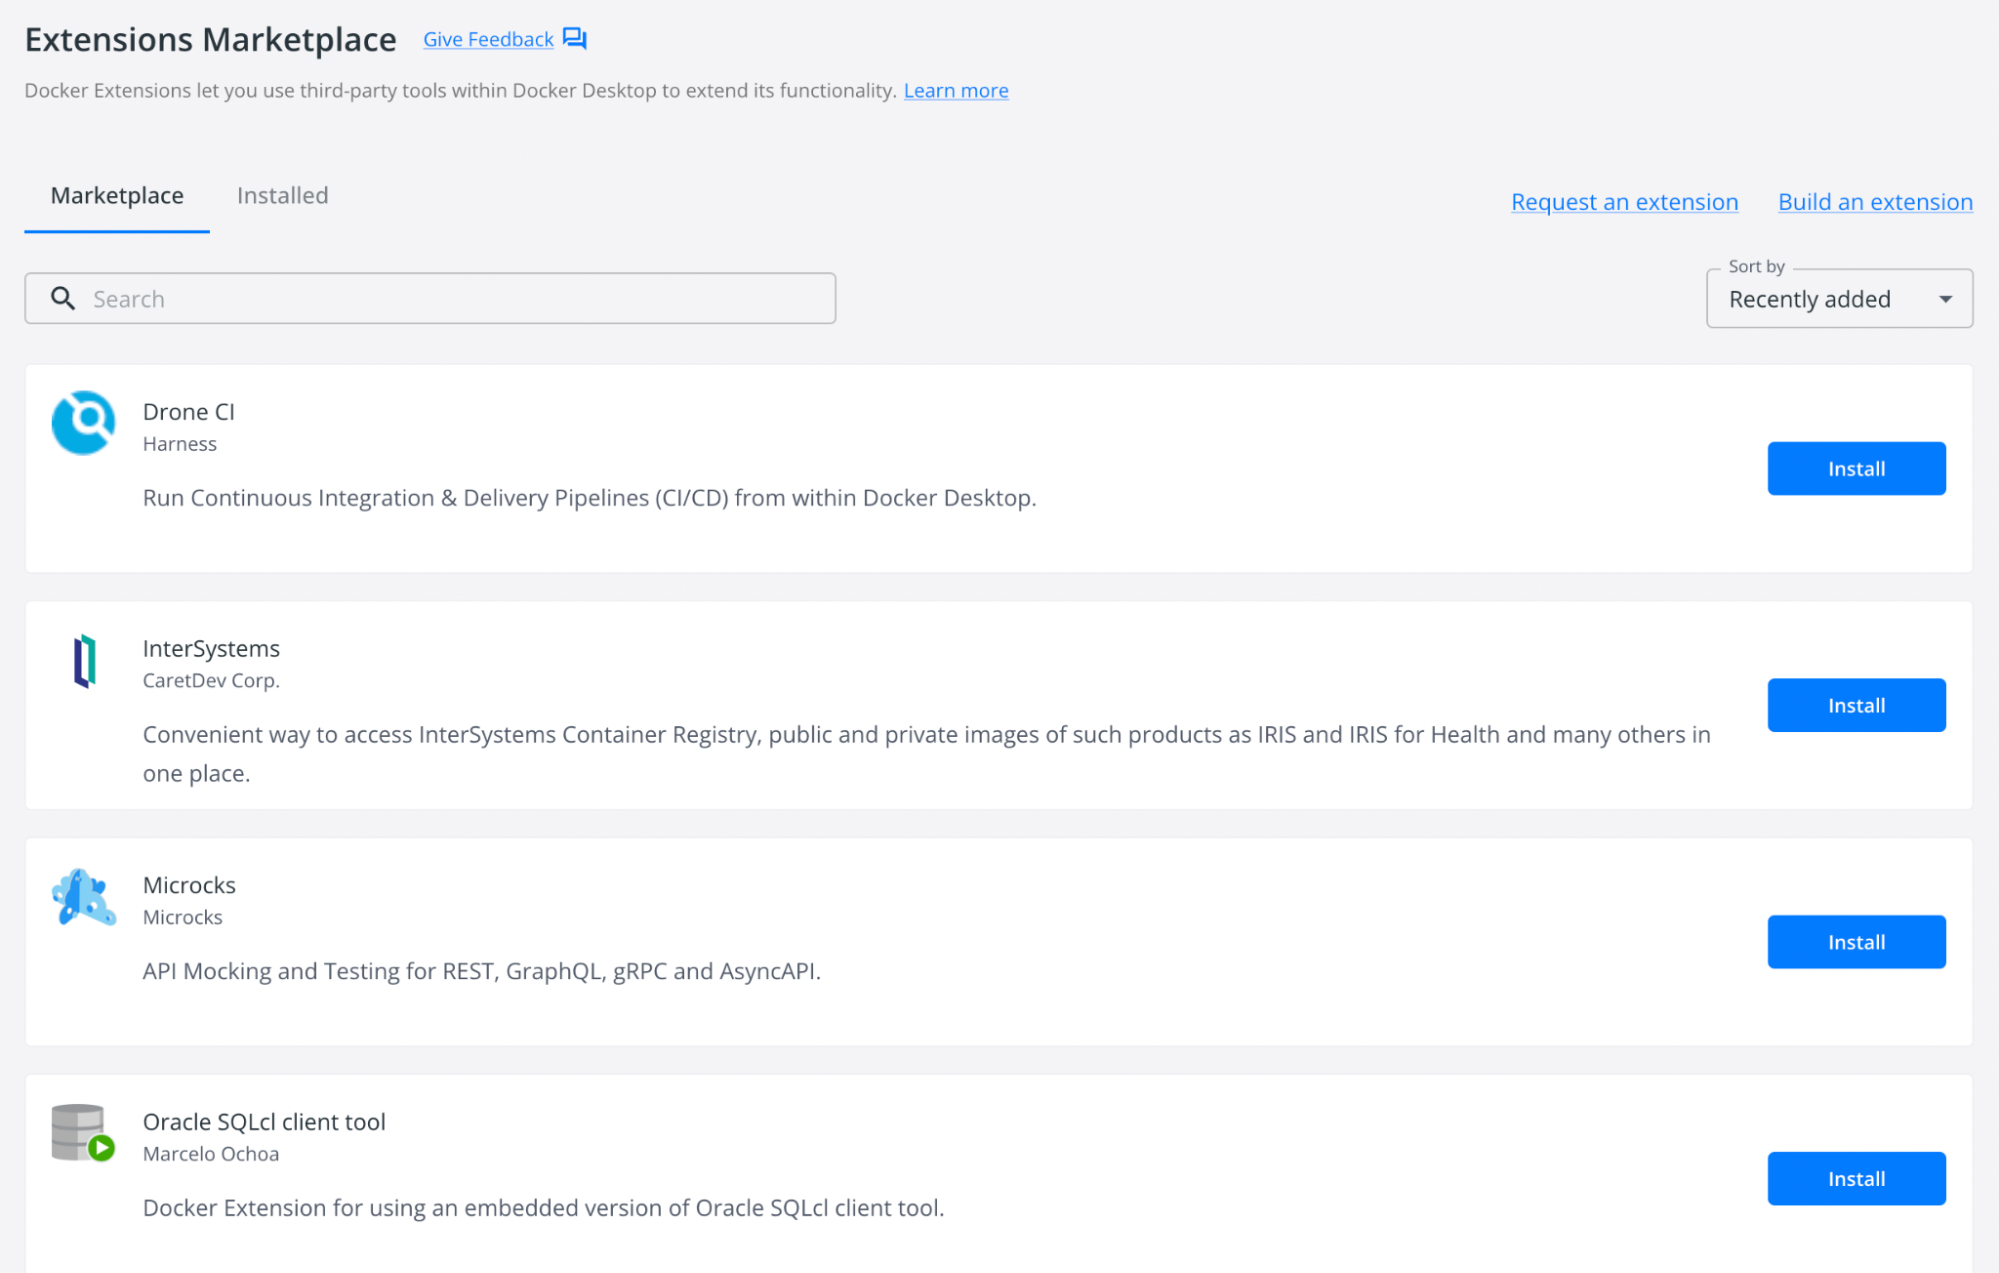
Today, we will see some must-have Docker extensions for developers to speed up their software development.
Drone CI
Drone CI Docker extension lets you do continuous integration from your laptops. We all know that continuous integration (CI) is the first official step to doing DevOps. When developers write the code, they store it in a source control management tool like Git. Then, they test and build the code with the help of a continuous integration tool. CI is an essential part of every DevOps approach. DroneCI is an open-source CI tool that is very easy to set up and use. Now that we have this as an extension, you will be able to do CI from your laptop. You just need a yml file to define your steps, and you are done.
Let us have a simple Node.js application to work with our plugins. Clone the sample application - https://github.com/pavanbelagatti/Simple-Node-App
Just to start with something bare minimum setup, let’s add a simple step in our .drone.yml file,
kind: pipeline
type: docker
name: default

platform:
 os: linux
 arch: arm64

steps:
- name: message
  image: busybox
  commands:
  - echo “Hello Captain Canary”!

- name: test
  image: node
  commands:
  - npm install
  - npm test
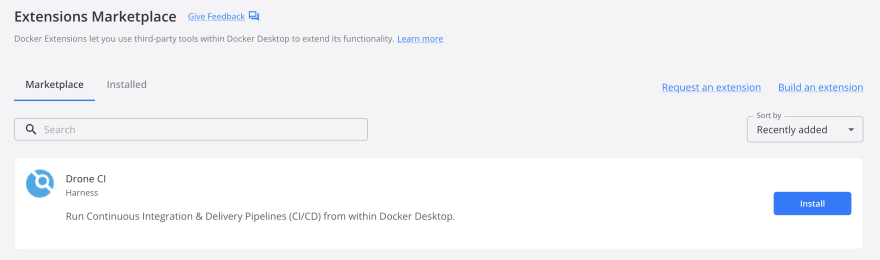
You can install the Drone CI extension from the Docker desktop extensions tab directly.
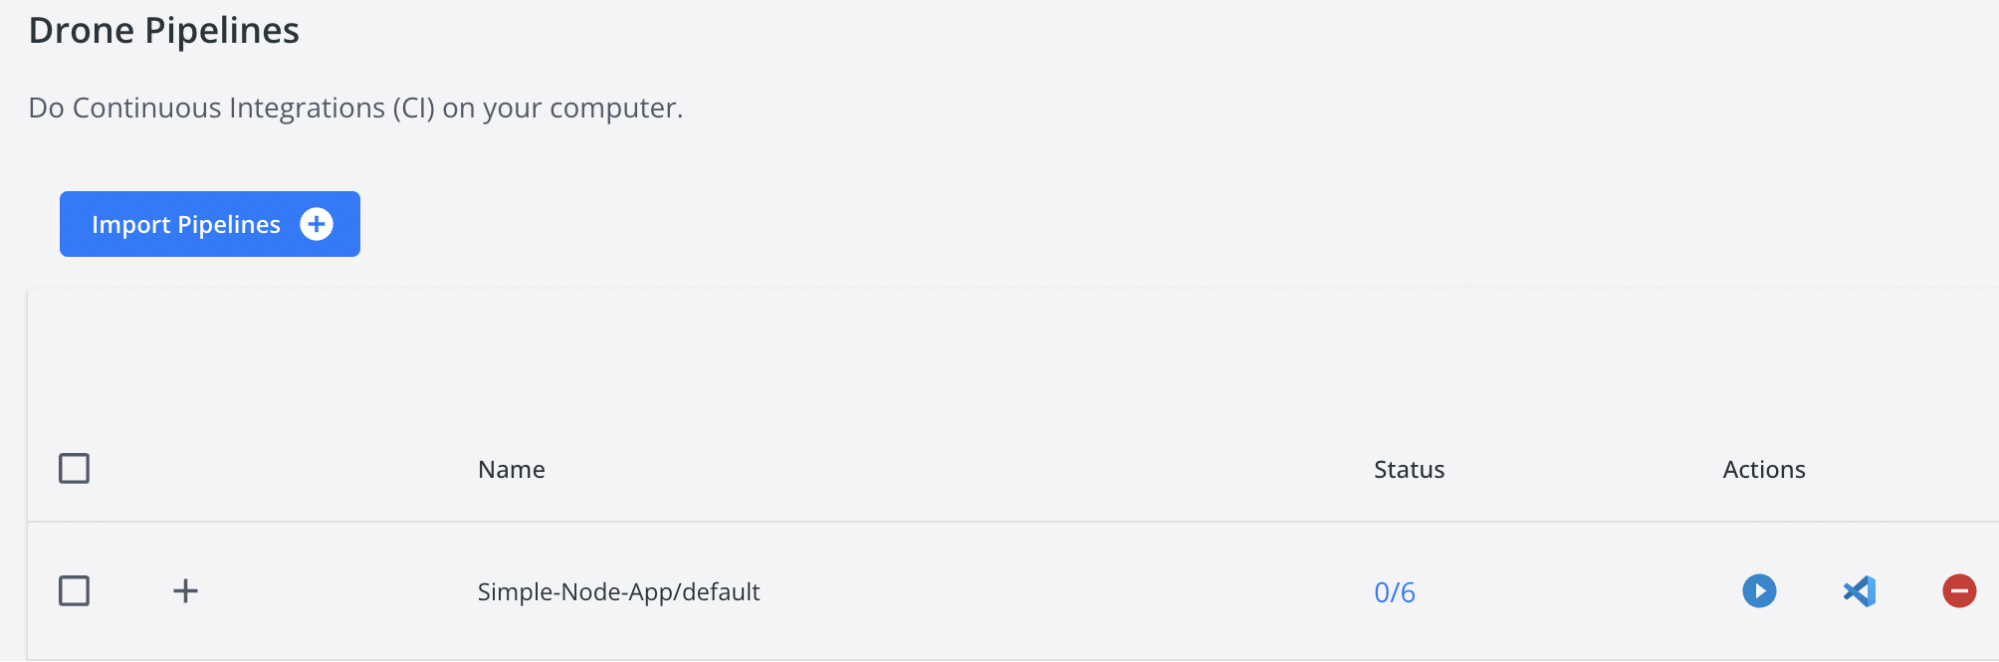
 Once installed, click on the Drone CI extension and you will be presented with the below dashboard,
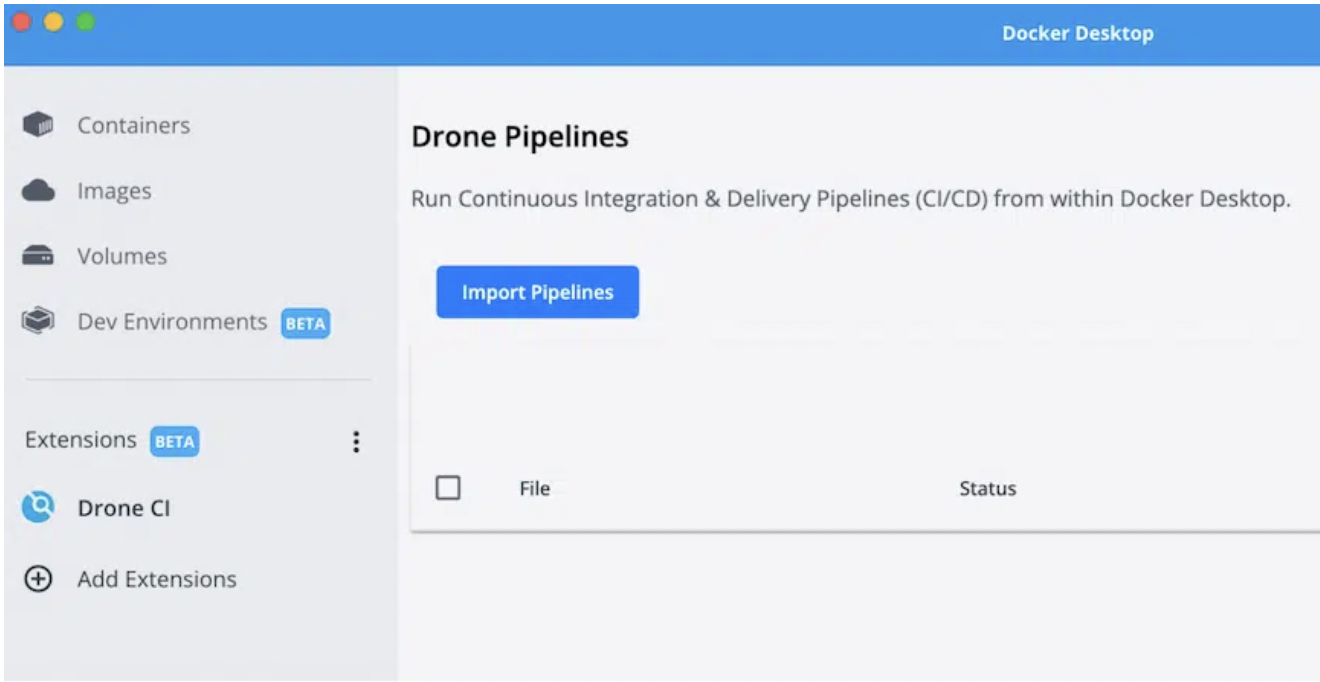
As we have not configured any pipeline yet, you should see a blank dashboard with no pipelines imported.
Click on Import pipelines to import your project. The extension will show you all the projects that have the .drone.yml in them. So, import a project to try from your local.
Just to show you an example, I imported my Simple-Node-App project, which is a simple node.js application that includes simple tests.
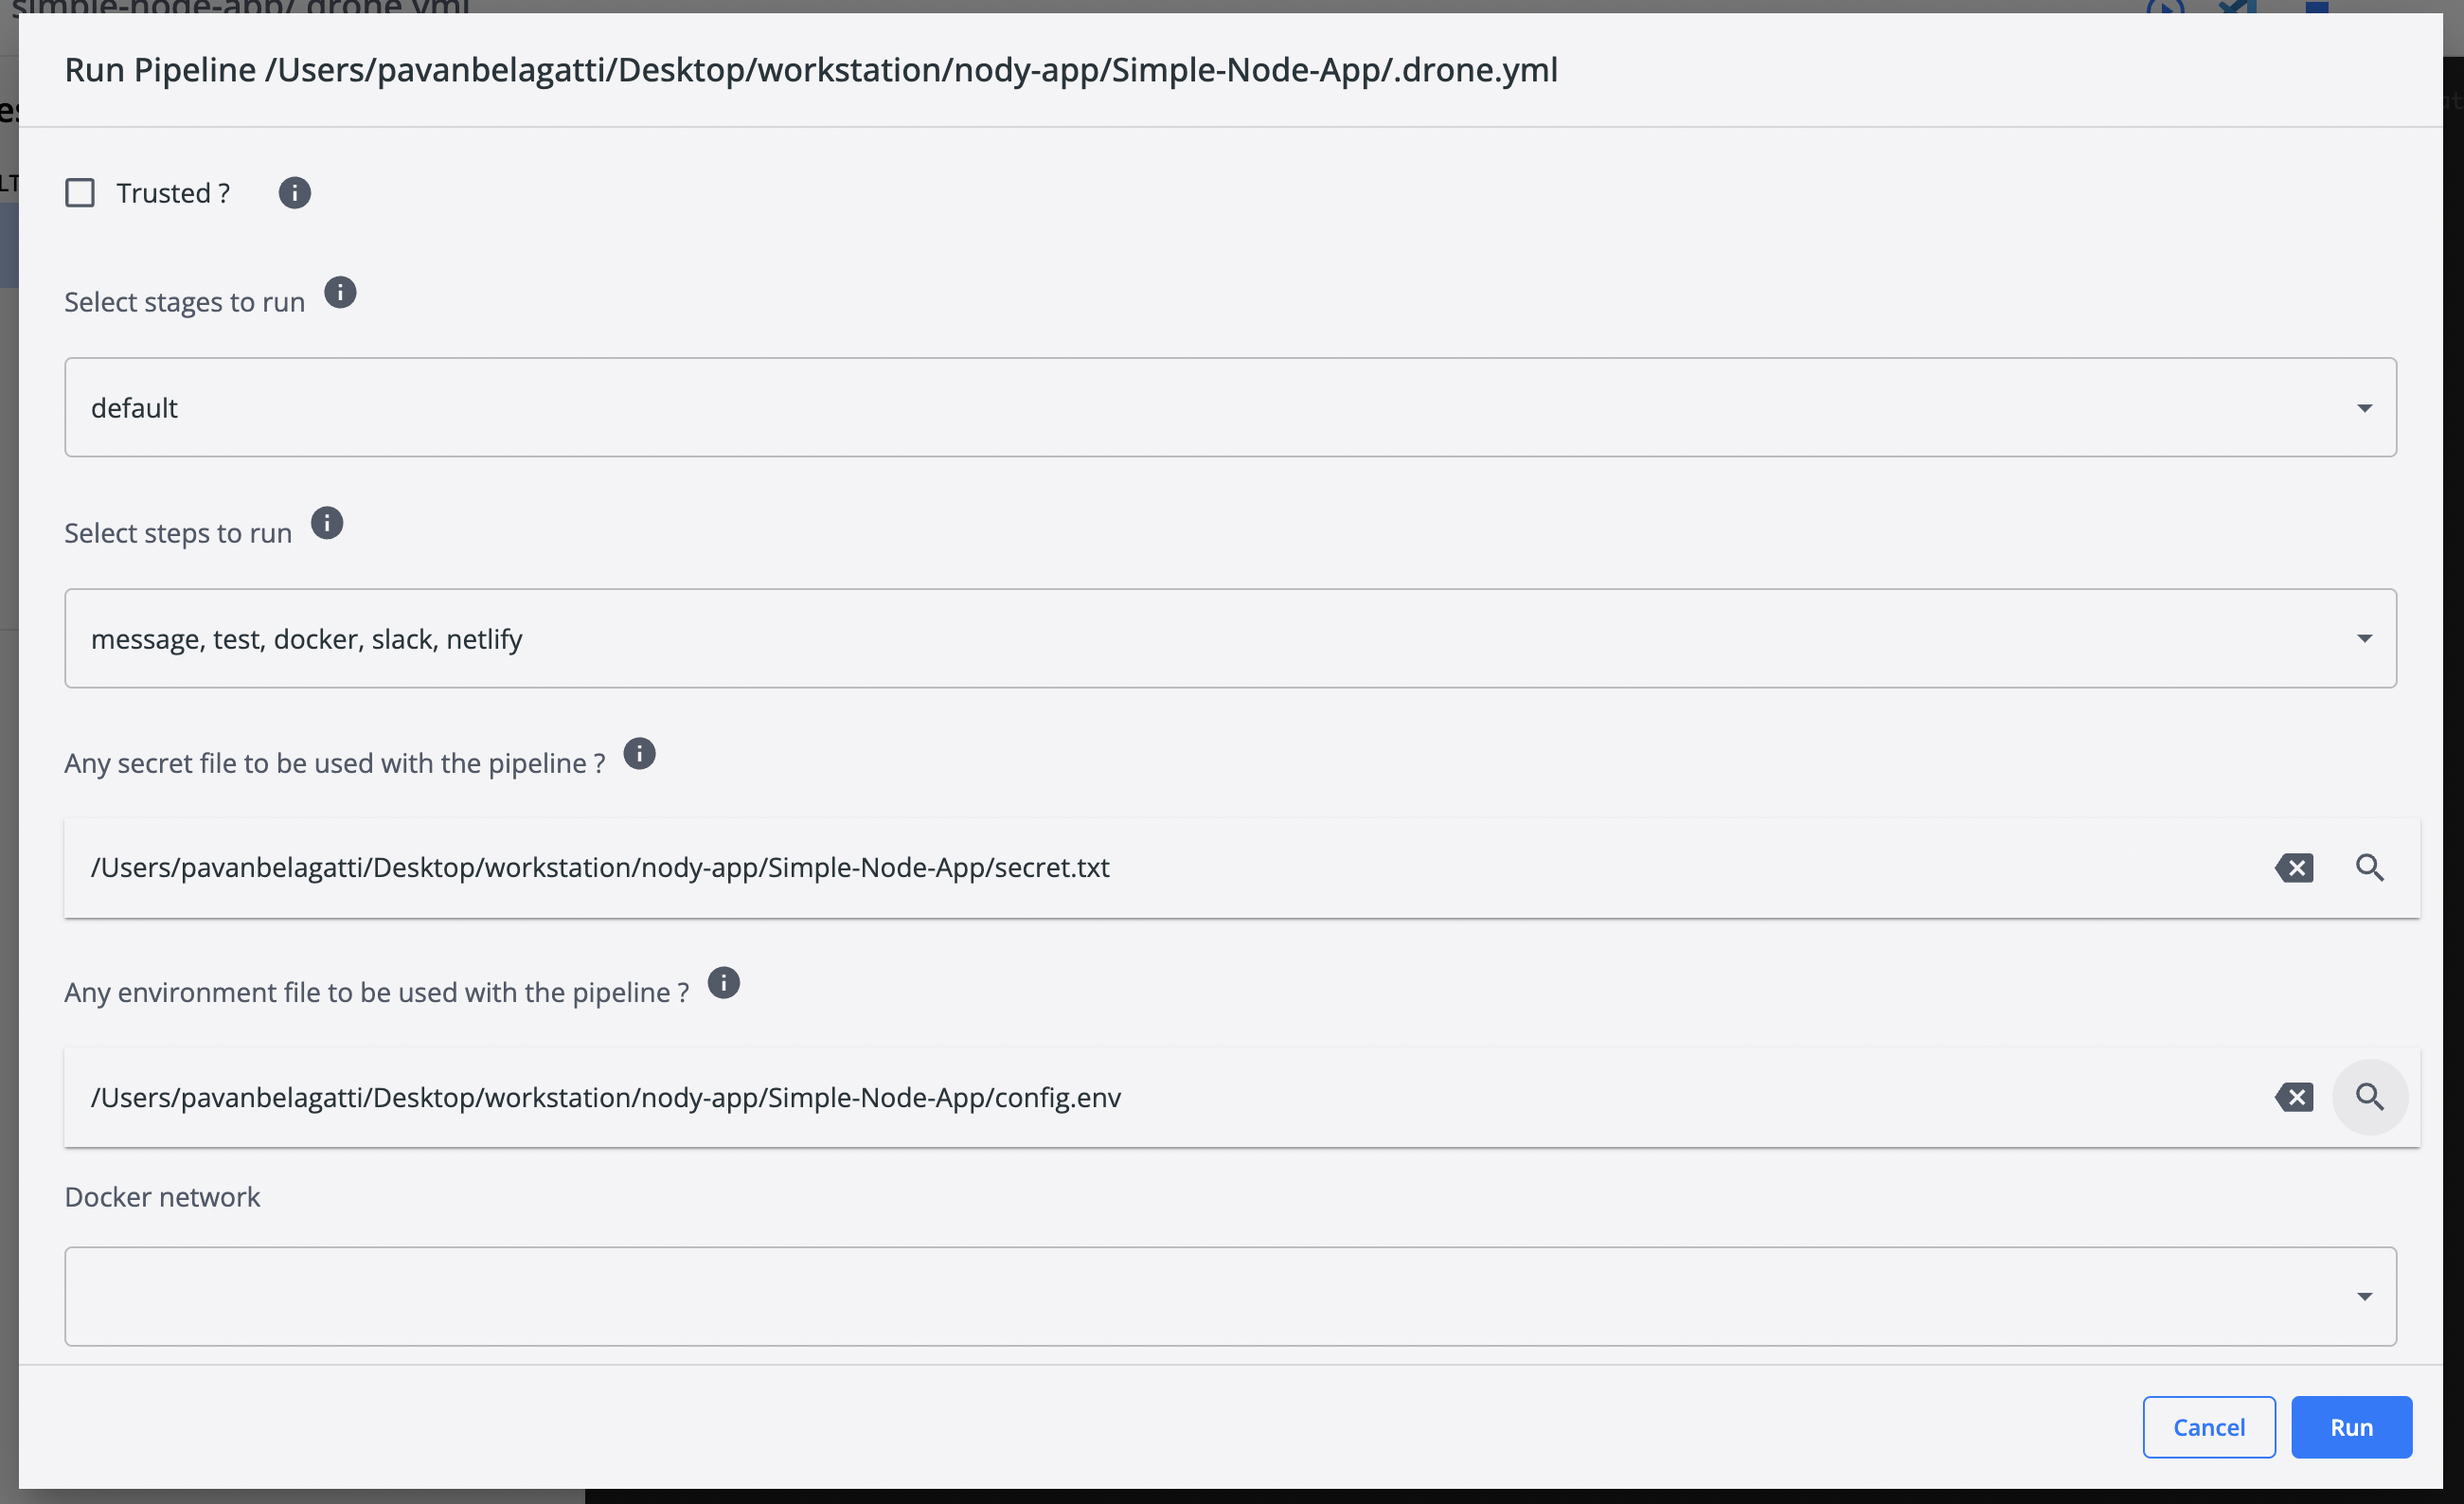
The next step is to run the pipeline and for this, we need to add some simple settings that we will be doing once we click on the run/play button you see the below actions,
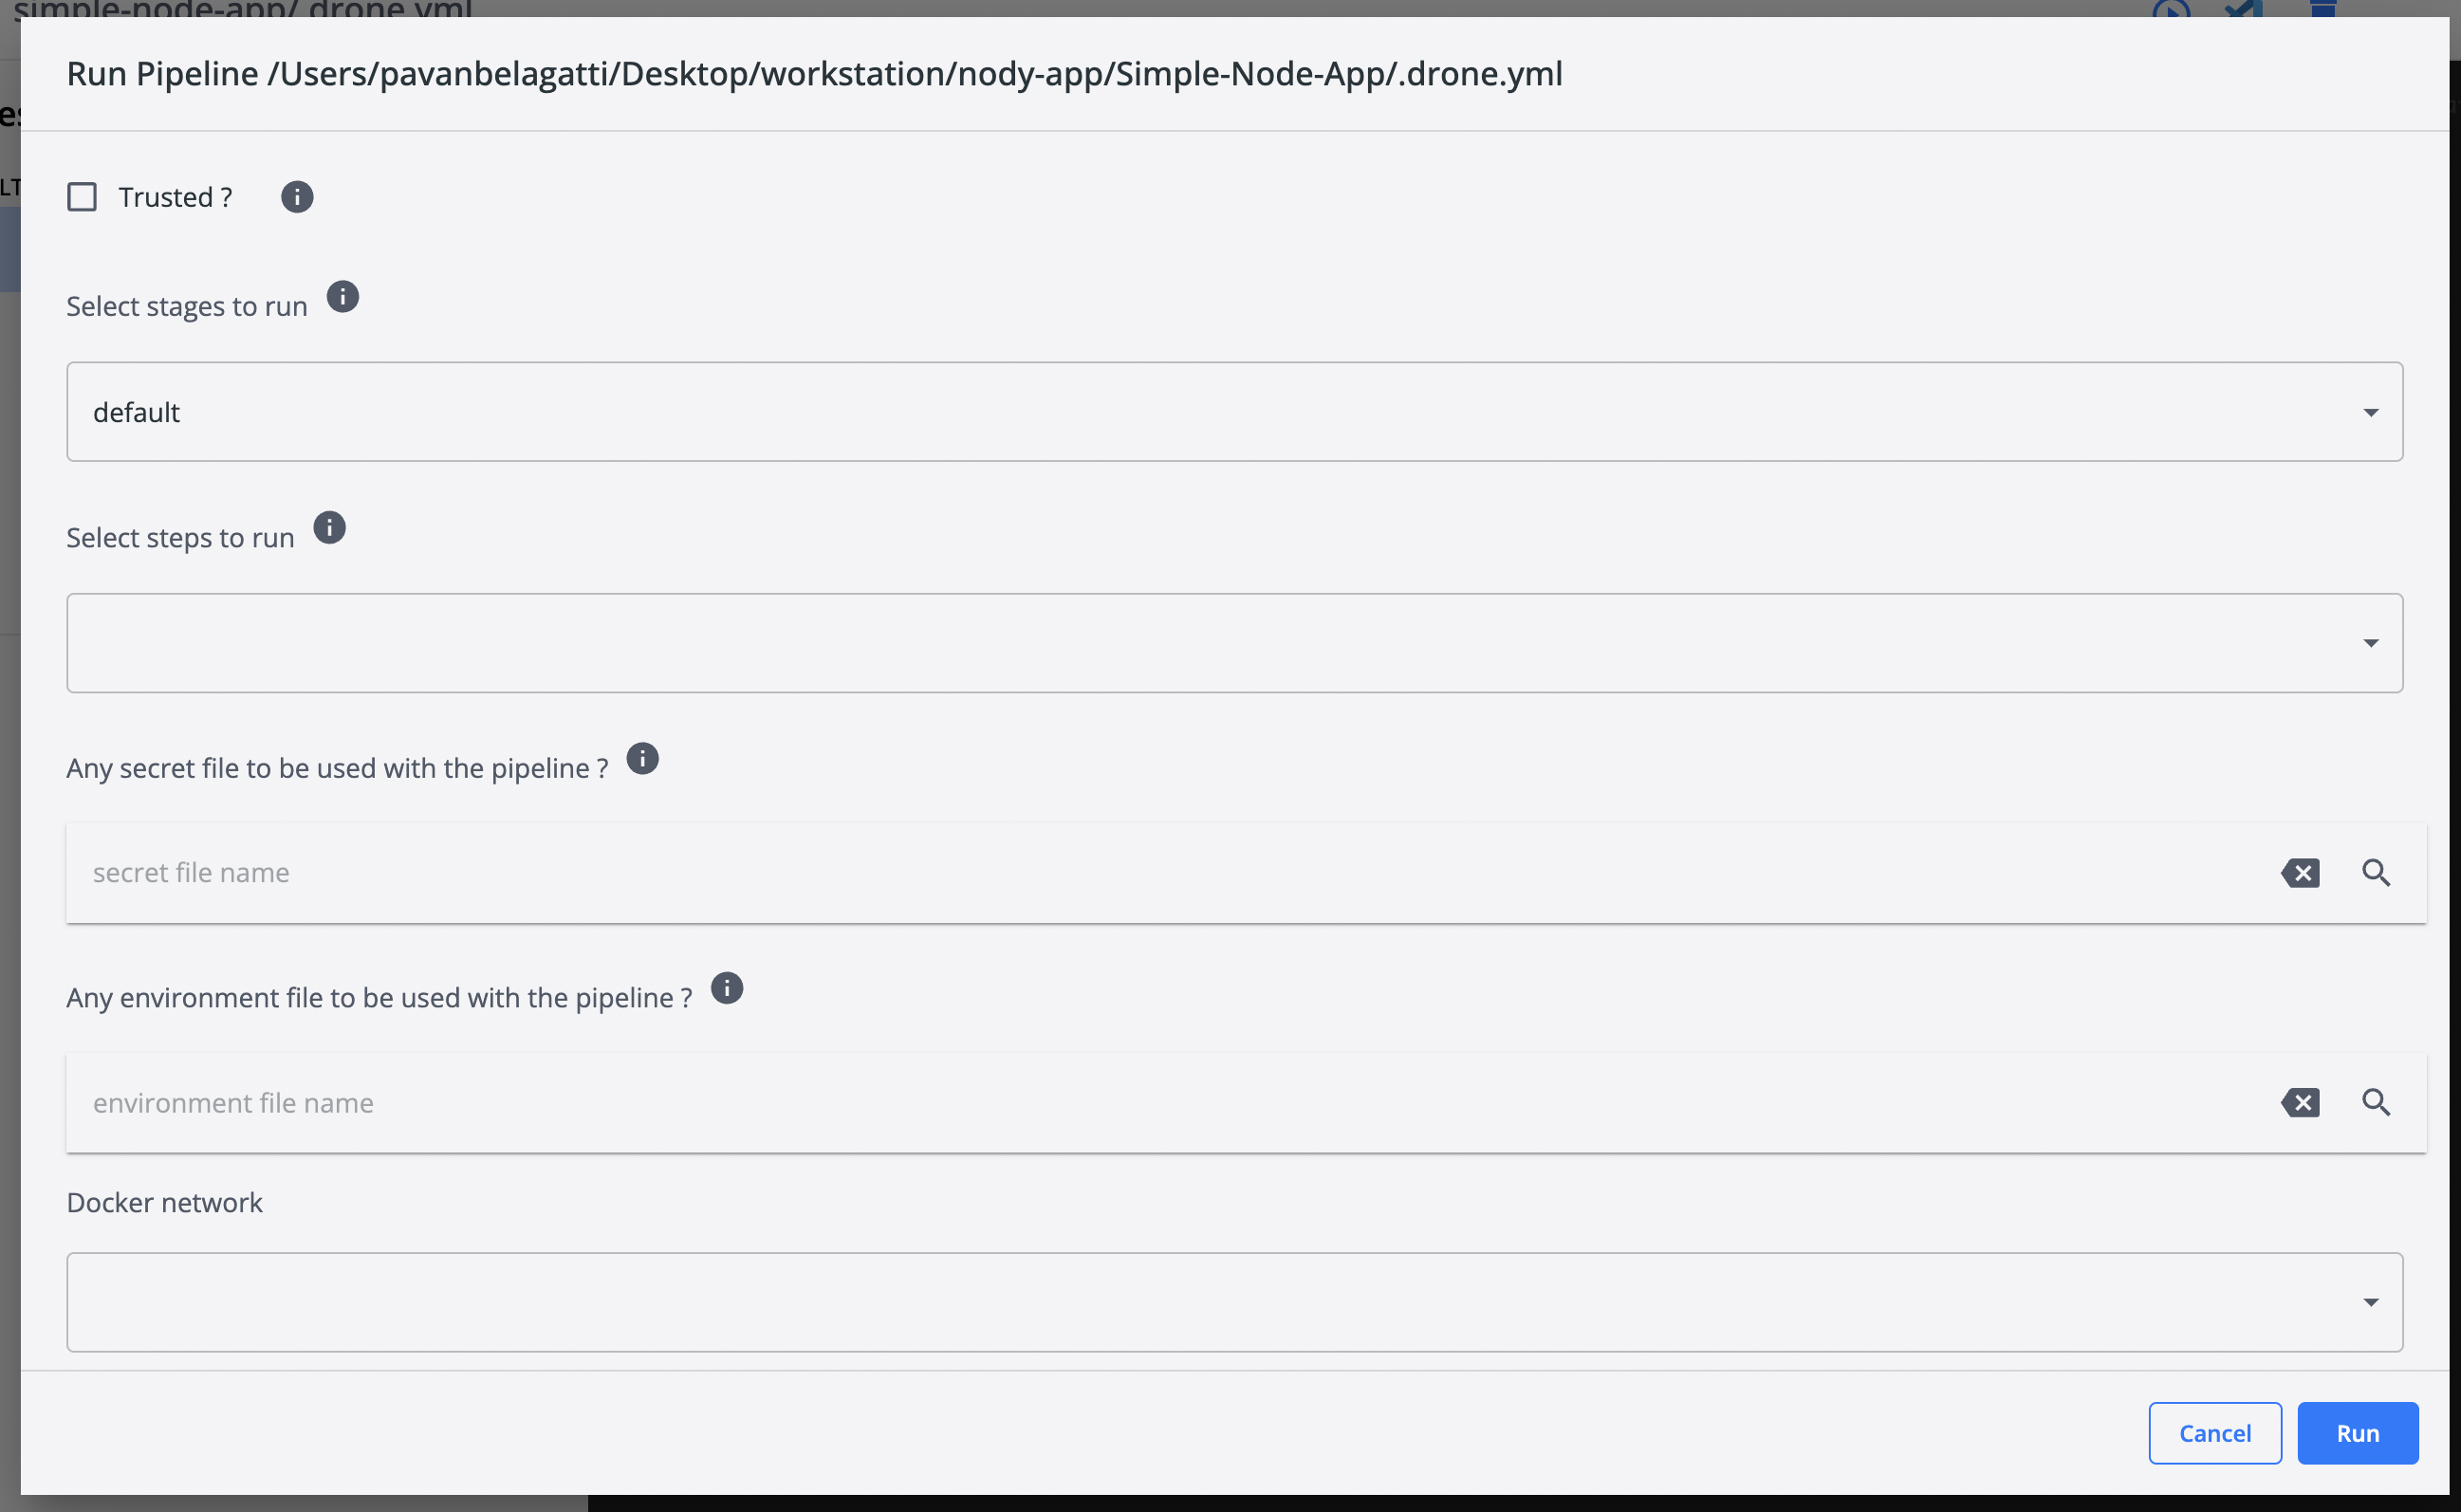 Add the required fields such as steps to run, a secret file if you have one (which you can specify in a
 secret.txt file), an environment file, etc.
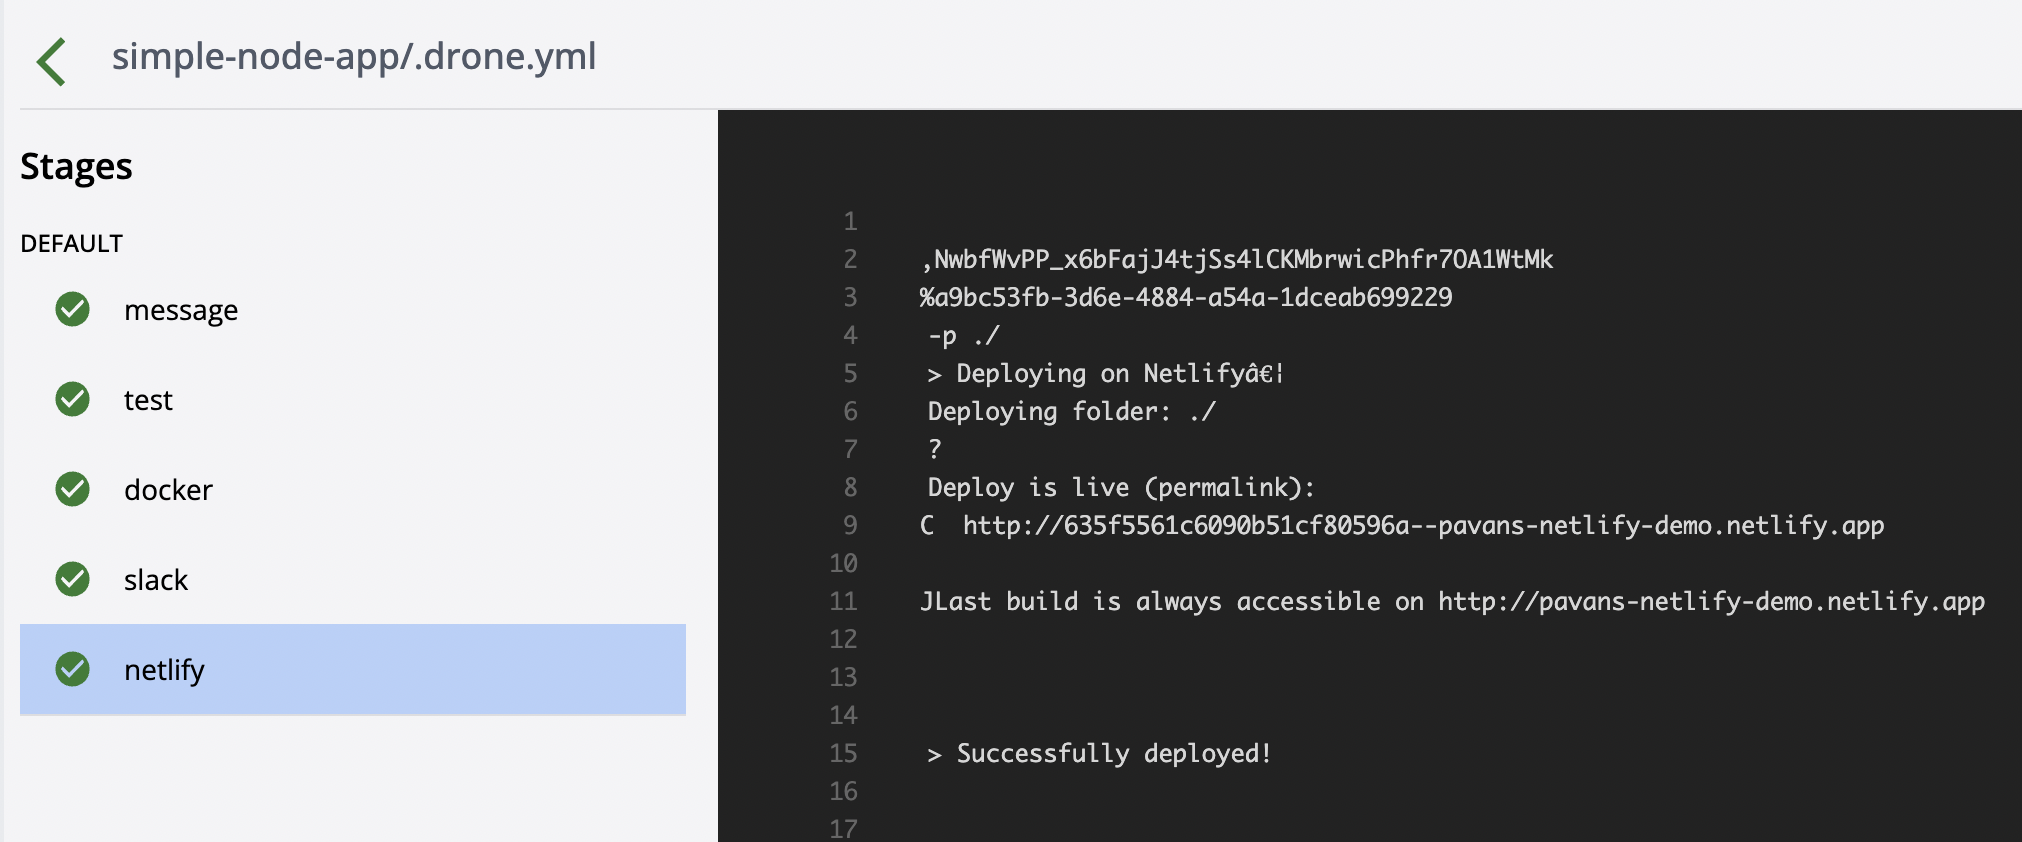
Once you run your application, you will see the pipeline getting executed.
Portainer
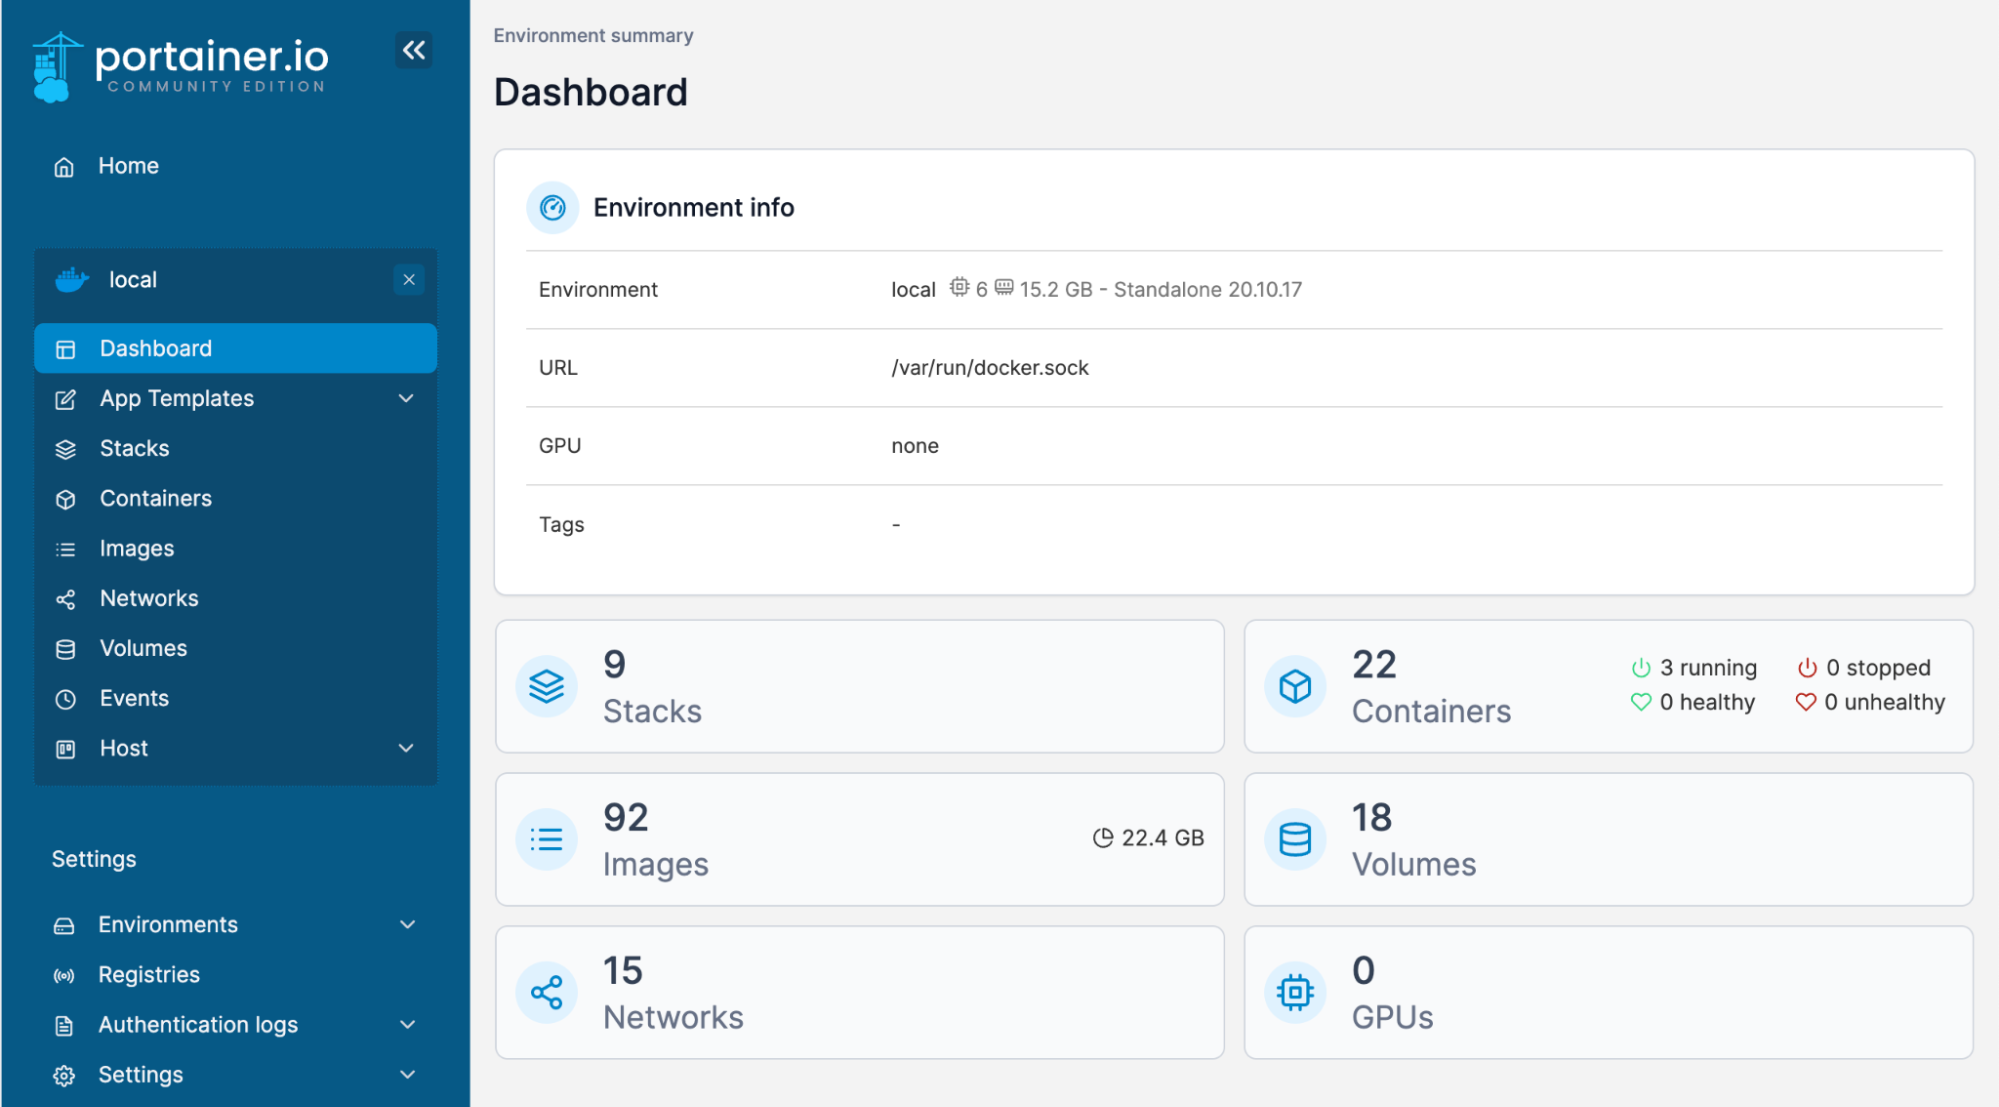
Portainer is a famous container management platform that makes it easy for developers to start managing their containers. Using Portainer, you can easily manage container hosts, Docker Swarm clusters, and Kubernetes clusters in a much simpler way. The unique feature of Portainer is it runs locally, providing a uniform UI to build, publish container images, and manage applications - all from one central place.
You can easily install the Portainer extension from the Docker desktop from the extensions tab. Once installed, it shows you the list of images, containers, stacks and applications running on your local through an amazing dashboard.
Snyk
Security is a critical ingredient of a successful DevOps approach. Every developer should take care of security and ensure the applications and images pushed to the container registry don't have critical vulnerabilities. The good news is that the Snyk Docker extension is available to tackle such critical vulnerabilities in the images.
Snyk is a developer security tool that helps developers discover vulnerabilities with their images and warn them of the associated risks. You can easily select your images, and the list of vulnerabilities will be displayed in Snyk's dashboard. With Snyk's Docker extension, it becomes easy to work with containerized applications and scan the images early in the process before they reach the production stage. Snyk extension provides the ability to scan and fix container issues quickly.
You can easily install the Snyk extension by going to the Docker desktop and extensions tab. The extension is already listed, and you just need to install it. Once the extension is installed, you can select your images and see the associated vulnerabilities.
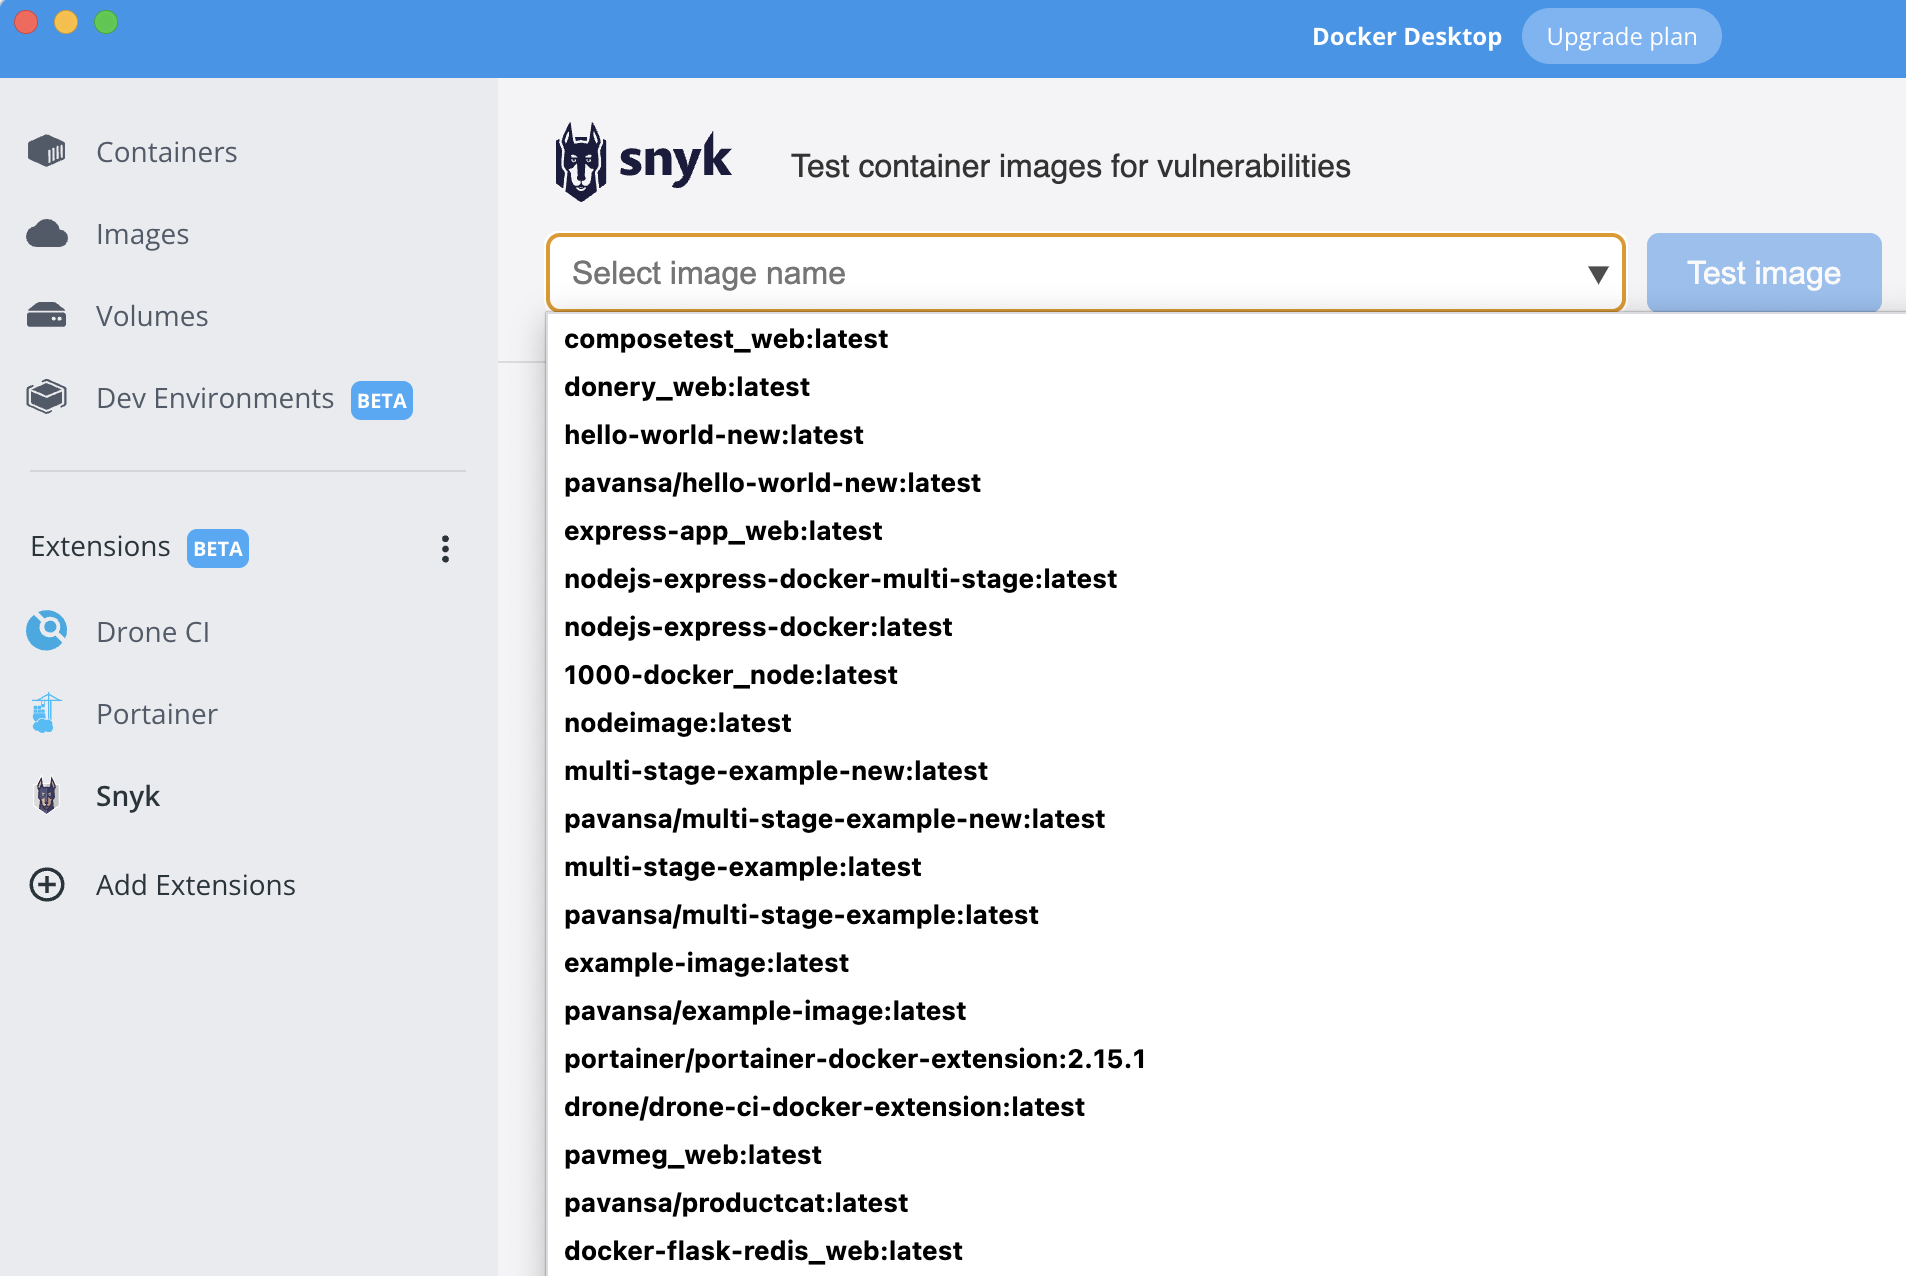
Let’s select any image we would like to scan.
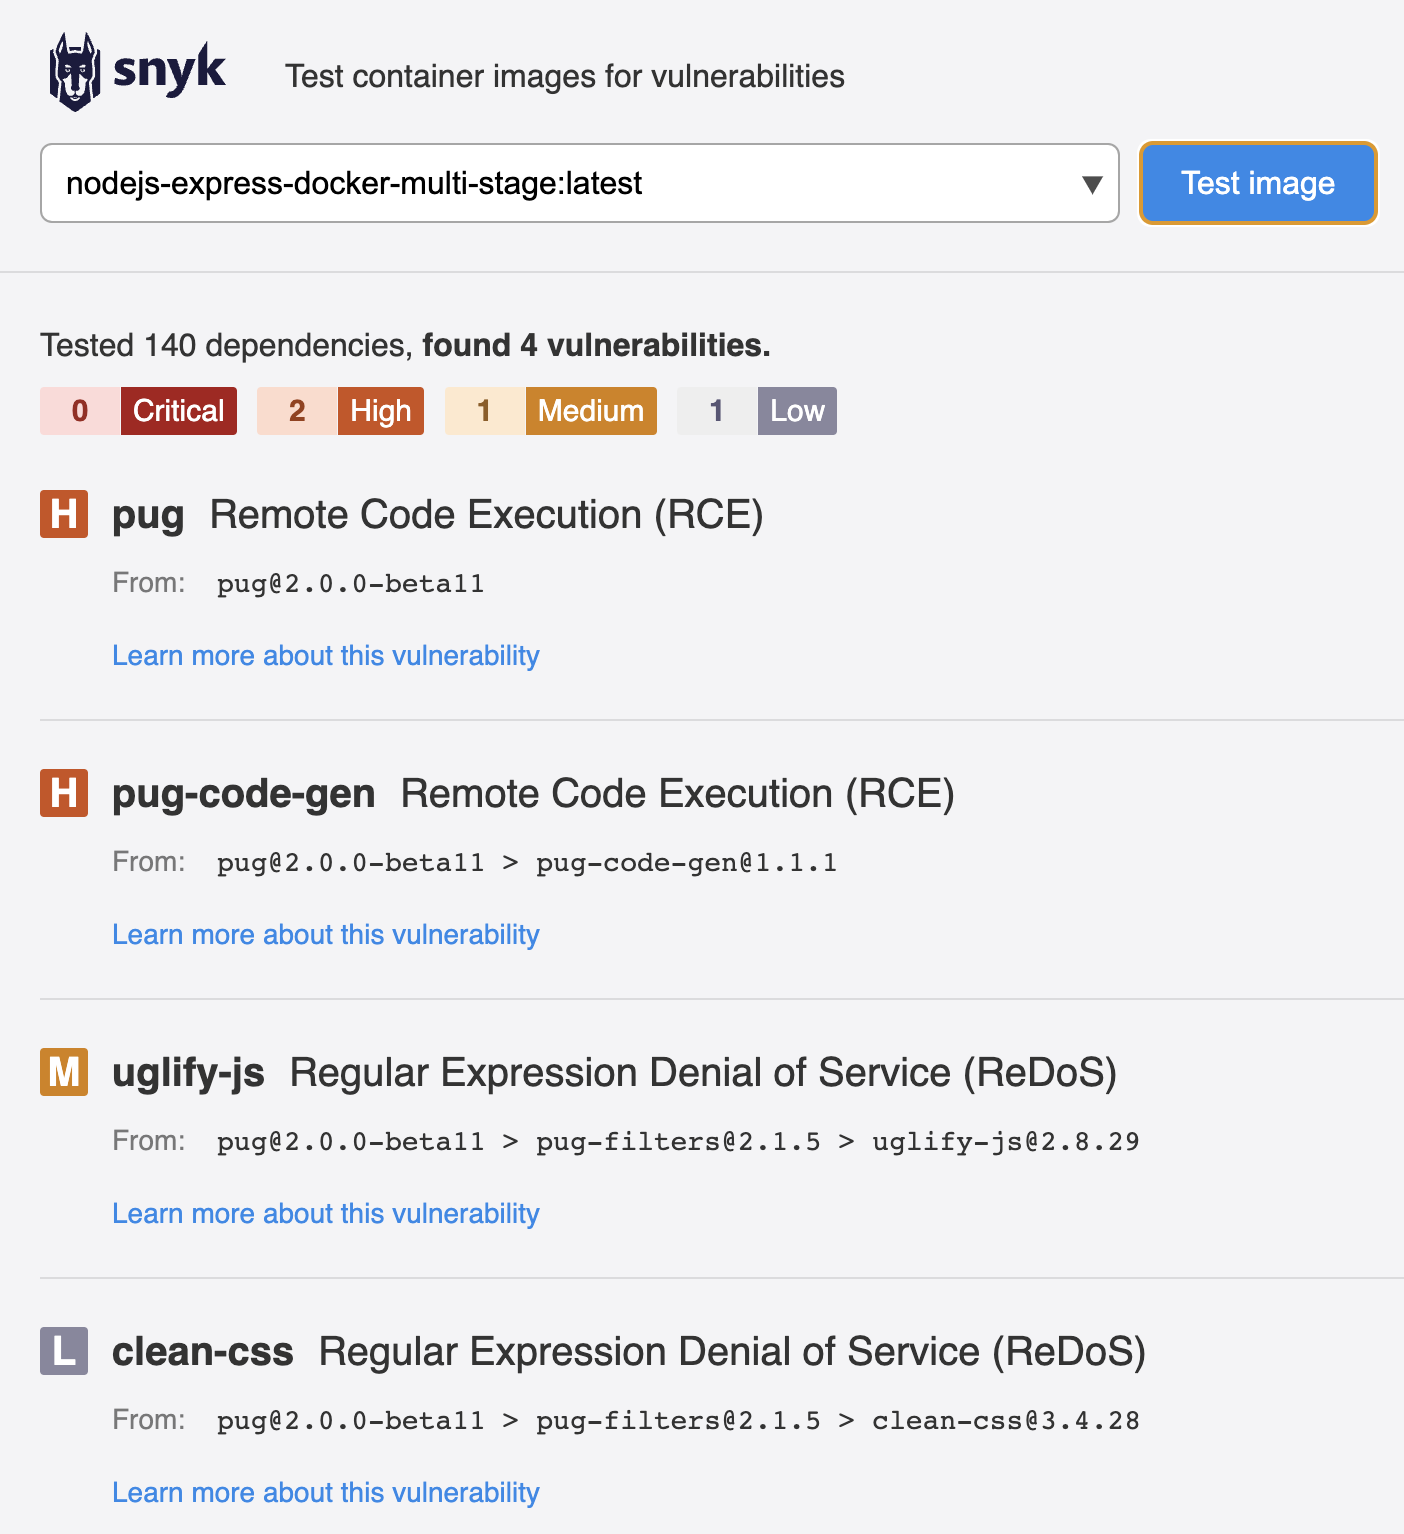
It scans the selected image and lists the vulnerabilities associated with it, along with details on each vulnerability.
JFrog Xray Scan
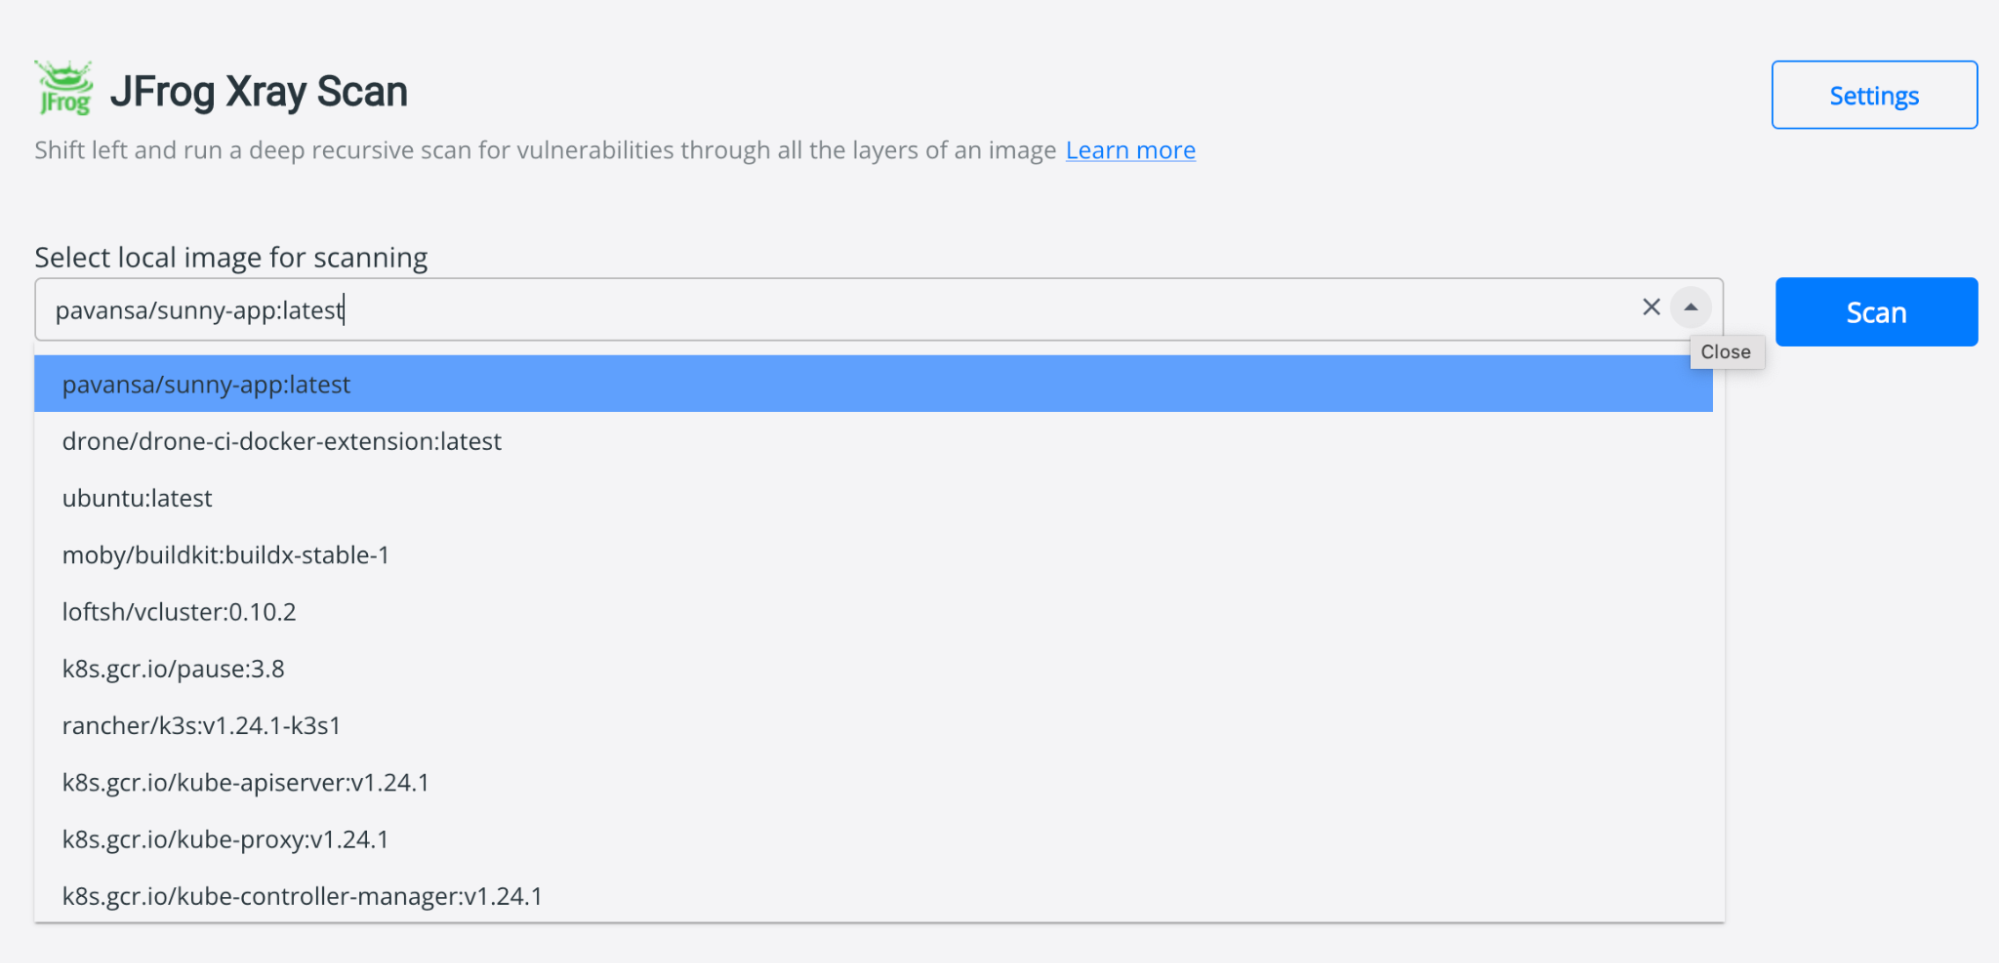
JFrog Xray Scan helps you scan your images for vulnerabilities. This extension will list all the possible vulnerabilities associated with your Docker images. The extension is readily available in the extensions marketplace and can be installed with just a click of a button. Once installed, you need to log in to your JFrog account, and then the dashboard appears where you are required to select the images for vulnerabilities.

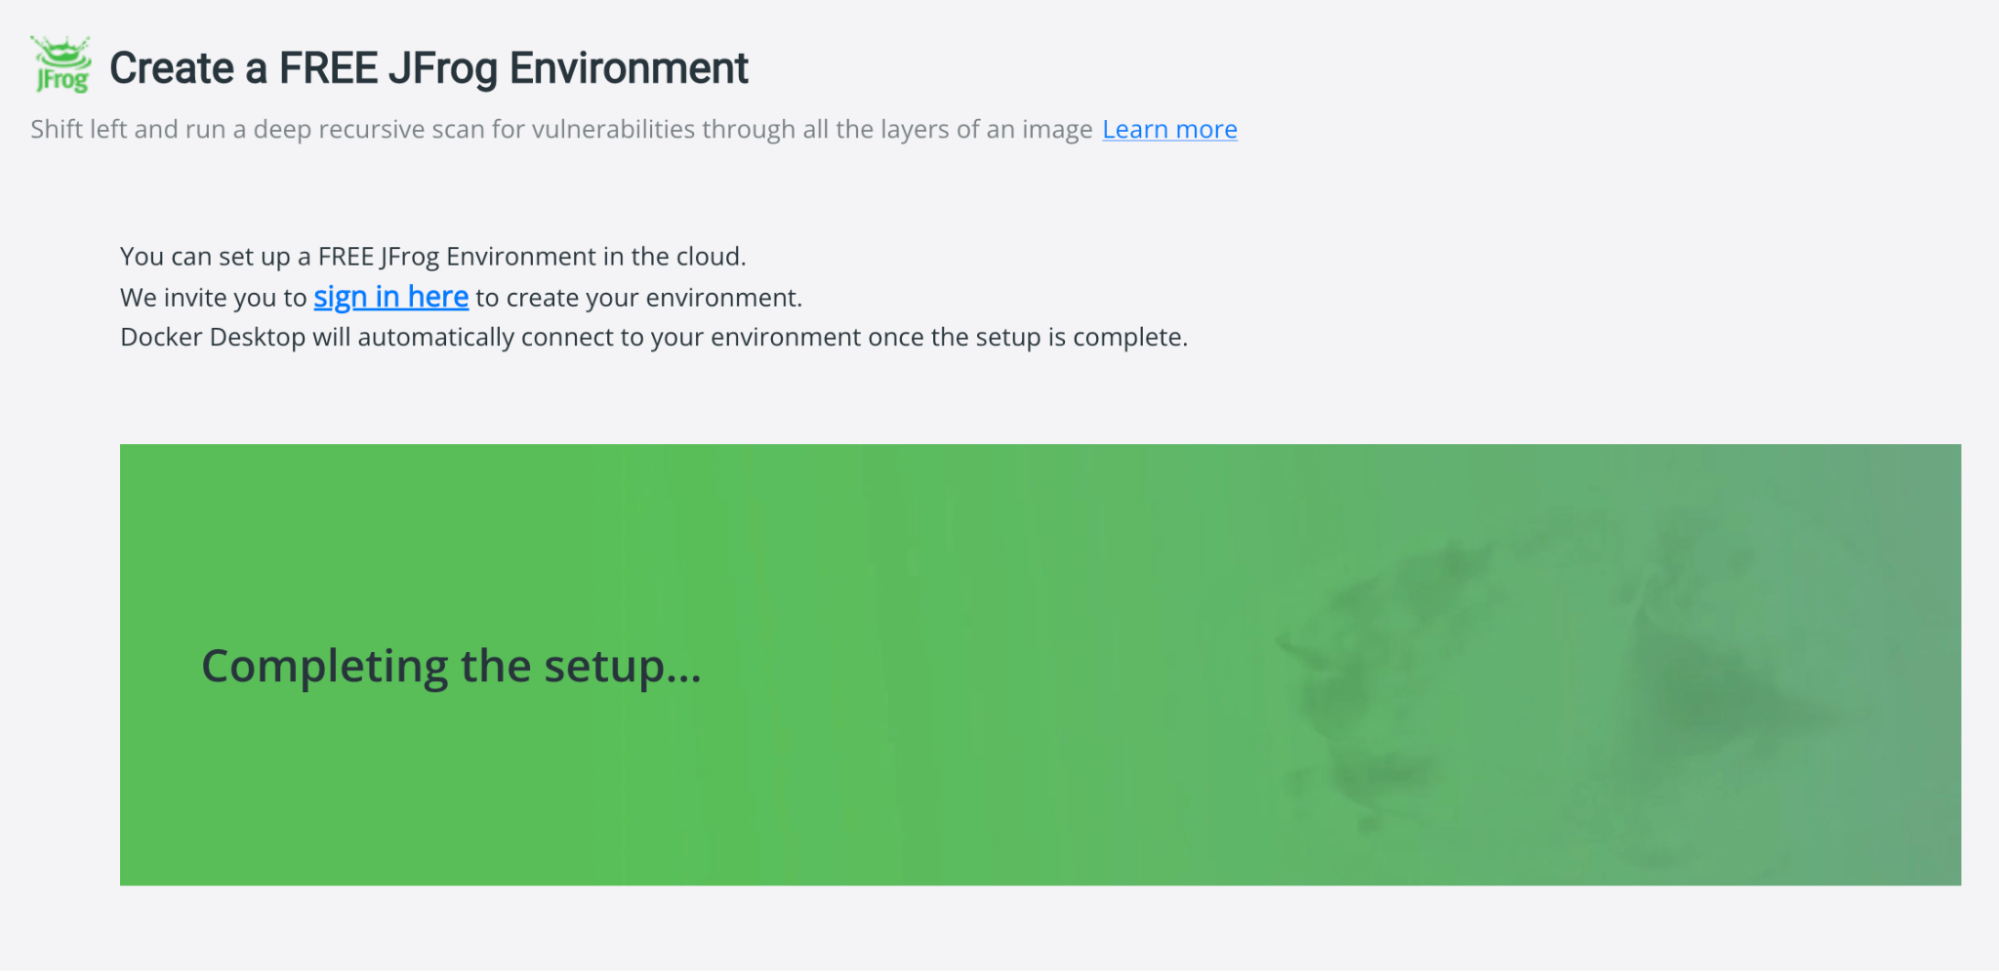
Once the setup is complete, it will ask you to select the images to scan.
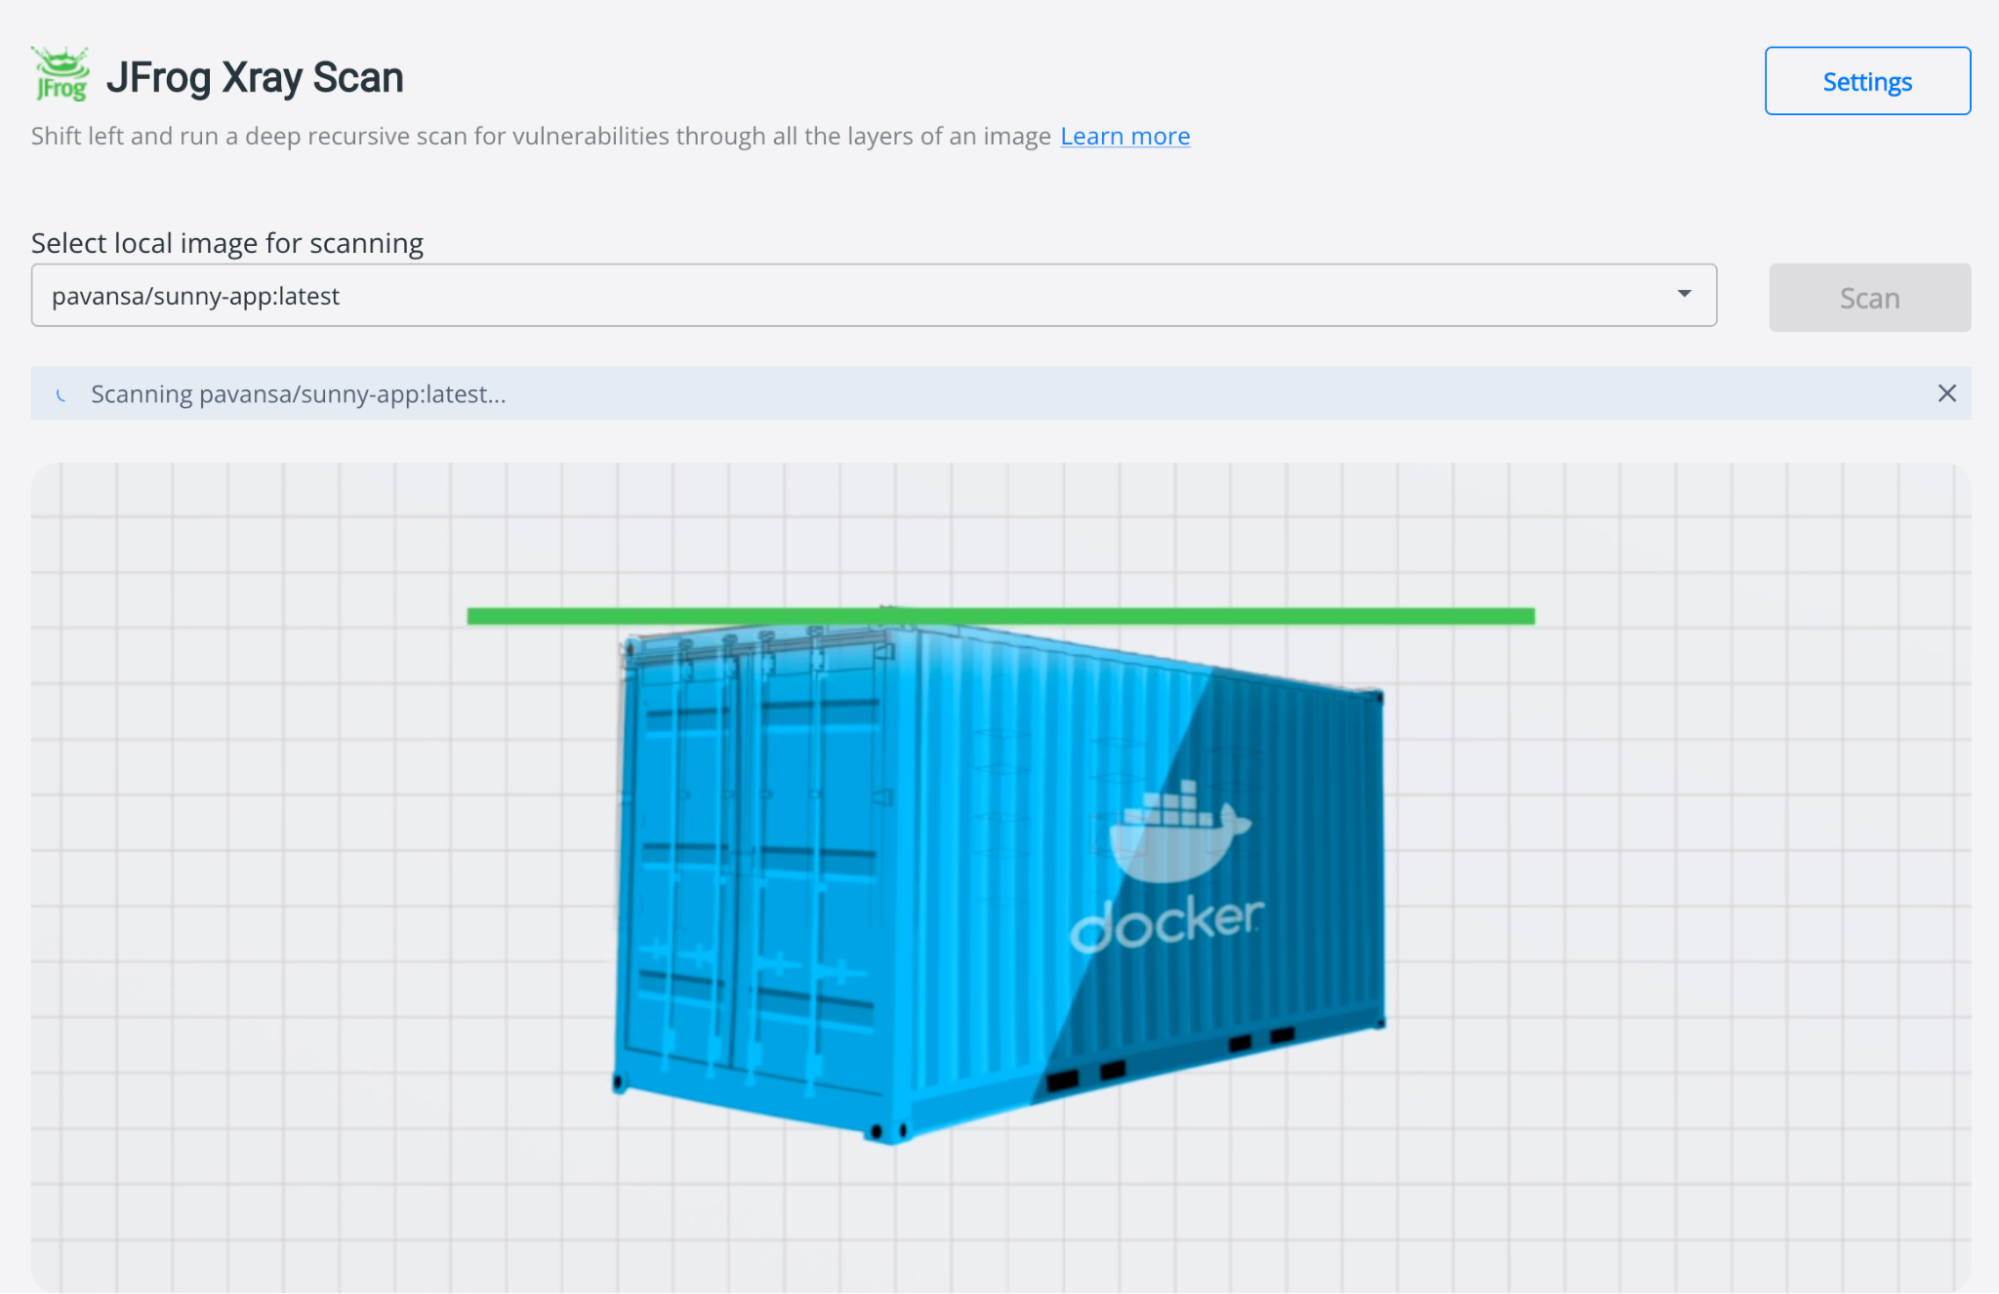
Once we select the image, it will start analysing the image to show the vulnerabilities associated with it.
Finally, you can see the vulnerabilities found in the selected image, along with the associated risks.
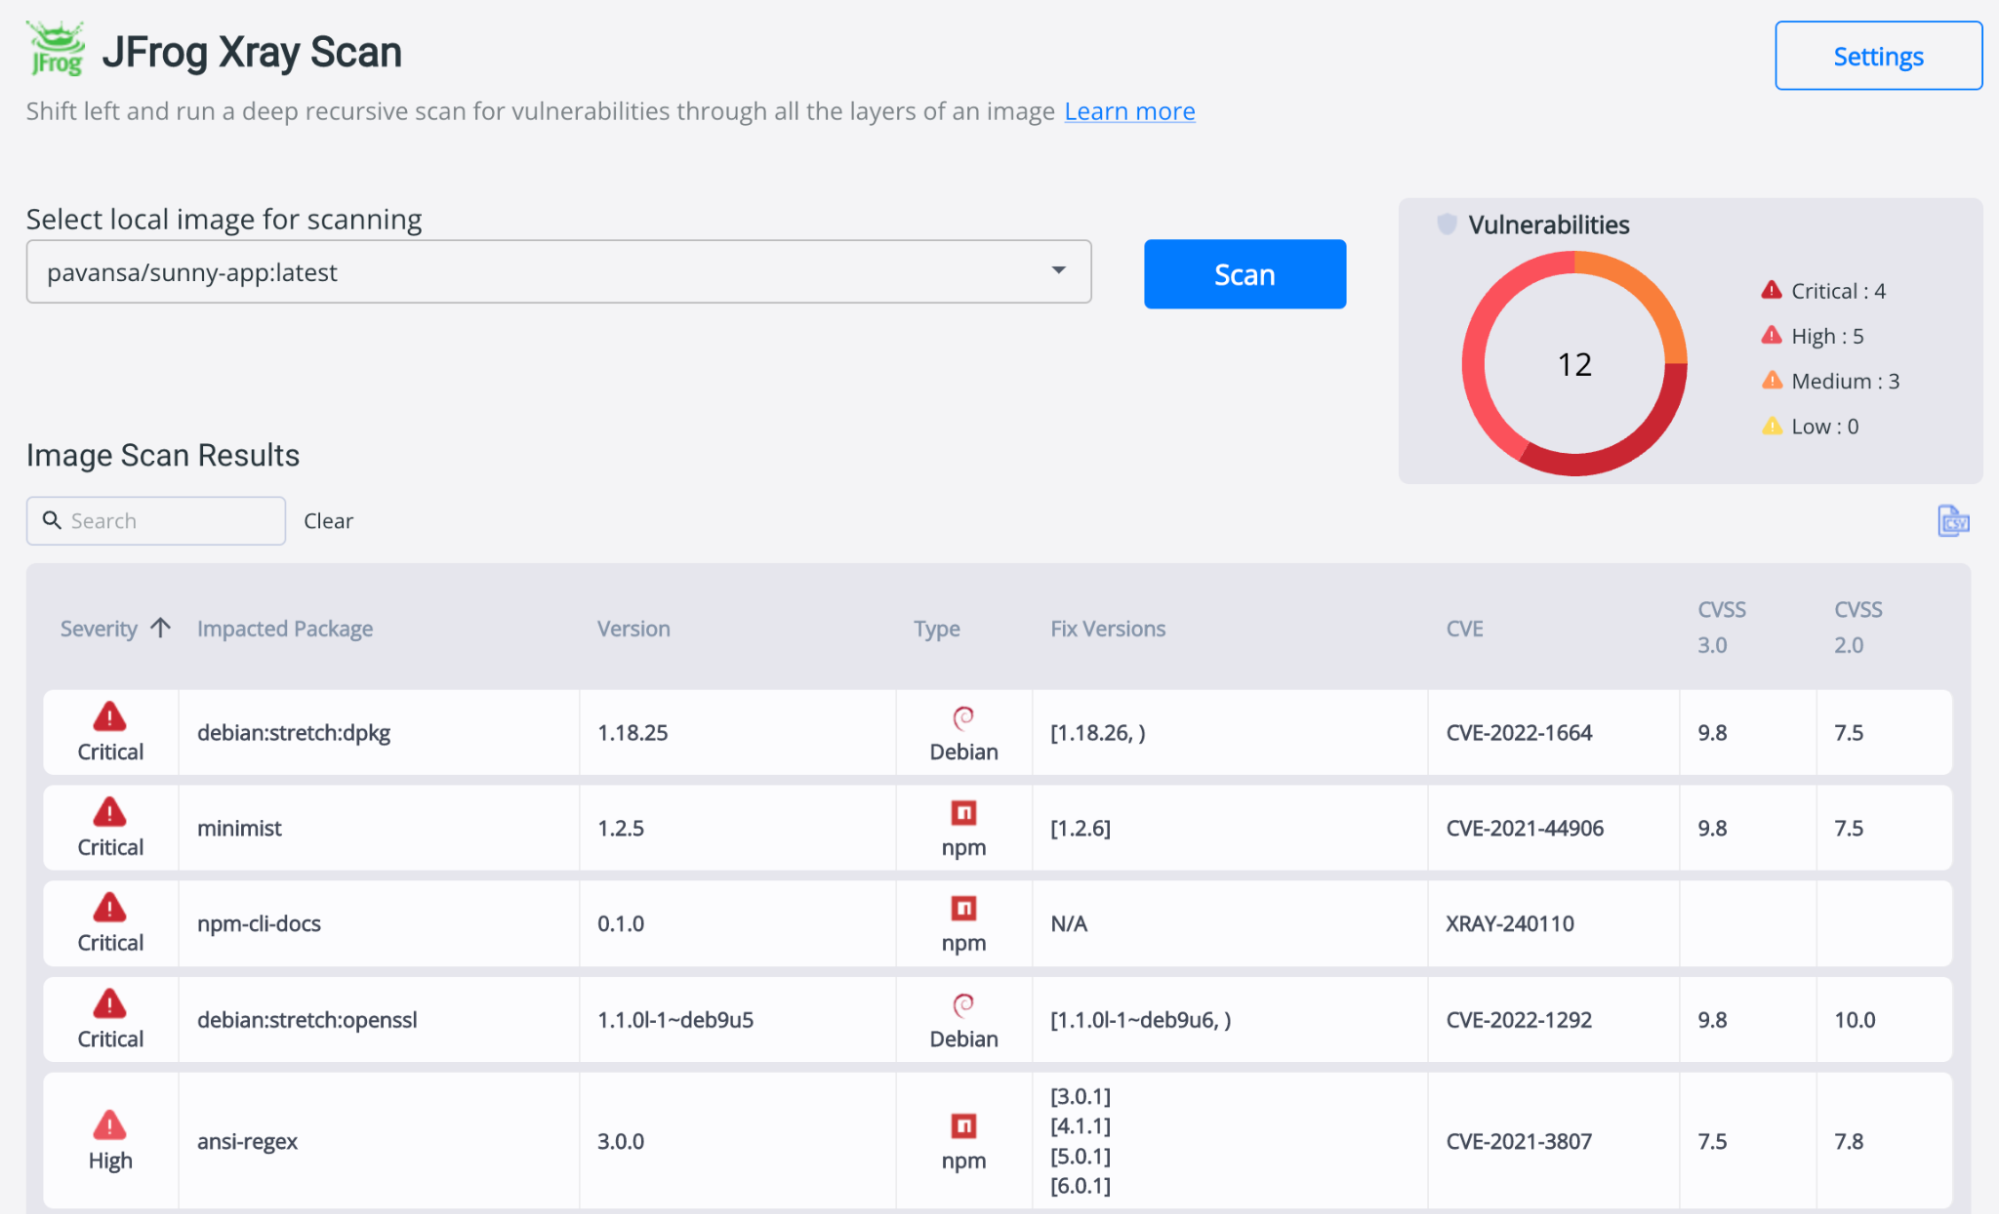
If you click on any of the impacted packages, it will show an in-depth analysis of the vulnerabilities with more details.

okteto
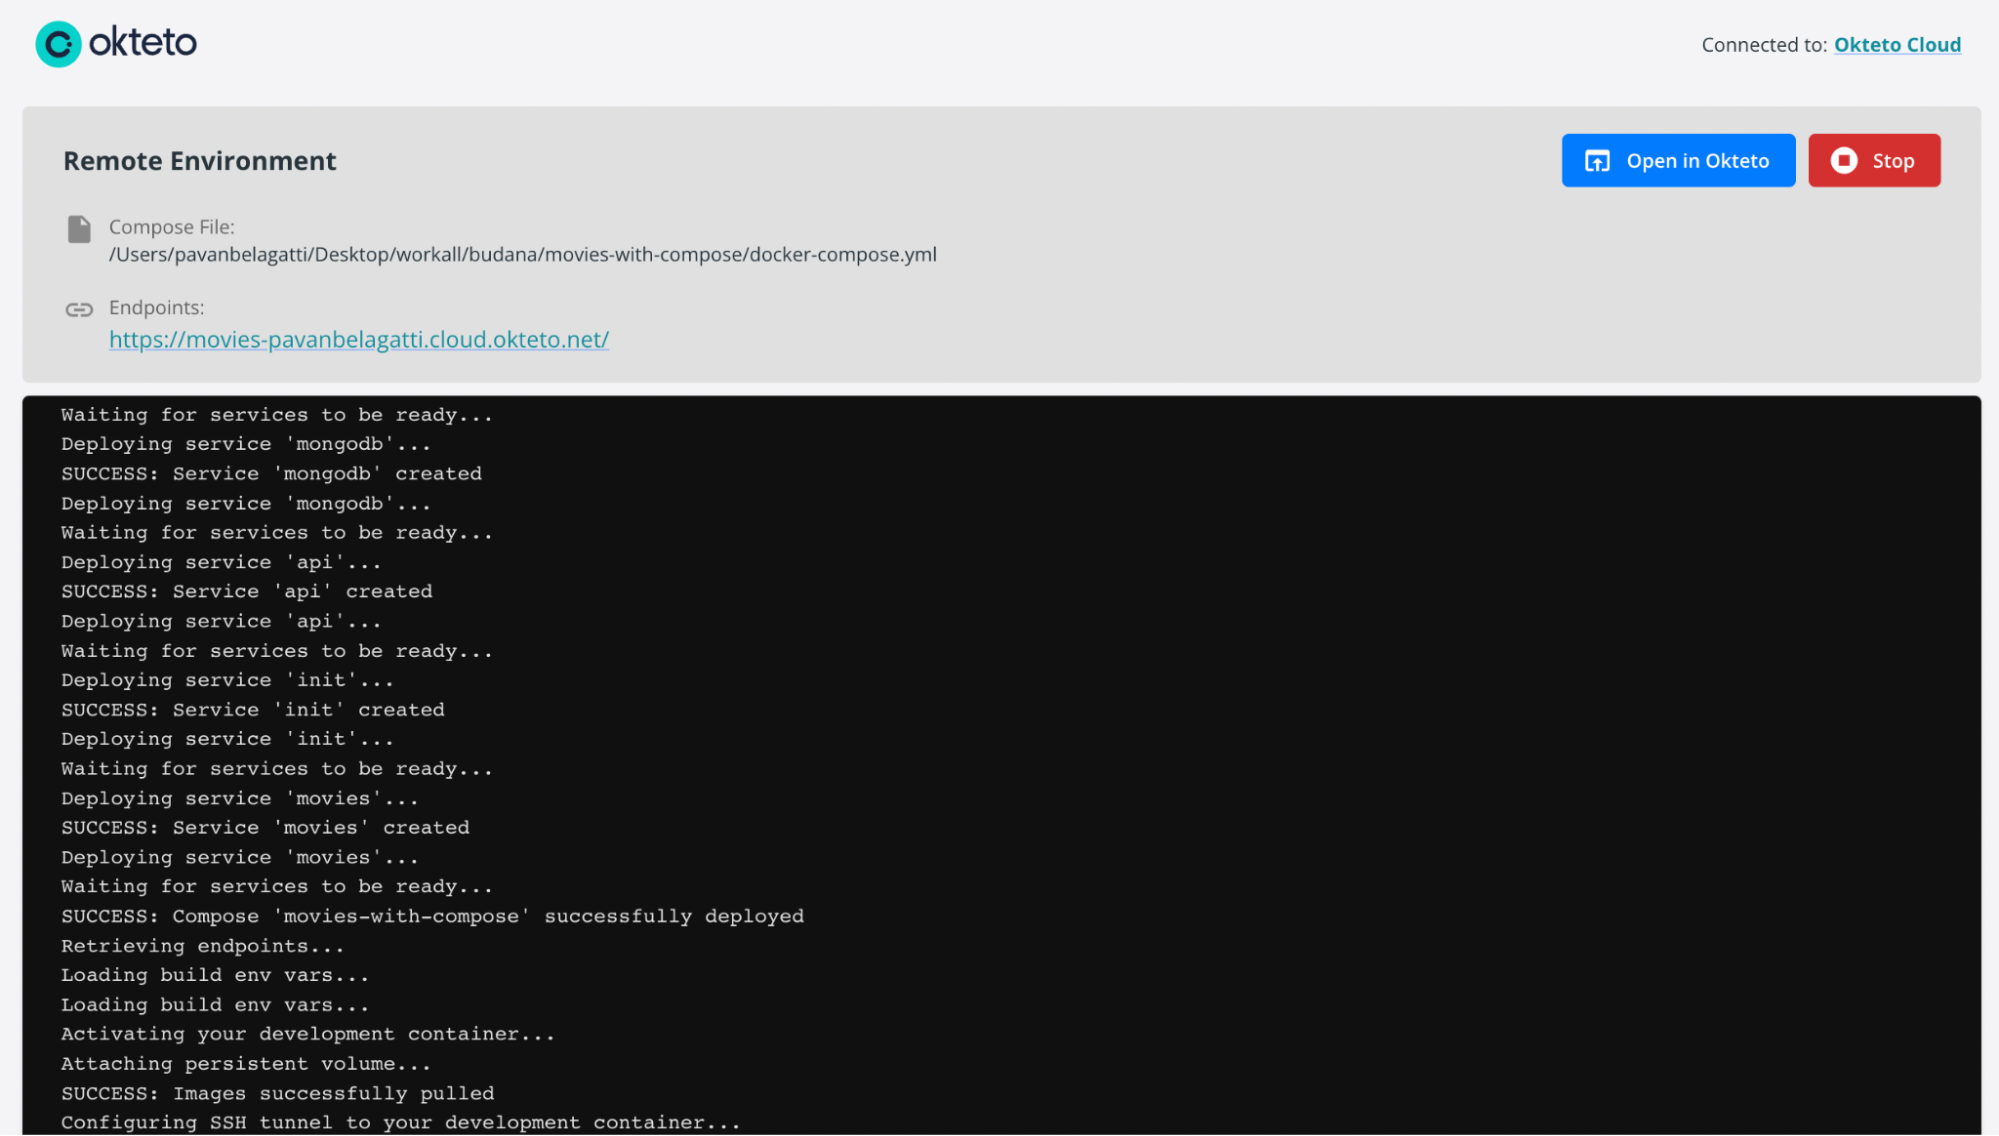
okteto is a fantastic tool that makes your developers happy and more productive by offering them pre-configured environments, so they can start developing instead of wasting time manually setting up environments. This can quickly speed up your software development and release cycles when combined with a proper CI/D platform. In addition, you can have preview environments similar to your test and dev environments where you can play around and see what is wrong before pushing the final changes to production. okteto makes cloud-native development easy for developers.
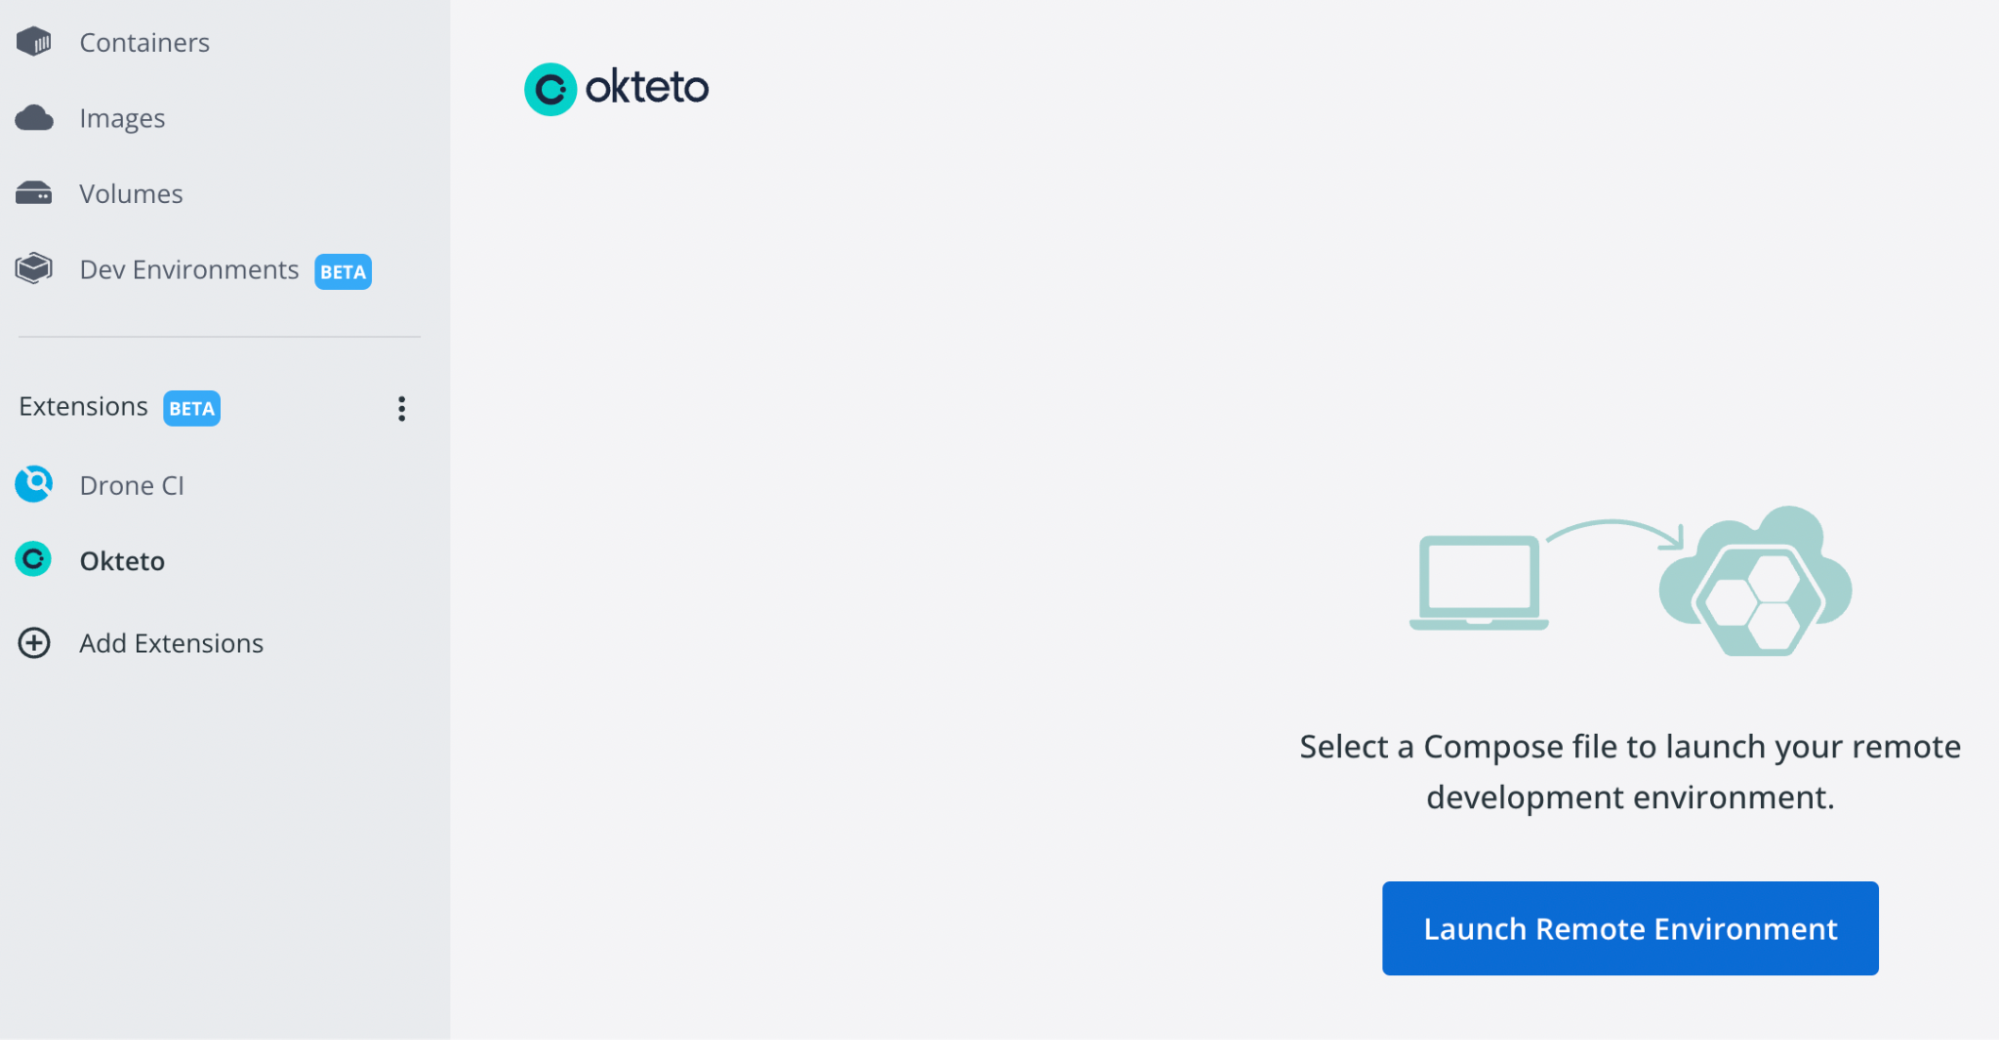
okteto extension is readily available in the Docker desktop extension marketplace and can be installed with just a click of a button. For okteto to do its magic, you need to have okteto manifest configured for our application. You can read their official documentation for more information on how to set up and use okteto. Once you install the extension, it will ask you to launch a remote environment. You can choose the application folder that has okteto manifest file and start experimenting. Try this simple tutorial where they show you how to fix a bug in the development environment with the help of okteto’s development environments.
Disk Usage
Disk Usage is a Docker extension by Docker. Inc that will help developers understand their disk usage. Once enabled, this extension analyses and categorizes the disk space used by different entities/objects such as images, containers, local volumes, and build cache. This extension gives you the option to reclaim your disk space by helping you delete unused objects. Optimizing your disk space is very essential by removing junk so you can accommodate space for your valuable objects. The extension is readily available on the Docker extensions tab.
 Click on install, and the extension gets installed in a second. Just open the extension, and you should be able to see the dashboard as shown below,
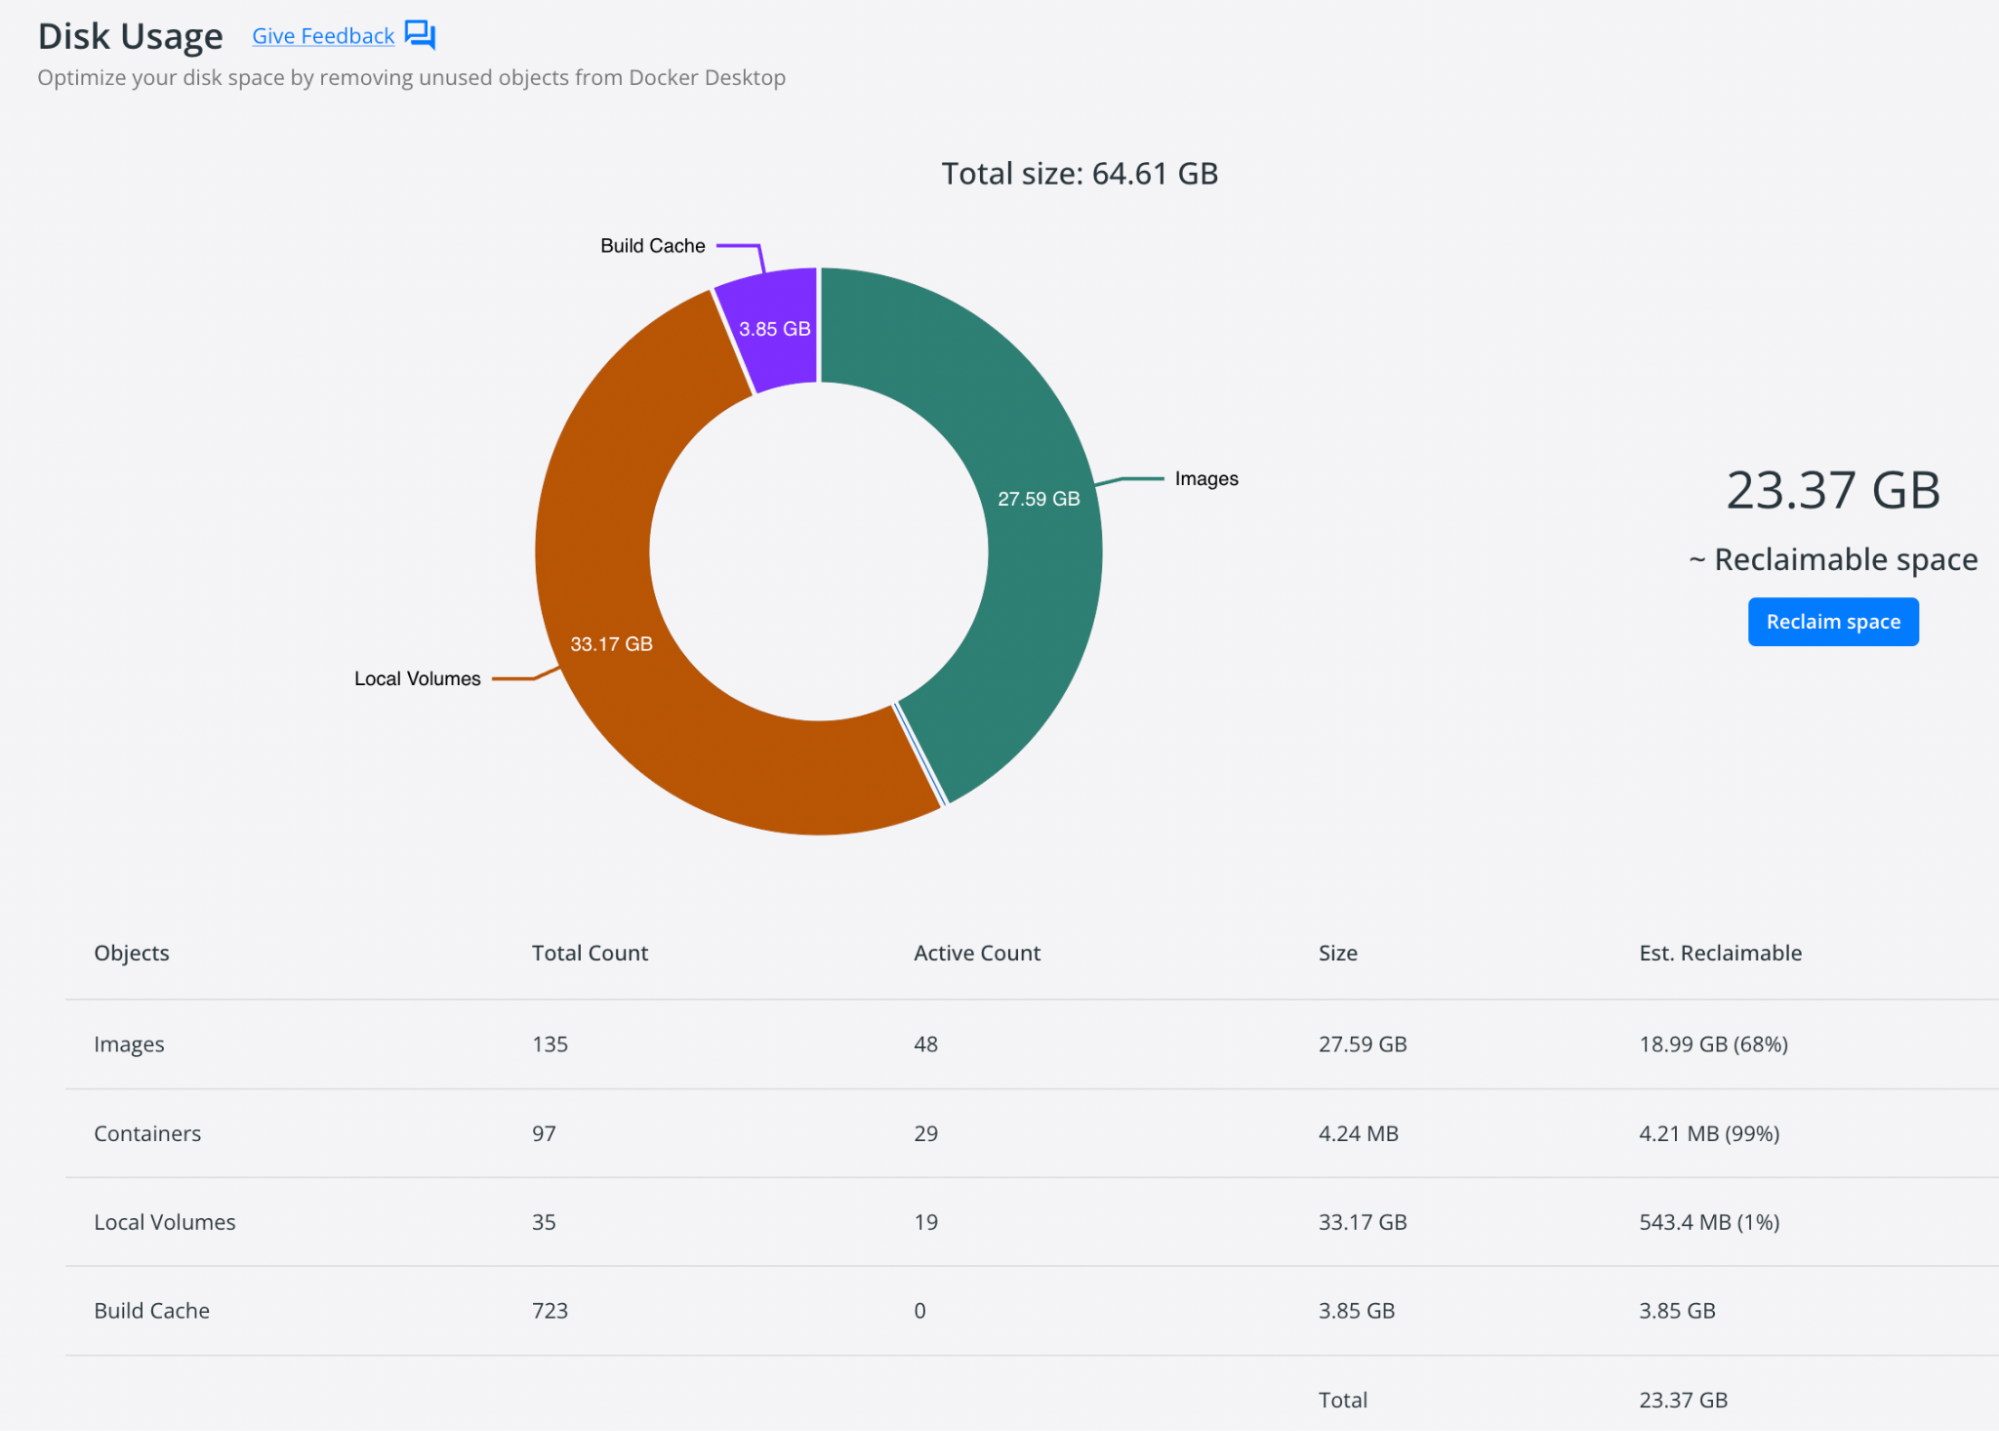
You can see the Objects listed and the size of each object occupied. By clicking on Reclaim space, you will get to see the options to delete and reclaim your space.
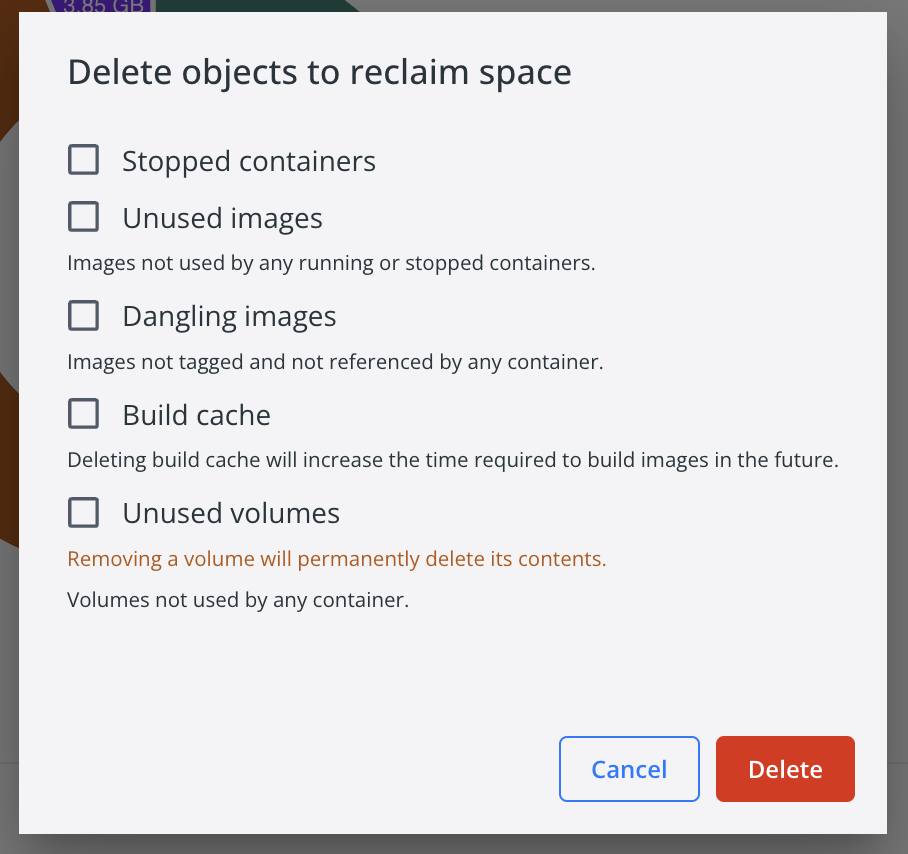
You can delete the objects you think of as not valauvle to you and then proceed to reclaim your disk space.
vcluster
Working with Kubernetes can be highly overwhelming. As it involves a vast learning curve, developers spend more time and effort understanding this platform. It is all worth it, but what if there are tools that aid developers and help them increase productivity? vclusters is one such tool with which you can create virtual clusters on top of any Kubernetes cluster. Instead of creating full-blown clusters that might just shoot up your cloud bill, the vclusters are cheap, with the added advantages of multi-tenancy. This will be very beneficial for anybody who is required to set up different development and testing configurations.
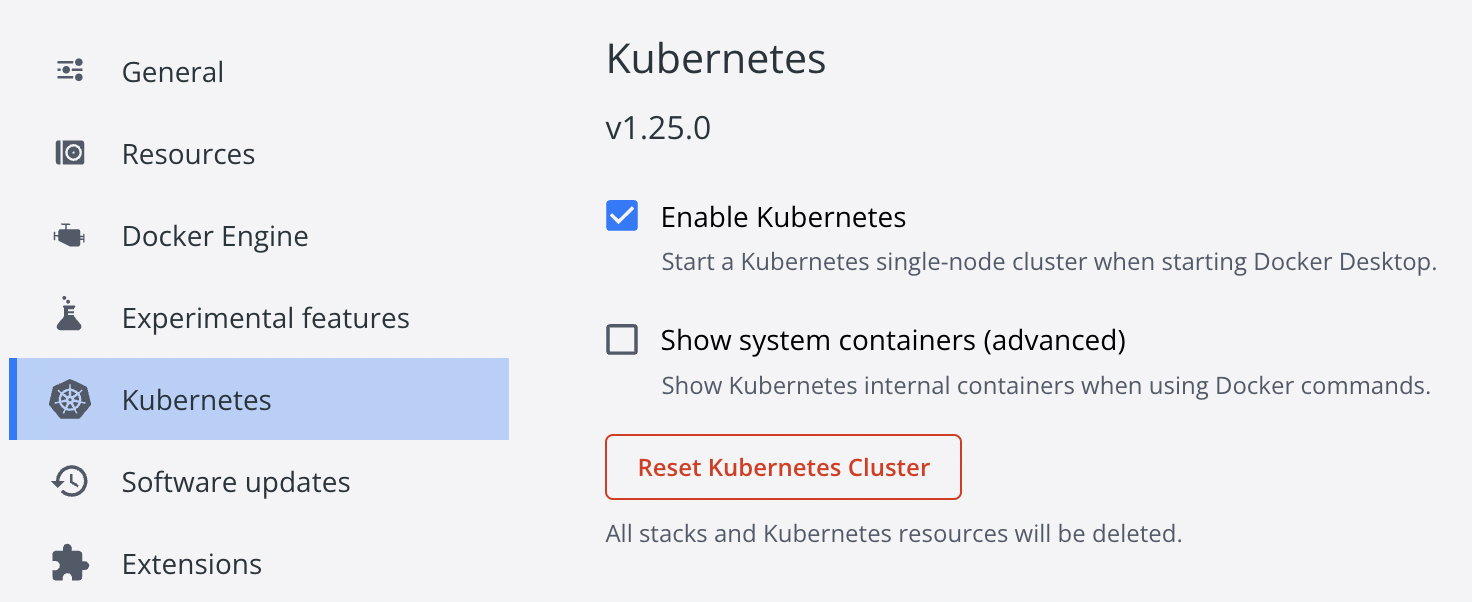
Make sure to enable Kubernetes from the Docker desktop preferences.
 The vcluster extension is readily available on the Docker desktop extensions tab and can be installed with a click.
 Once the extension is installed, you will see a simple dashboard to create the virtual cluster.
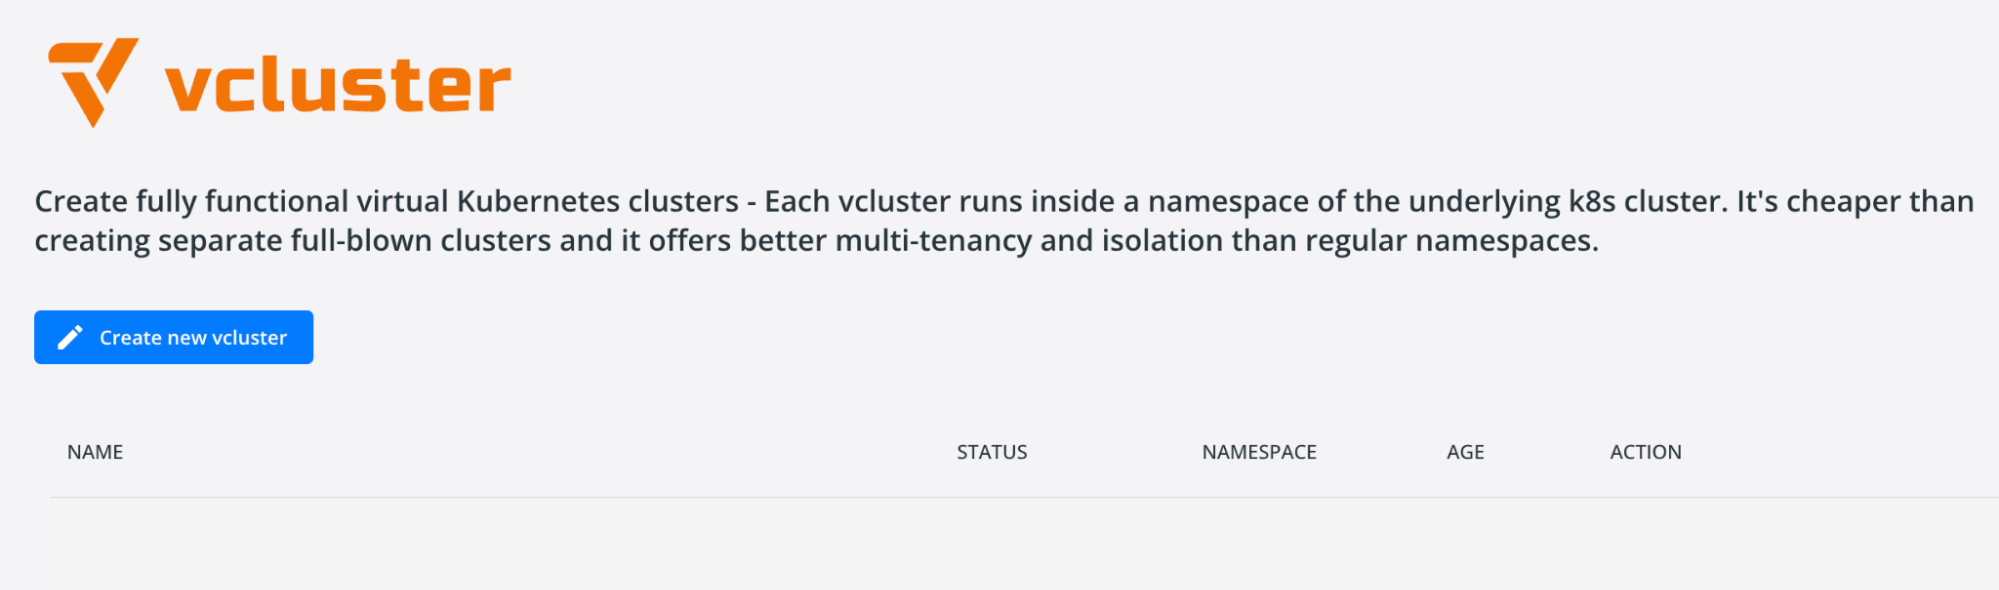 You can then click on ‘Create new cluster’. Name your cluster, fill in the required fields and click on create.
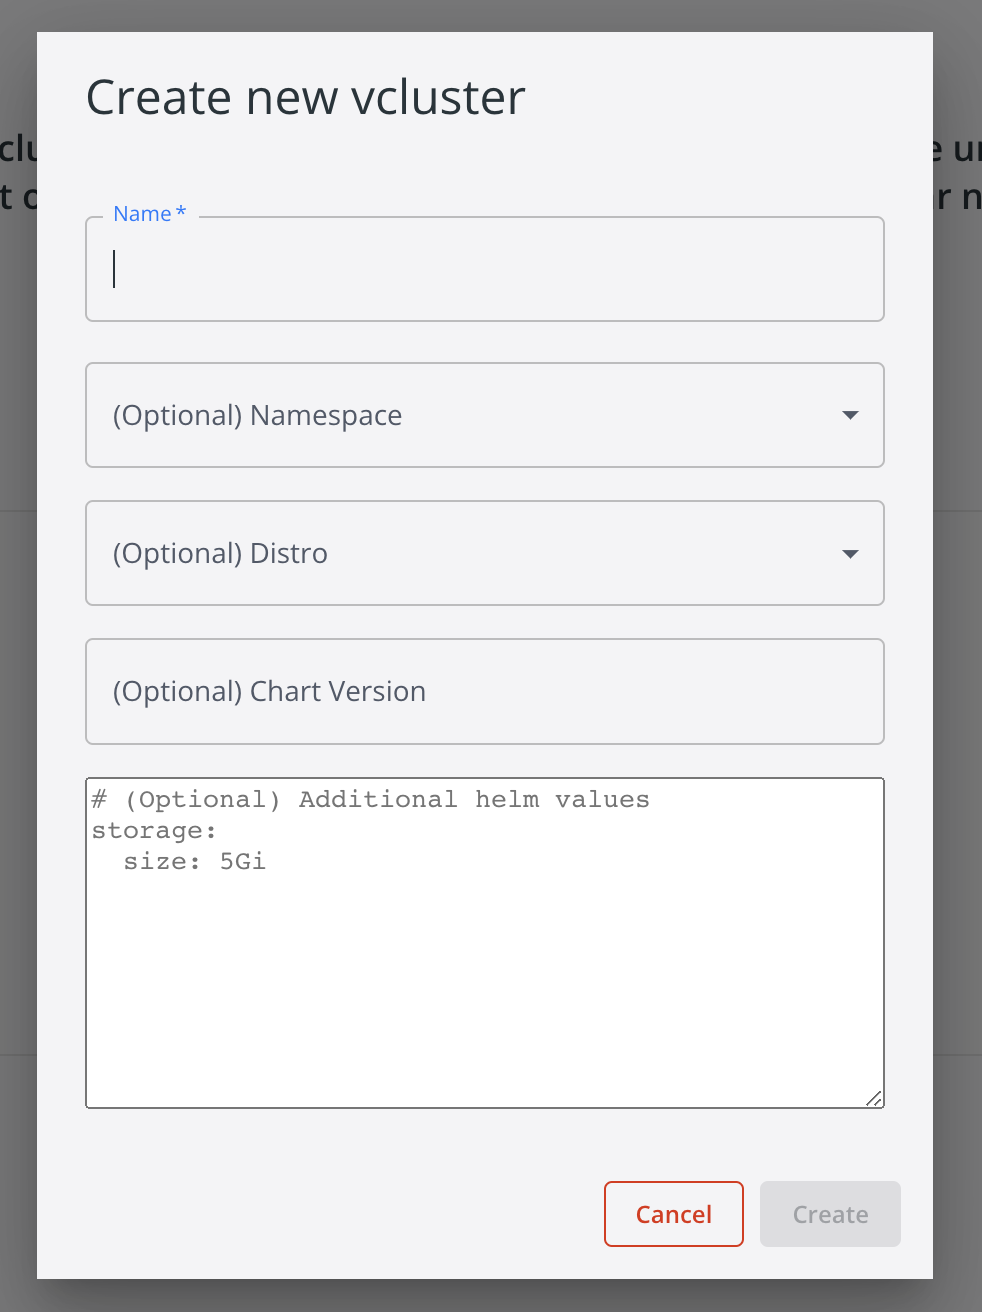 Once you fill in all the required fields, you should be able to see your cluster getting created. After some time, you should see it running.
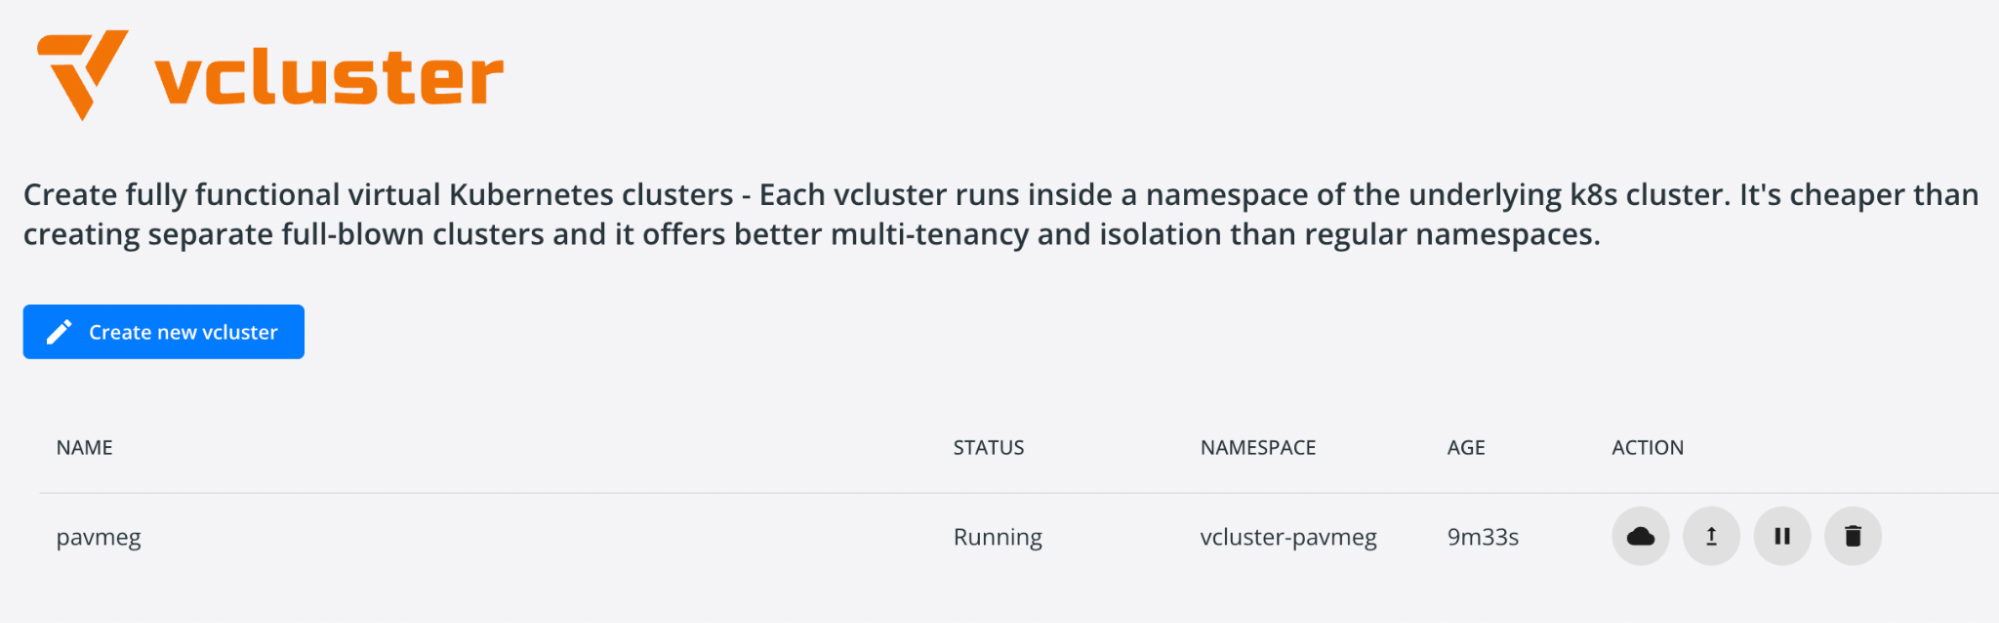 You can verify the running cluster using vcluster CLI. The command to list your vclusters is,
vcluster list

Microcks
Microcks is an Open source platform to mock and test APIs and microservices. You can deploy mocks and experiment with your rest APIs locally. Now that the Docker extension is available, you can efficiently mock and test event-based APIs. Microcks extension is readily available on the Docker desktop and can be easily installed with a click.
 Click on the tab ‘Launch Microcks’
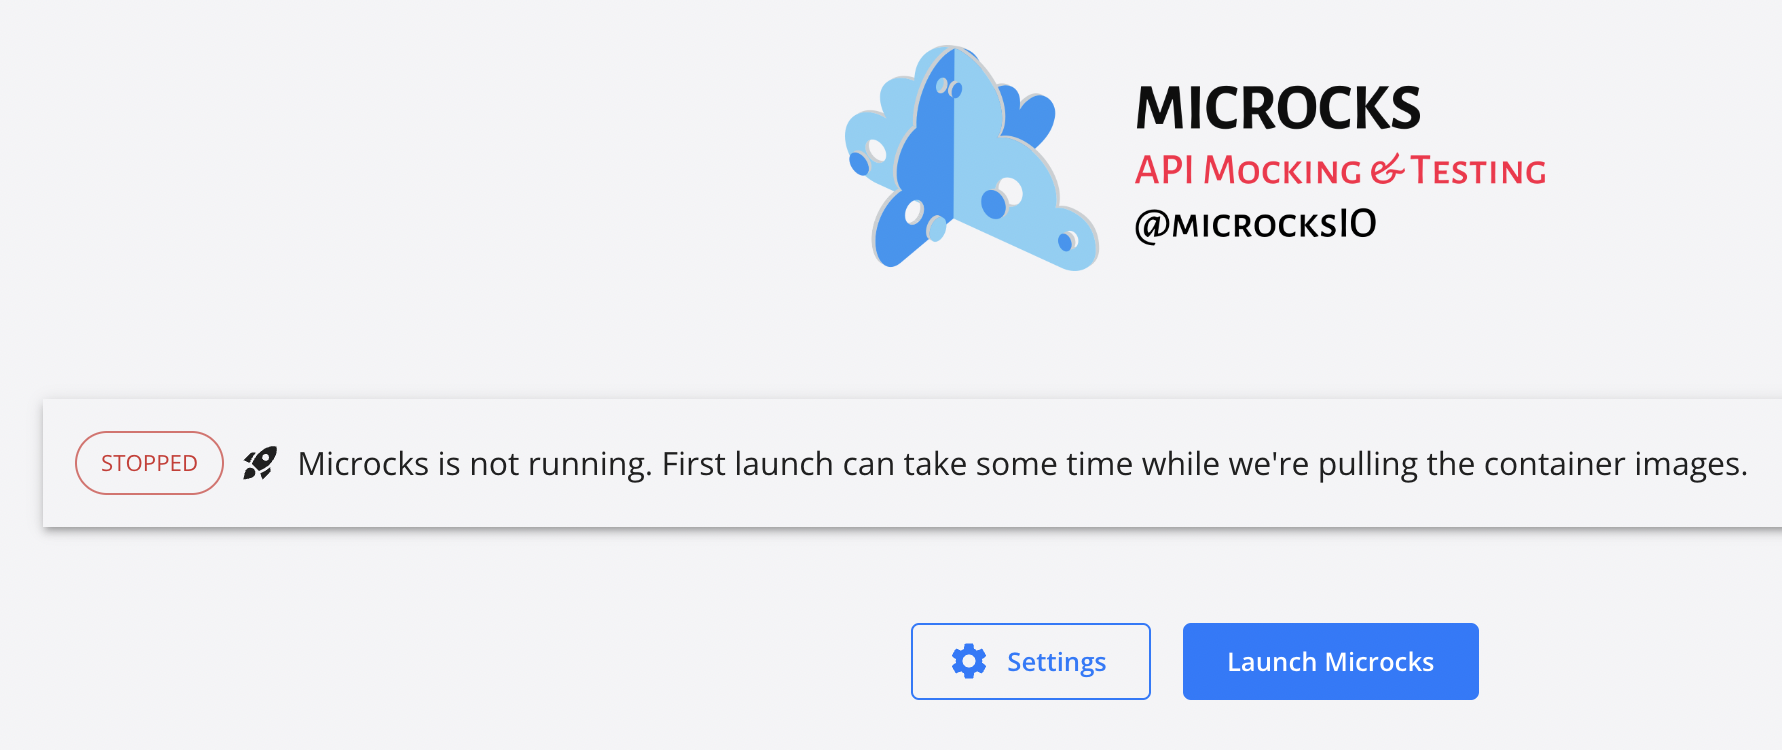
 The Microcks starts running, and you can access the localhost:8080 to test your APIs.
Let’s go to localhost:8080, and you should see the Microcks dashboard.
The Microcks starts running, and you can access the localhost:8080 to test your APIs.
Let’s go to localhost:8080, and you should see the Microcks dashboard.
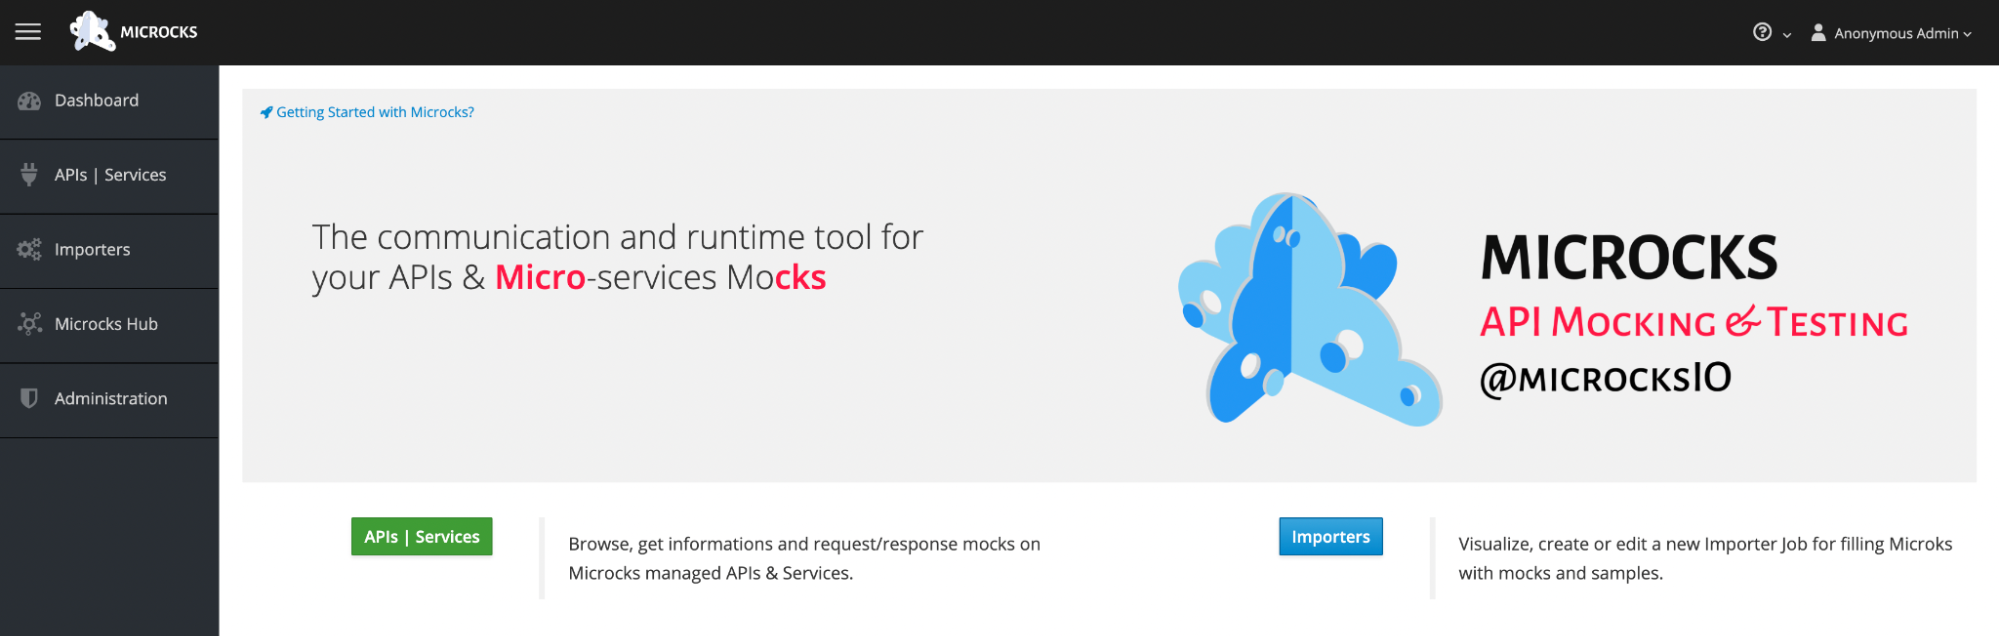 Click on APIs and Services tab,
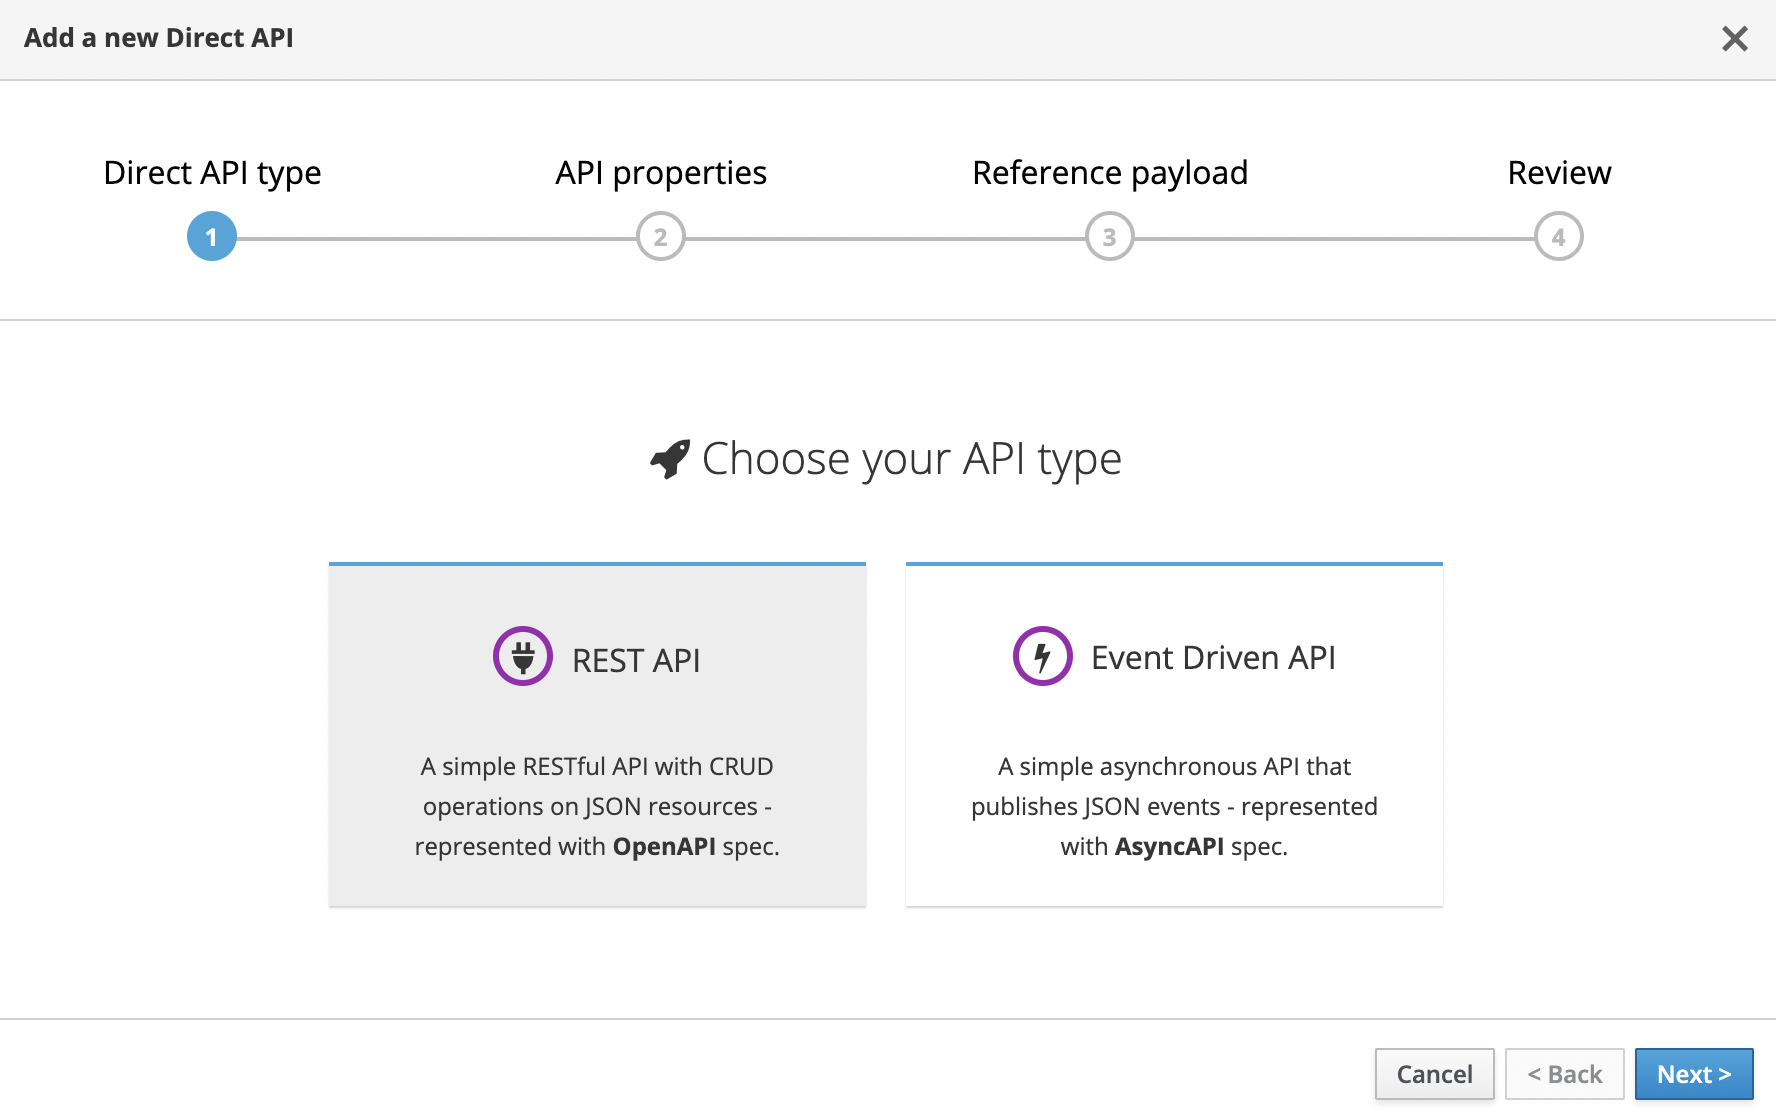
 Choose REST API and click Next.
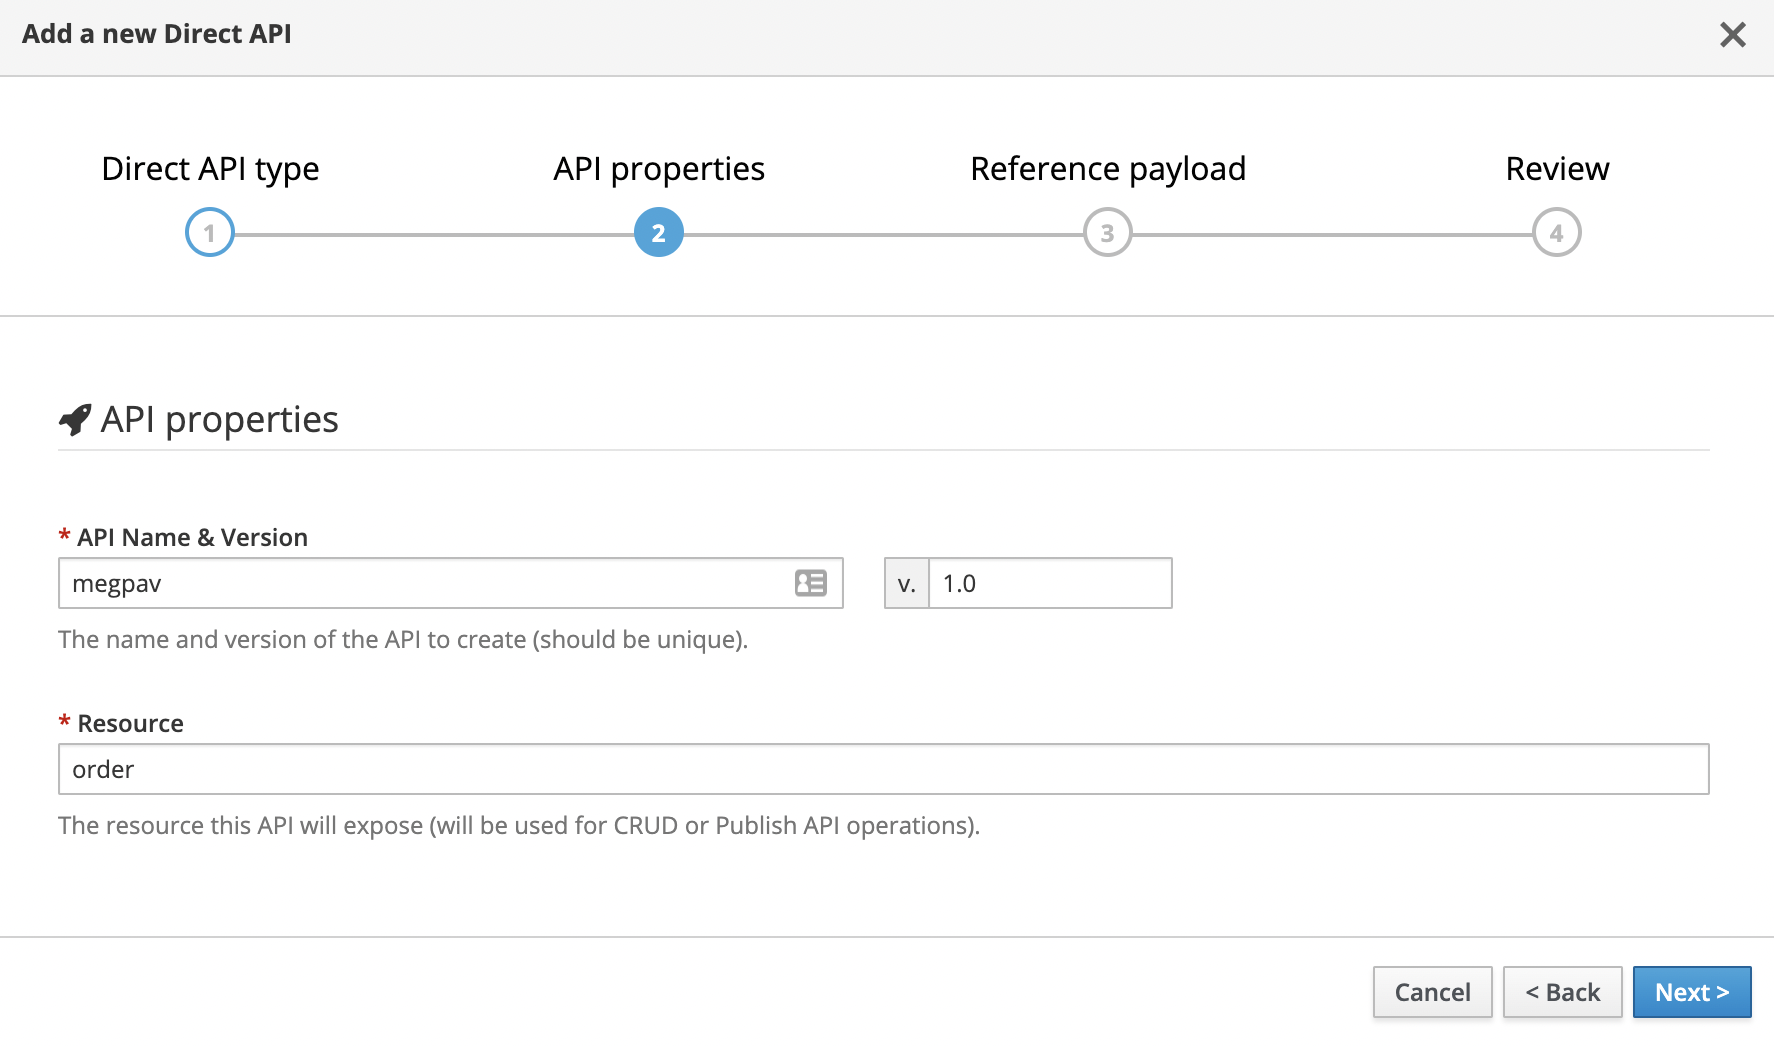
 Name the API, Version and Resource and click Next.
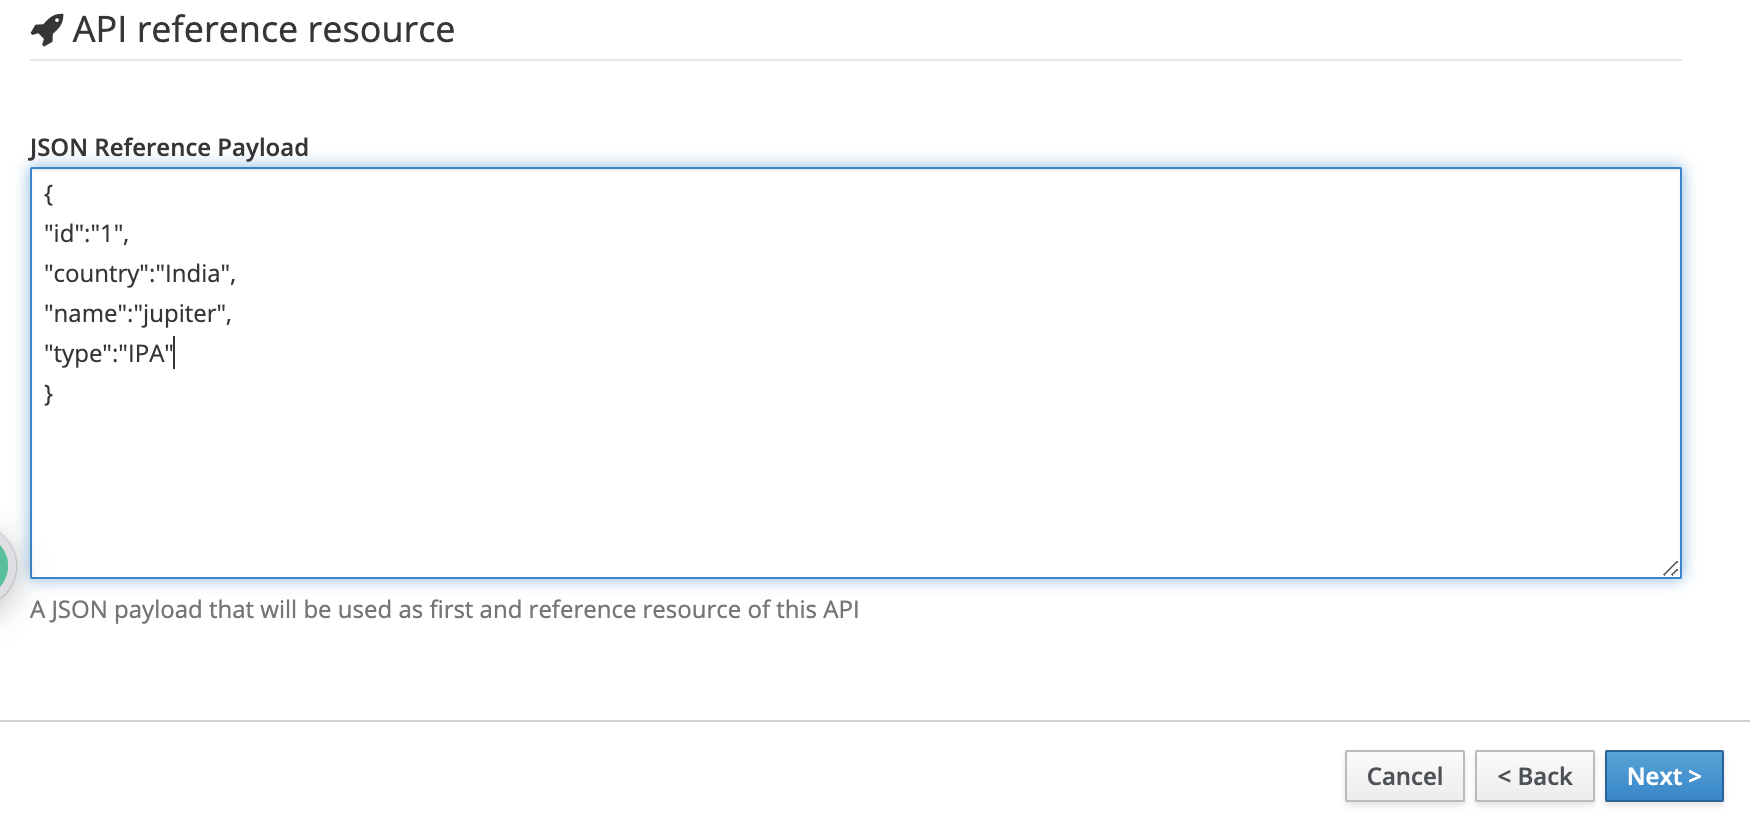
 Add the dummy JSON Reference Payload as shown below for this experiment and click next.
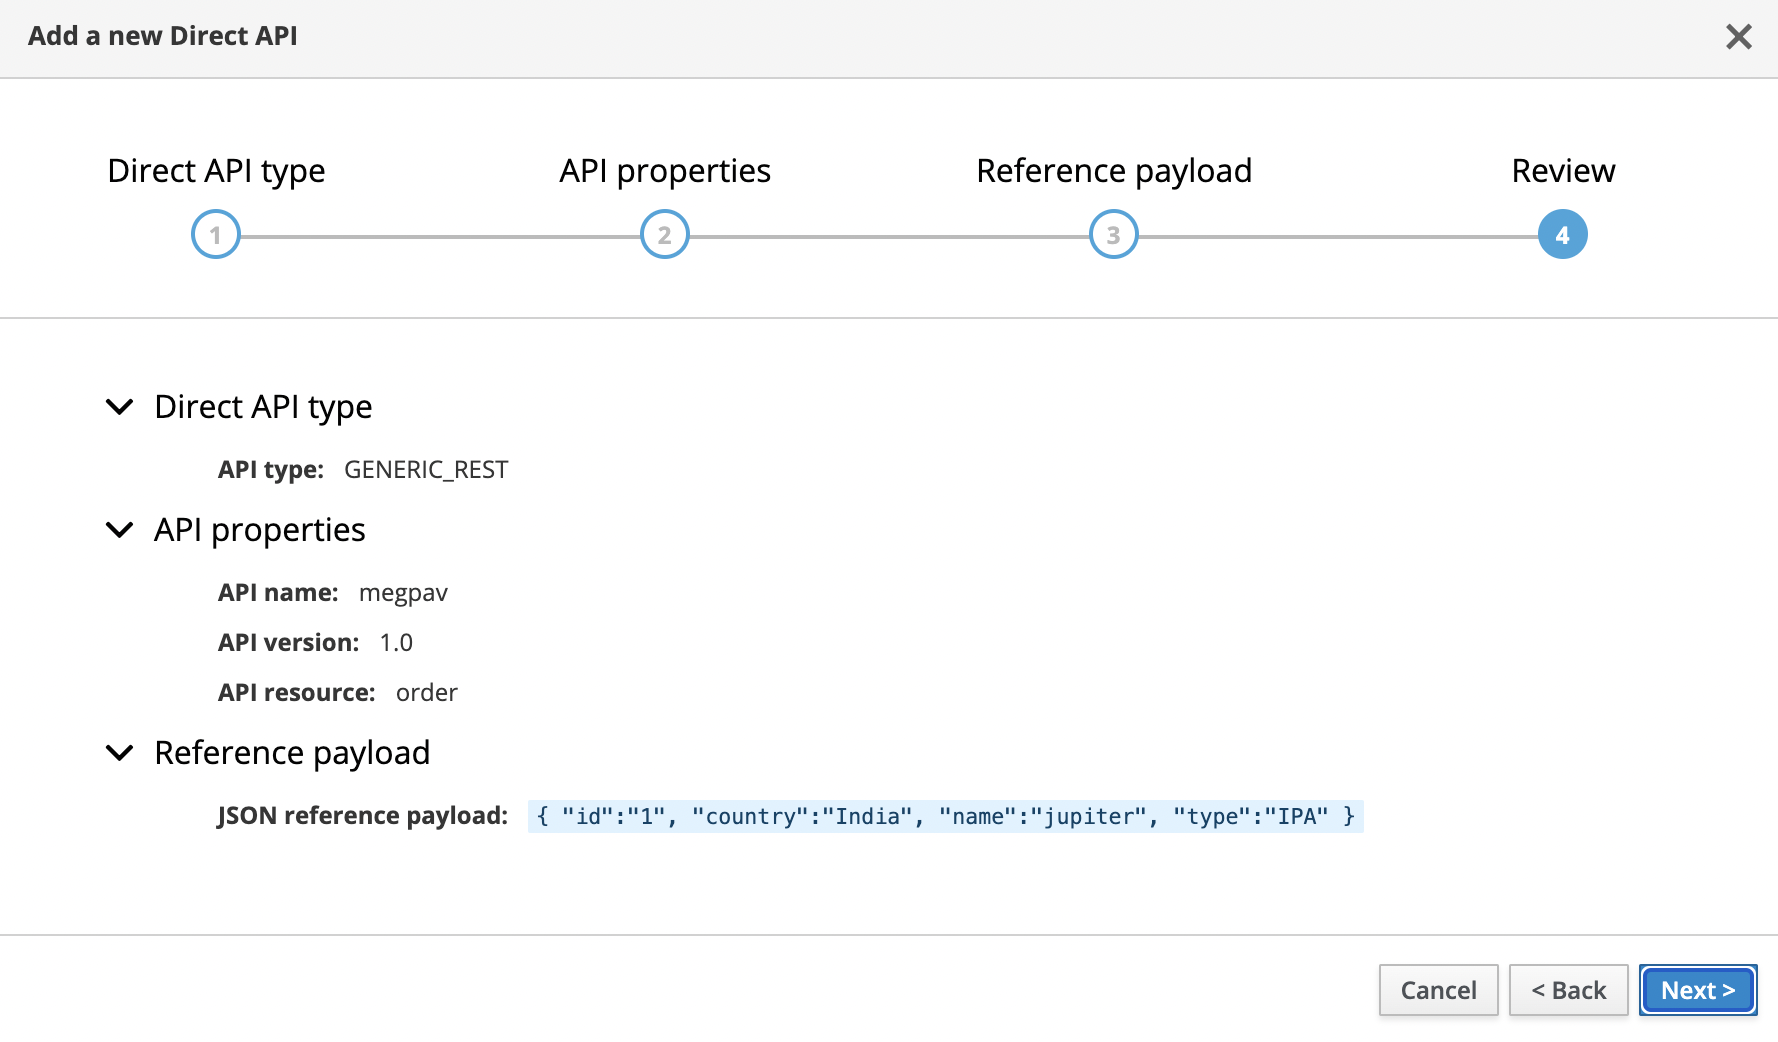
 The last step is to Review, and once the data added by you is all correct, click next.
 You should see your just created API listed.
 Click on it to see the CRUD operations listed with endpoints. Let’s test with Get.
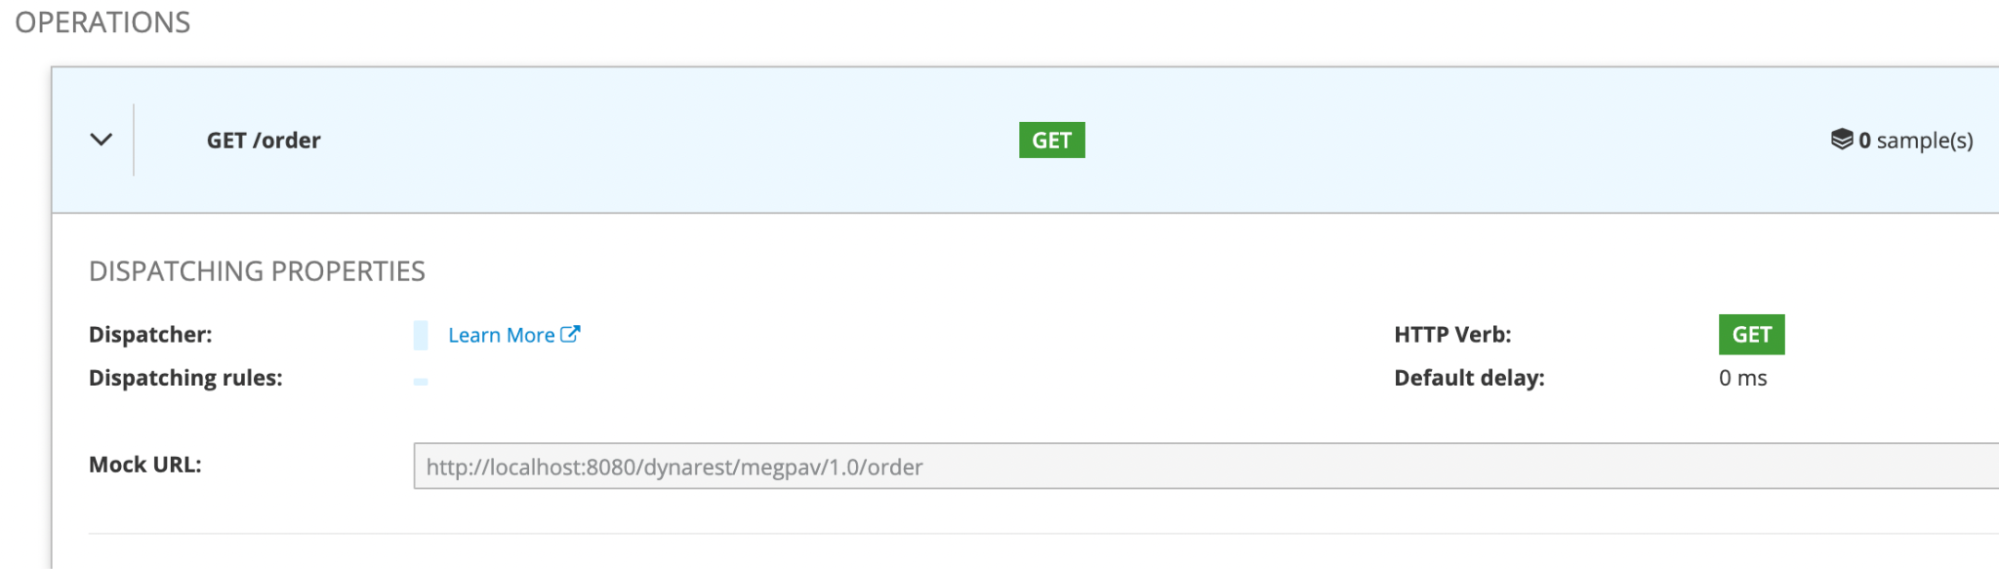 Copy the link and open the endpoint on a local browser and you should see something like this,

OpenShift
Developers often look for ways to deploy their applications on a highly scalable platform such as Kubernetes or OpenShift. OpenShift makes it easy for developers to deploy their images and applications. Now, with the introduction of the OpenShift Docker extension, you can easily deploy local containers onto remote OpenShift environments or Kubernetes clusters with a single click. This extension helps developers deploy their applications onto environments other than their local and easily test the applications.
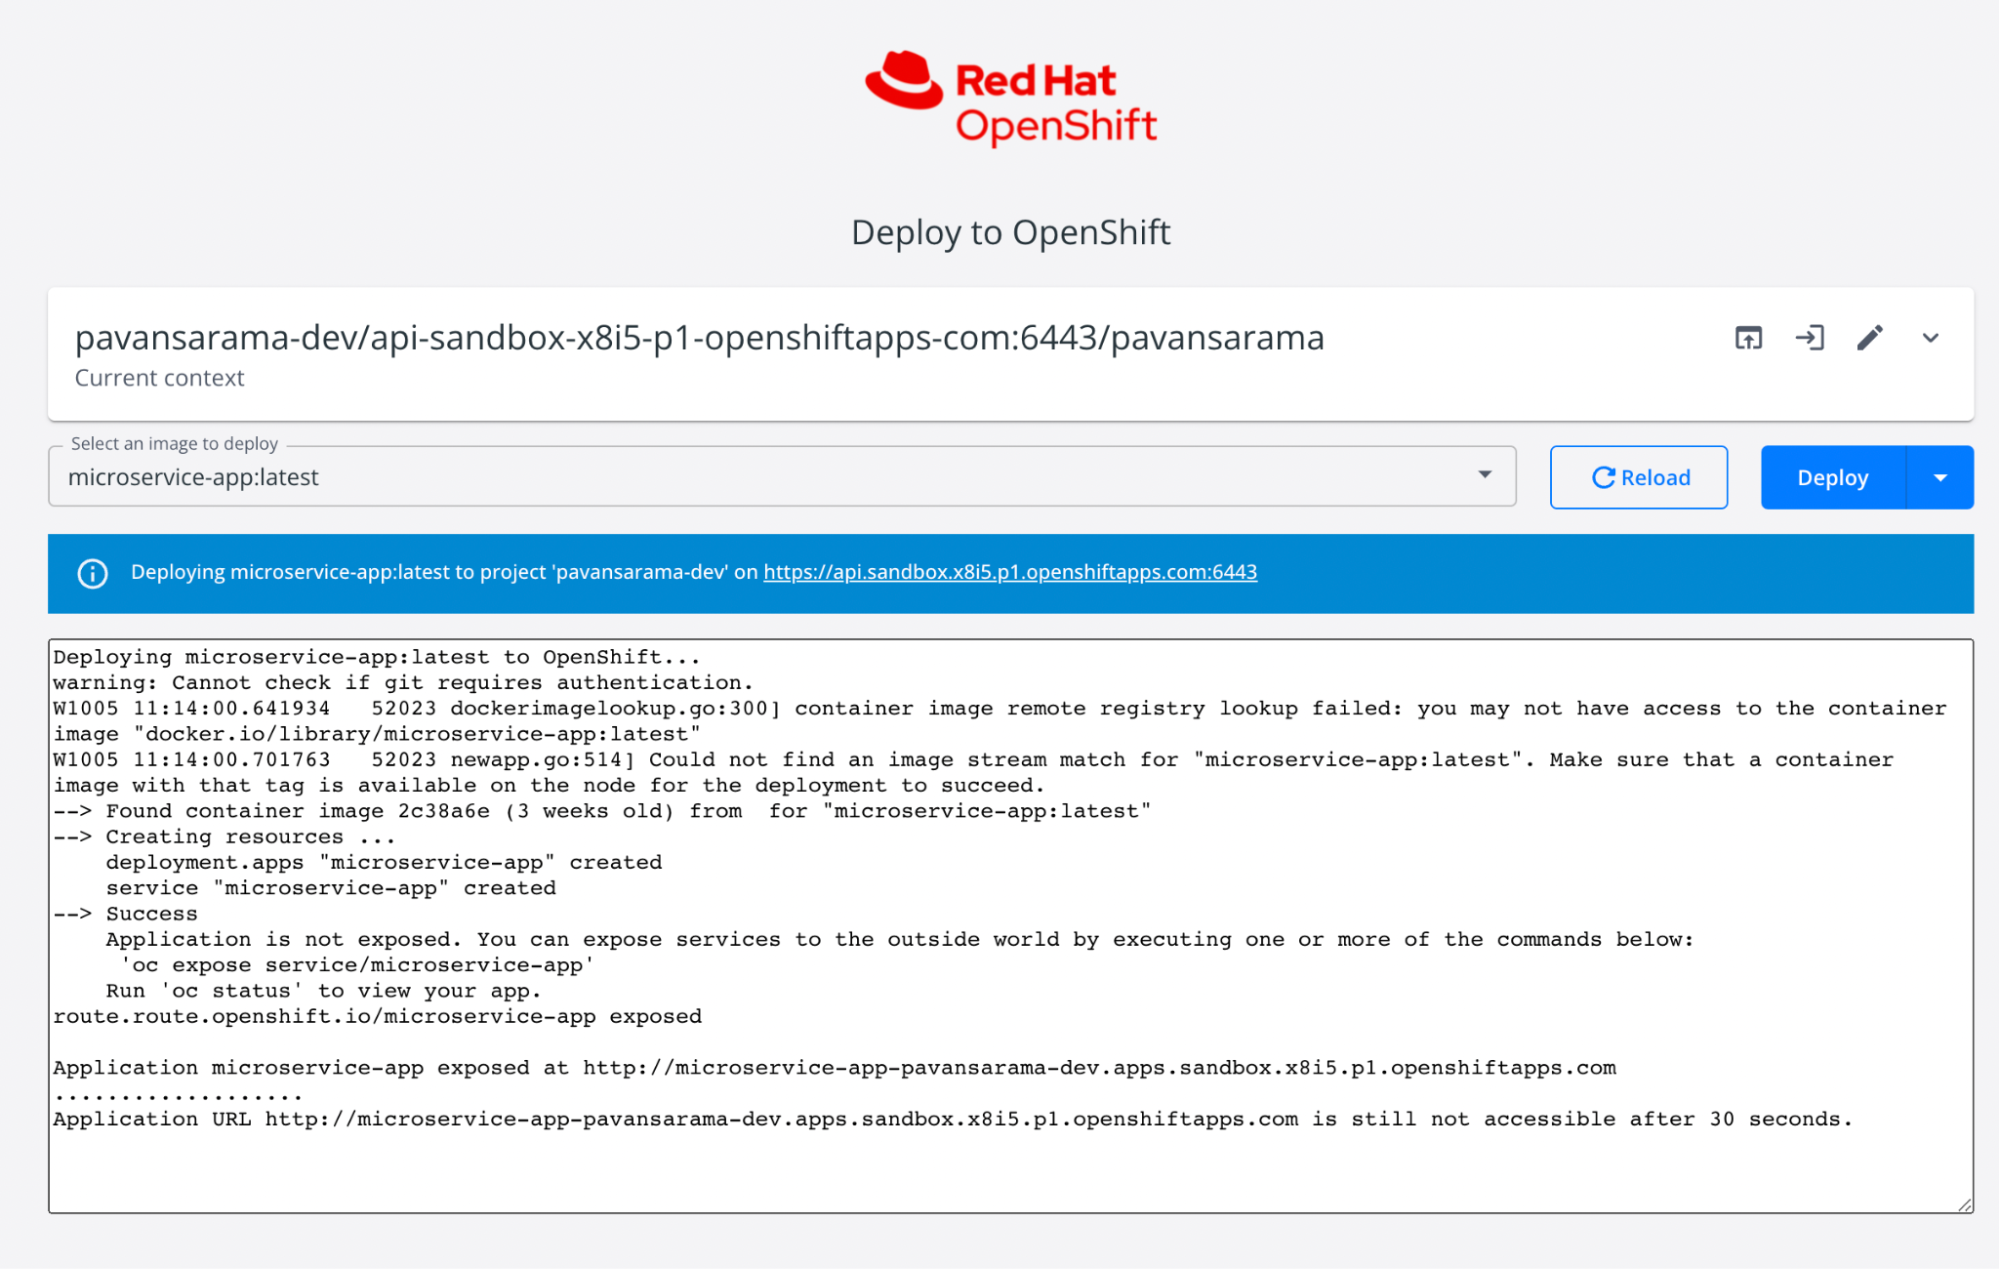 The OpenShift extension is readily available in the Docker extensions marketplace. Once installed, it will automatically detect the Kubernetes contexts and the container images. You can switch contexts and log in to different clusters. Select your containers to be deployed from the dropdown and click deploy.
Conclusion
Docker is a must-know platform for anybody working with software development. Over the years, Docker has built a vast community and support. This is an excellent initiative by Docker to help developers to streamline their work around software development and deployment. The exciting fact is you can build your own custom-made extension. We have several extensions on and off the extensions marketplace. From continuous integration to delivery, we have all the extensions we need. The above-listed extensions can significantly impact your software delivery pipeline when used wisely. Please try them and increase your speed and productivity.


![This is How I Built a Real-time Chat Application with Socket.io & Node.js [Added Automated Testing]](/_next/image?url=https%3A%2F%2Fcdn.hashnode.com%2Fres%2Fhashnode%2Fimage%2Fupload%2Fv1681709527211%2Ffde84202-e495-4ba0-8258-05288d138179.png&w=3840&q=75)
