

![[Tutorial] Scaling Your Application Using Kubernetes](https://cdn.hashnode.com/res/hashnode/image/upload/v1661352745073/LkzNf9mVm.png?w=1600&h=840&fit=crop&crop=entropy&auto=compress,format&format=webp)


With the advancements in the DevOps world, every organization started embracing the microservices pattern. Docker helped the organizations in standardizing the process of microservices from code to packaging to shipping. While Docker made packaging and shipping code easy with containerization, Kubernetes came as a saviour in managing these Docker containers when they scaled from one to thousand in numbers.
Kubernetes has become the standard platform for orchestrating the containers and deploying applications. Scaling an application essentially means ensuring it can handle more users and their load at peak times by splitting up its workload and distributing it across multiple nodes. Today, let us see how we can scale our applications on Kubernetes with different techniques.
Scaling Applications on Kubernetes
When deploying applications in Kubernetes, several design decisions must be considered. One of the most important aspects is how you can scale your application using Kubernetes and the technique to use. Scaling an application in Kubernetes requires a different approach than with other services. Kubernetes Autoscaling provides a mechanism to automatically scale up or down the number of pods of an application based on resource utilization or other user-defined triggers.
1. Monitor your application so you know when to scale You need to check on two key things as you monitor your application. First, you want to keep an eye on how many users are interacting with your application. If many people are hitting your application and interacting with it, but the app is responding slowly, you want to scale to ensure that users can still get their jobs done.
Second, you want to look at your nodes’ CPU and memory usage. In general, you want to keep the memory usage below 70% and the CPU usage below 80%. You may need to scale if your app uses significantly more than this. There are many ways to monitor your application.
2. Use cloud providers and resource limits to help automate your scaling process. Most cloud providers offer some kind of autoscaling functionality. These systems use a variety of metrics — often the same ones you can monitor yourself — to determine when to start and stop new instances. Many of these systems also use resource limits to help automate your scaling process. Resource limits are a way to set a maximum value on a metric. The system will trigger an action if a metric goes above that value. For example, if your application uses a certain amount of RAM or CPU and those metrics go higher than their limits, the autoscaling functionality will help scale the application.
If the application uses too much of a specific resource — like memory — but doesn’t use enough of a different resource — like CPU — you can set a resource limit for the first resource and have the autoscaling functionality monitor the second resource. If the second metric goes above the limit, the autoscaling functionality can respond by adding more instances of the application.
3. Keeping a buffer percentage of mission-critical applications When you think a particular application or a process is critical for the business, you would like to be on the safer side and have an extra buffer in terms of pod replicas and other resources so it won’t go down and affect the business operation.
What is Autoscaling in Kubernetes?
Autoscaling is when you configure your application to automatically adjust the number of pods based on current demand and resource availability. For example, if too few pods are running, the system could automatically create more pods to meet demand. On the other hand, you can also scale down if there are too many pods. There are three types of autoscaling in Kubernetes — Horizontal Pod Autoscaler, Vertical Pod Autoscaler and Cluster Autoscaler. Let’s dive in and understand each option in detail.
Horizontal Pod Autoscaler
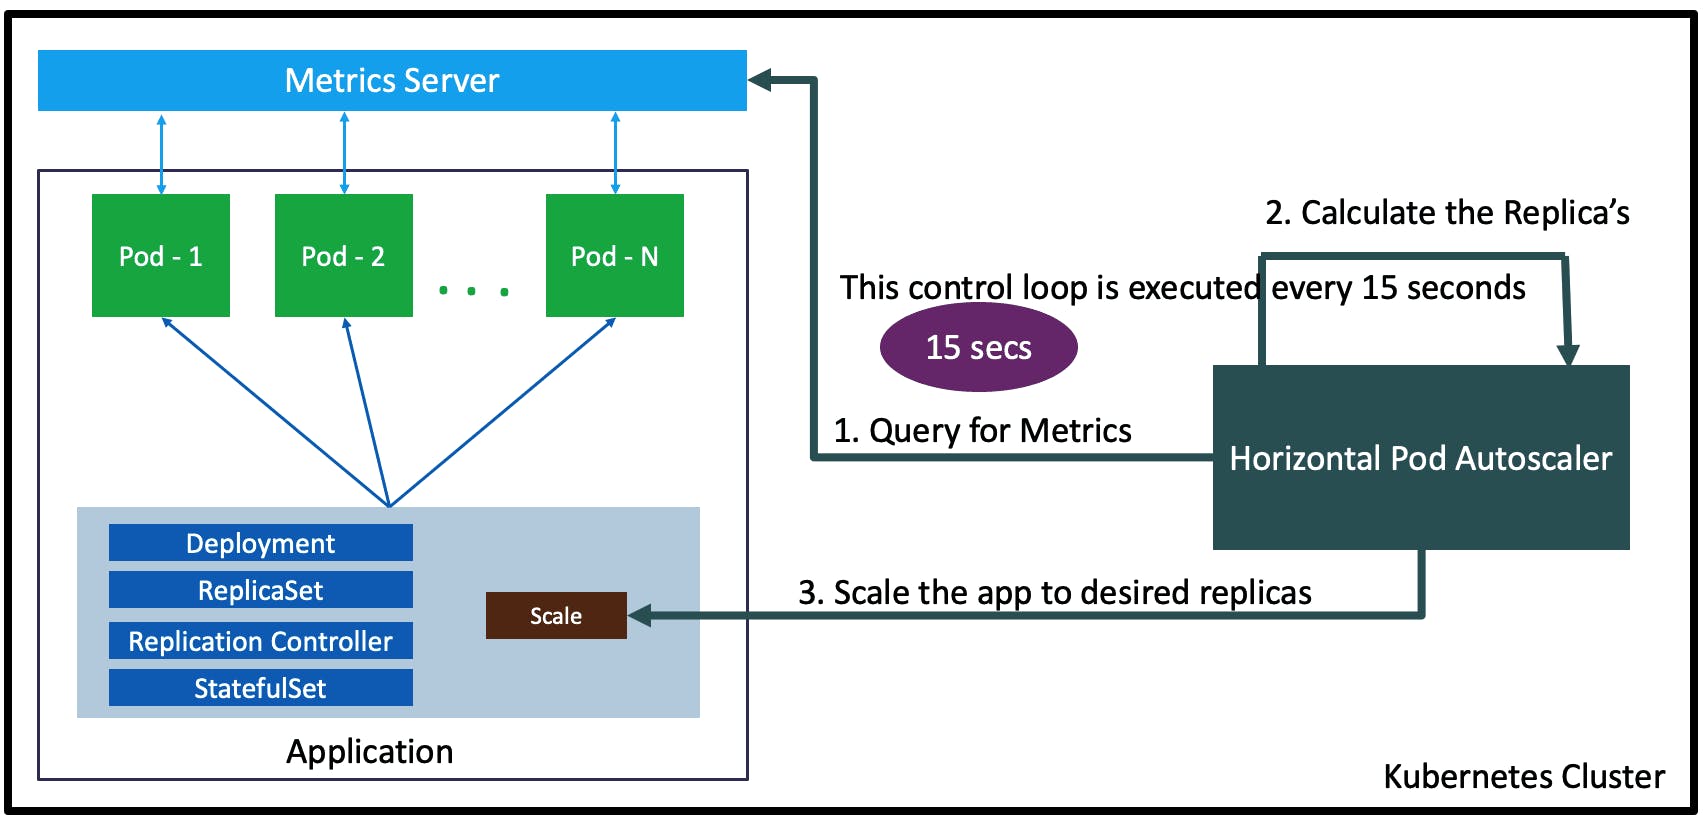 Image credits: stacksimplify
HPA (Horizontal Pod Autoscaler) enables automatic scaling of the number of pods in a particular replication controller or deployment. A replication controller is a logical group of pods created together and treated as a single unit. On the other hand, a deployment is a logical group of pods created as one or more pods. HPA is configured as a Kubernetes resource, and its state is managed as a separate resource. When new pods are created, the HPA updates the state to reflect the current situation.
Vertical Pod Autoscaler
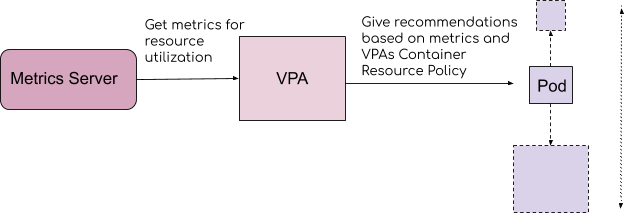 Image credits: velotio
VPA (Vertical Pod Autoscaler) enable automatic scaling of the CPU and memory resource limits of a particular pod type (based on the name in the type field). The VPA resource has a scale (or autoscale) field and a target (or target utilization) field. Scale determines the maximum number of pods of that type allowed in the cluster. Target utilization determines the percentage of resource utilization relative to the limit. For example, you have one type of pods that are consuming 10% of the CPU. A VPA with target utilization set to 10% will scale that type of pods up to match their CPU usage to the maximum amount allowed by the VPA (100%).
Cluster Autoscaler
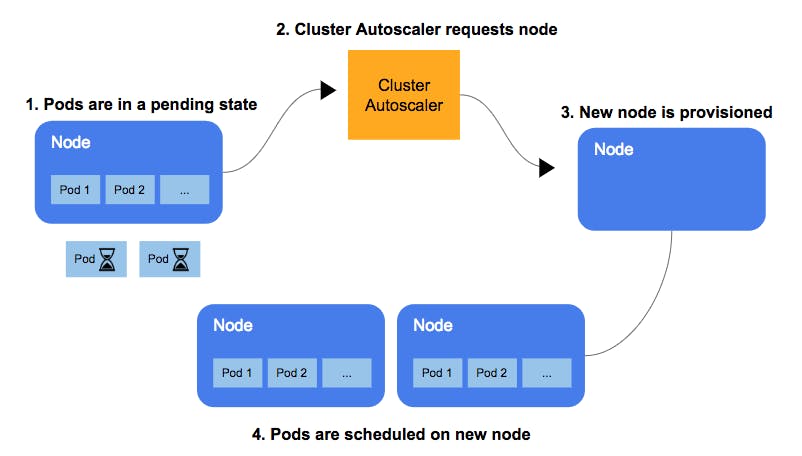 Image credits: Ajay on Medium
The cluster autoscaler scales the number of pods in a cluster based on observed resource utilization and user-defined metrics. It is designed to scale the number of pods up or down based on metrics such as CPU utilization in a particular namespace. Cluster Autoscaler is configured as a Kubernetes resource with a scale (maximum number of pods) and metrics (user-defined metrics). As new pods are created or deleted, the autoscaler updates the state to reflect the current situation.
Scaling your application using Harness
Harness is a modern continuous delivery platform and works well with your Kubernetes deployments. Select the continuous delivery module, and set up the stage and steps to deploy your application to Kubernetes.
Let’s assume you have your deployment.yaml file as below,
apiVersion: apps/v1
kind: Deployment
metadata:
 labels:
   app: todo-app
 name: todo-app
spec:
 replicas: 2
 selector:
   matchLabels:
     app: todo-app
 template:
   metadata:
     labels:
       app: todo-app
   spec:
     containers:
     - image: thoba/todo-list-app
       name: todo-app
       ports:
       - containerPort: 8080
Notice that your replicas count is 2.
Now, let us set up our deployment to scale our application.
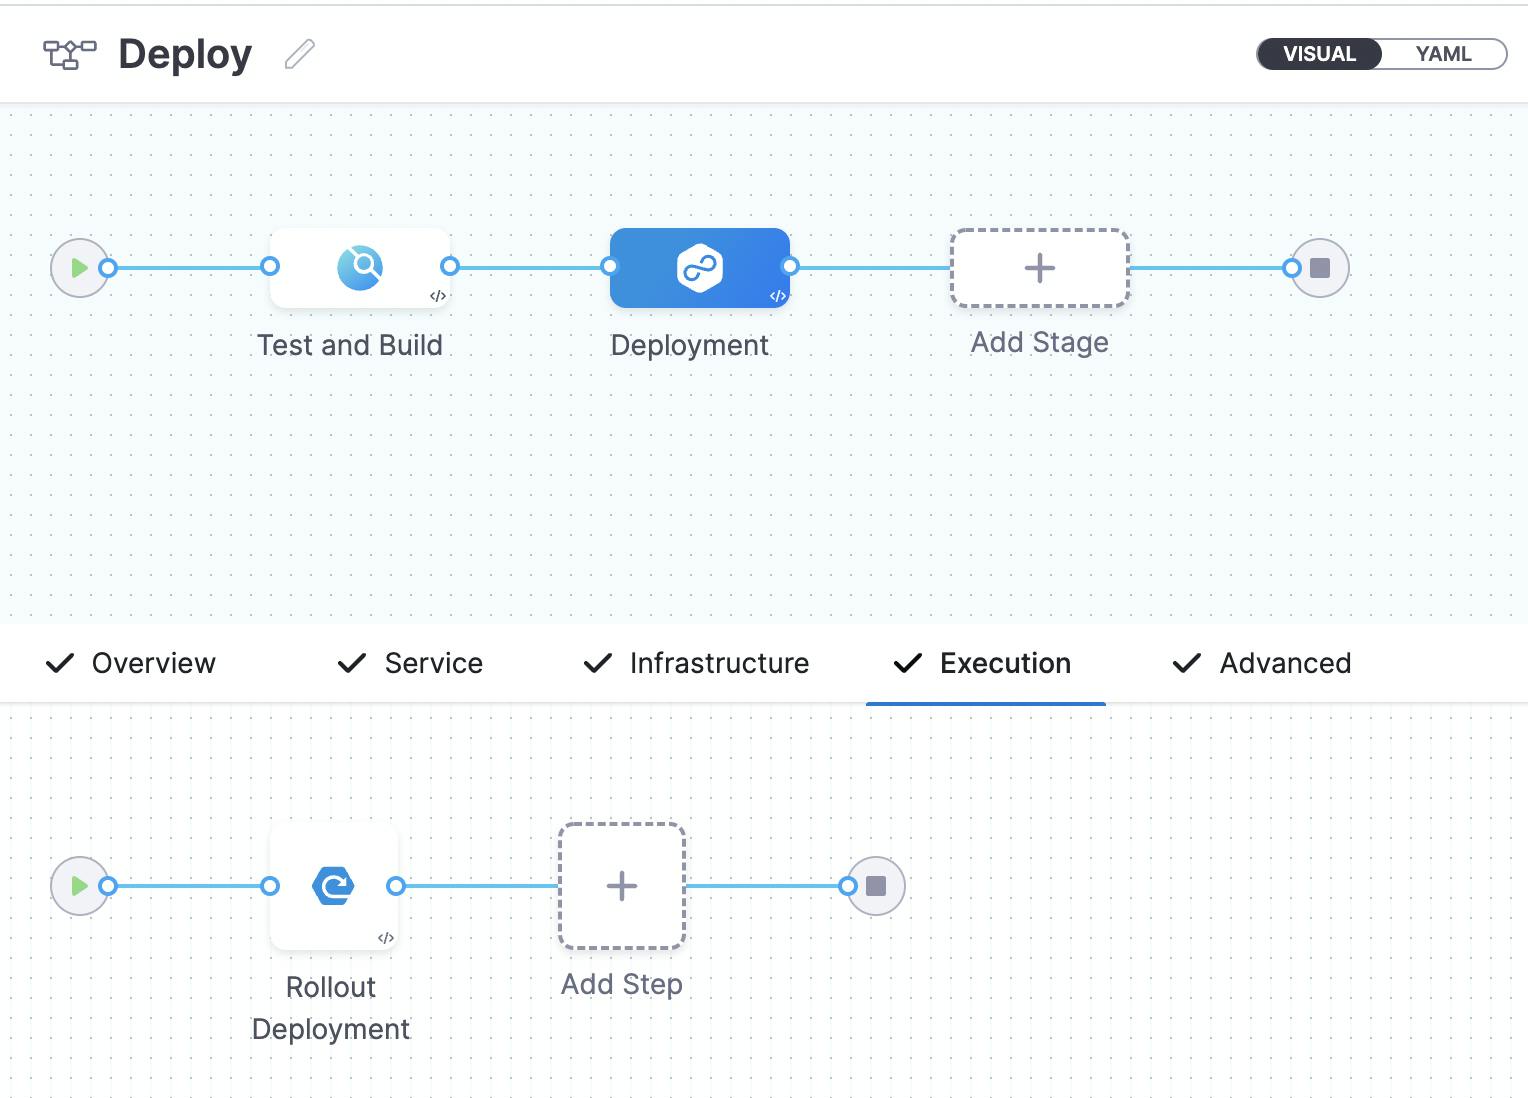
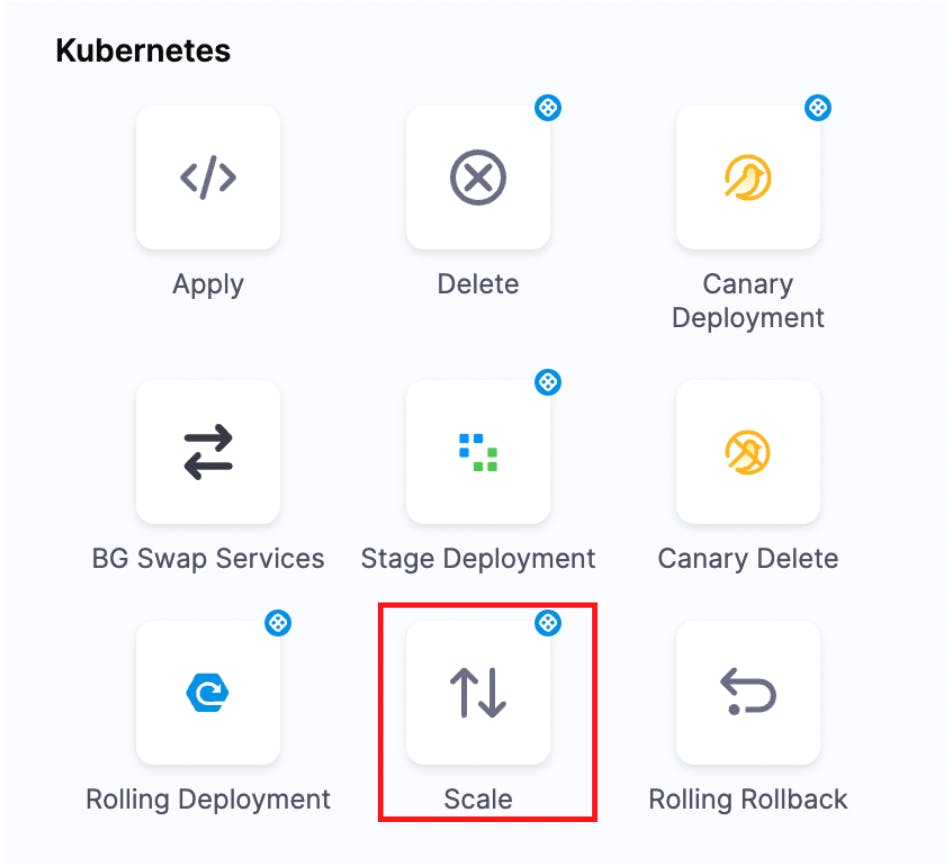
In the Add Step, select Kubernetes and Scale.
Add the instances expected and workload details.
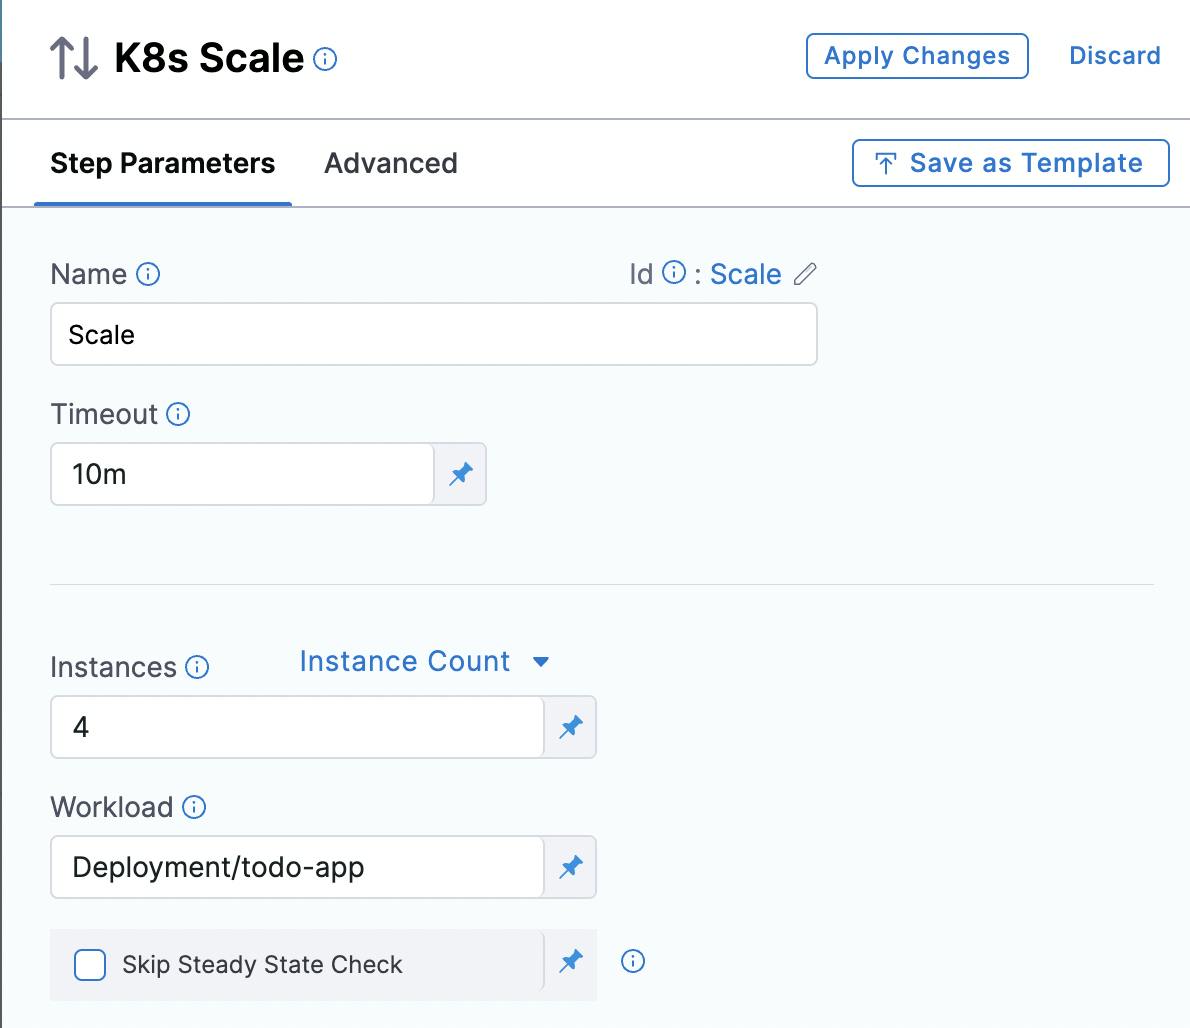
We would like to increase our deployment from 2 to 4 pods running.
So, apply changes, save the pipeline and run it.
After the successful execution of the pipeline, you should be able to see your pod replicas increase from 2 to 4 as specified.
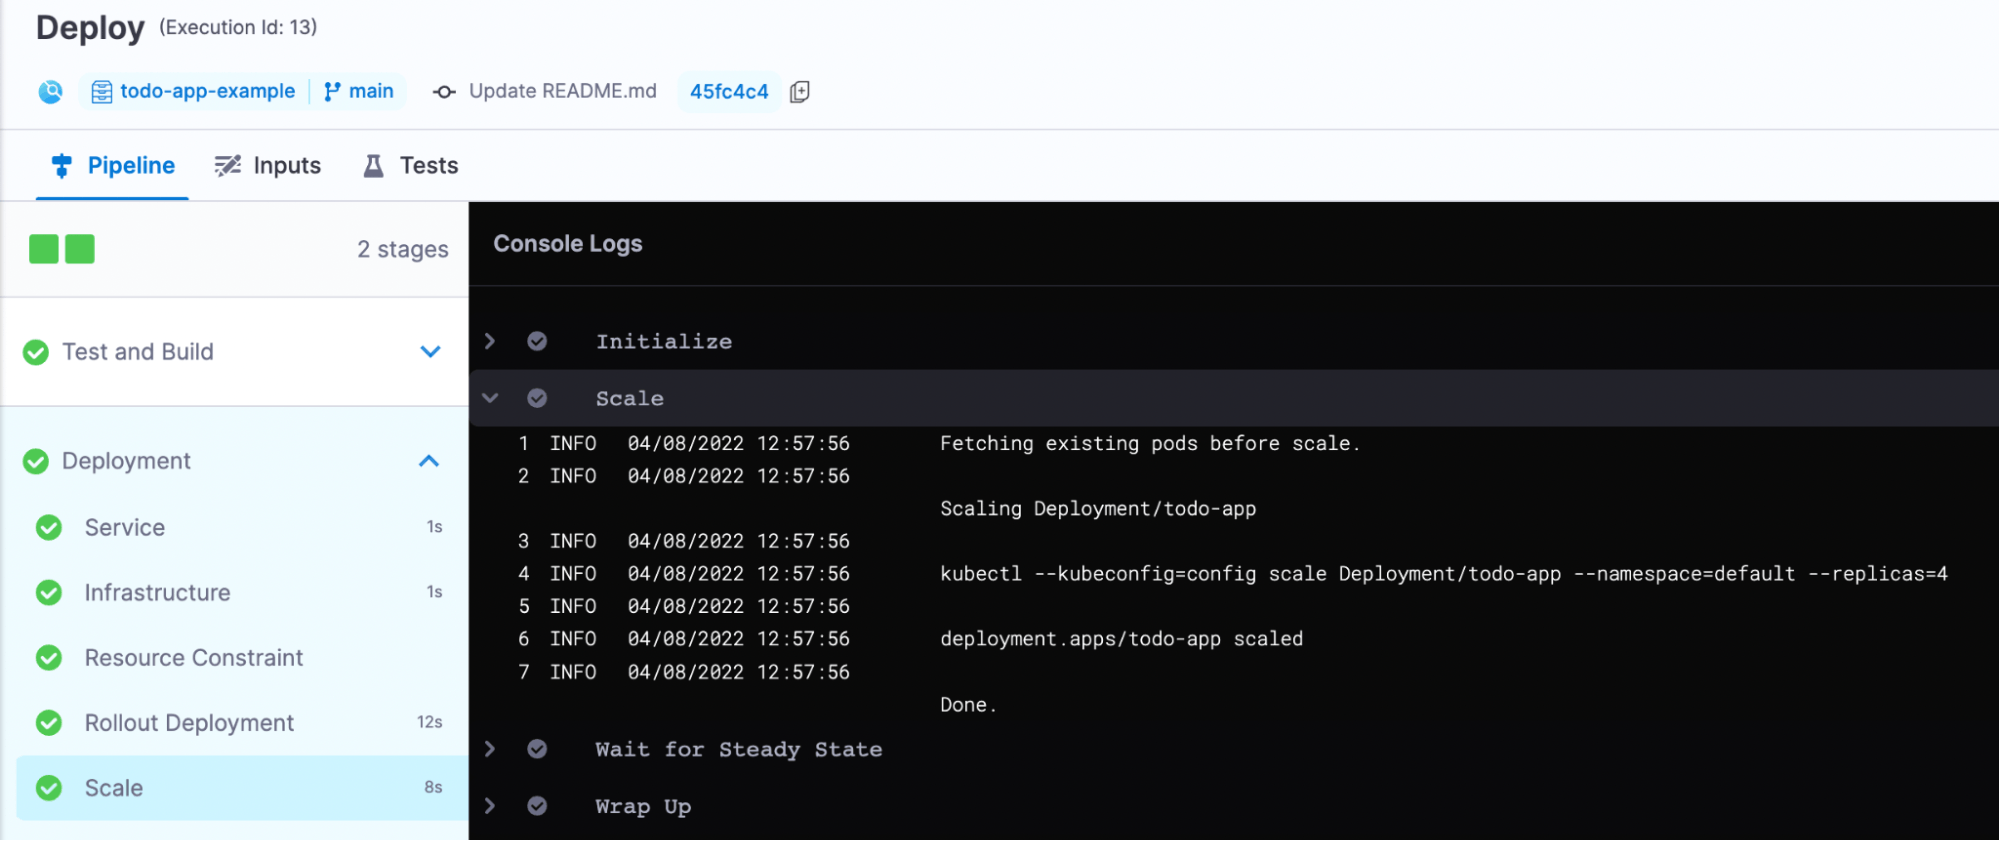
You can verify this by running the command kubectl get deployment

Congratulations! You just scaled your deployment replica pods from 2 to 4 successfully using Harness CD.
Conclusion
Scaling an application in Kubernetes is a critical concept to understand — and a necessary one. For example, if an application receives a lot of traffic, it may need to scale to handle all of those requests. However, before you scale your application, ensure you understand the strategies you have at your disposal and which is best for your application. Kubernetes Autoscaling has been the most discussed concept, and I hope this article helped you understand the different techniques to scale your application using Kubernetes.