

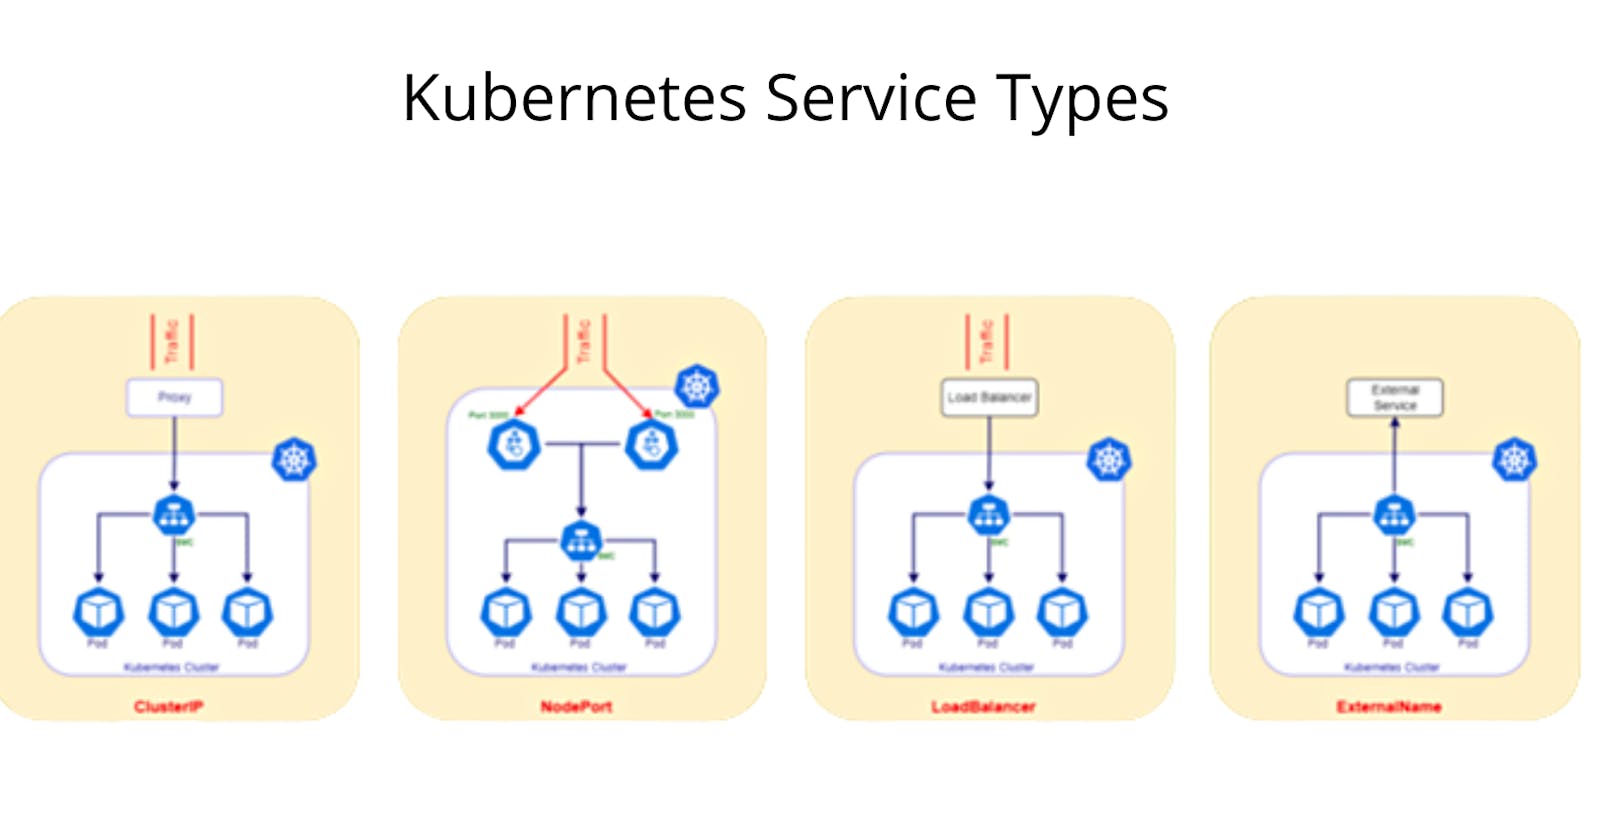


We hope you are here to understand how Kubernetes services work and what are the different service types available. While most cloud-native deployments happen with Kubernetes, it becomes necessary to know these service types, when to use what type, and how they work. Today, we will look at the different service types available and how they work in practice.
Below is my other article where I have explained in detail about each service type.
Prerequisites
- Docker Desktop installed and enabled. Install it from this official link
- Minikube installed and running on your computer. It is a lightweight Kubernetes implementation that creates a VM on your local machine and deploys a simple cluster containing only one node. Get it from this official link
Let’s Get Started:
Let’s create an NGINX web-server deployment with a pod that accepts the traffic to its port 80.
kubectl create deployment nginx --image=nginx
You should see the below output on your terminal,
deployment.apps/nginx created
Now, check if the NGINX is running with the command,
kubectl get deploy nginx
The output you should see on your terminal is below,

Find the exact name of the pod so we can do port forwarding to make it accept the traffic from port 80
Use the following command to find the pod’s name.
kubectl get pod
Then do port forwarding with the following command
kubectl port-forward <pod name> 8080:80
You should see the output similar to as shown below,
Forwarding from 127.0.0.1:8080 -> 80 Forwarding from [::1]:8080 -> 80 Handling connection for 8080
Check your localhost:8080, you should see the NGINX screen.
ClusterIP:
Let’s create a Kubernetes manifest yaml file with type ClusterIP.
Name this file as nginx-svc.yaml
---
apiVersion: v1
kind: Service
metadata:
  name: "nginx-service"
  namespace: "default"
spec:
  ports:
    - port: 80
  type: ClusterIP
  selector:
    app: "nginx"
Create the NGINX service with the following command,
kubectl apply -f nginx-svc.yaml
The output should be as below,
service/nginx-service created
Now, check the service via kubectl command,
kubectl get svc nginx-service
The output should be as below,

Since ClusterIP type is only accessible by the internal pods, we will use kubectl proxy command to do port forward and access our NGINX.
kubectl proxy --port=8080
The output should be as below on your terminal,
Starting to serve on 127.0.0.1:8080
NodePort:
Update the Kubernetes manifest file as below,
---
apiVersion: v1
kind: Service
metadata:
  name: "nginx-service"
  namespace: "default"
spec:
  ports:
    - port: 80
      nodePort: 30001
  type: NodePort
  selector:
    app: "nginx"
Now, apply the following command and update the service,
kubectl apply -f nginx-svc.yaml
The output is as below,
service/nginx-service configured
Now, check this service and you should see the type,
kubectl get svc nginx-service
Below is the output,

Let’s try to access this externally, for that we need to use the describe service command,
kubectl describe service nginx-service
The output on your terminal should be as below,
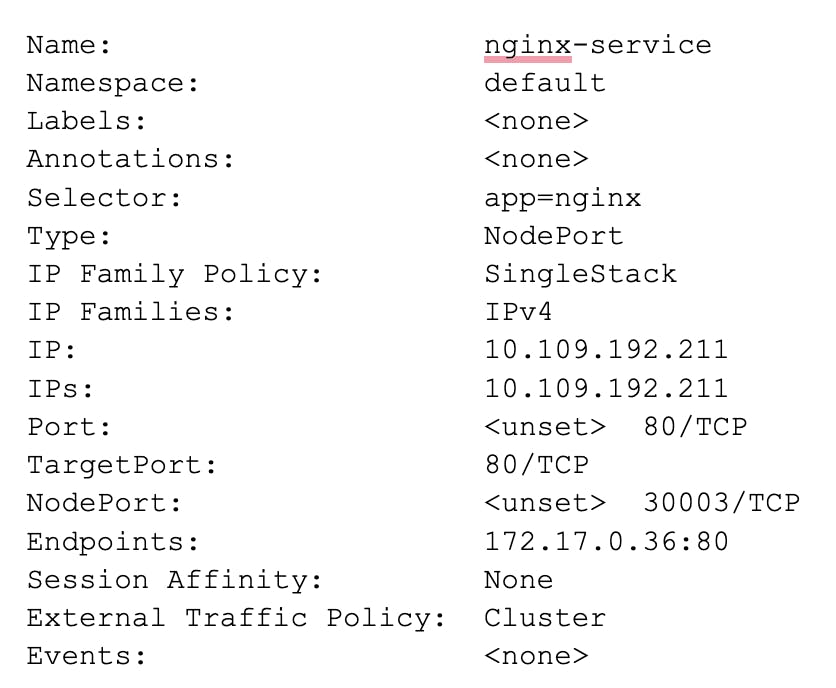
I am using Minikube to create a cluster and Minikube has a command for the NodePort access,
minikube service --url <service-name>
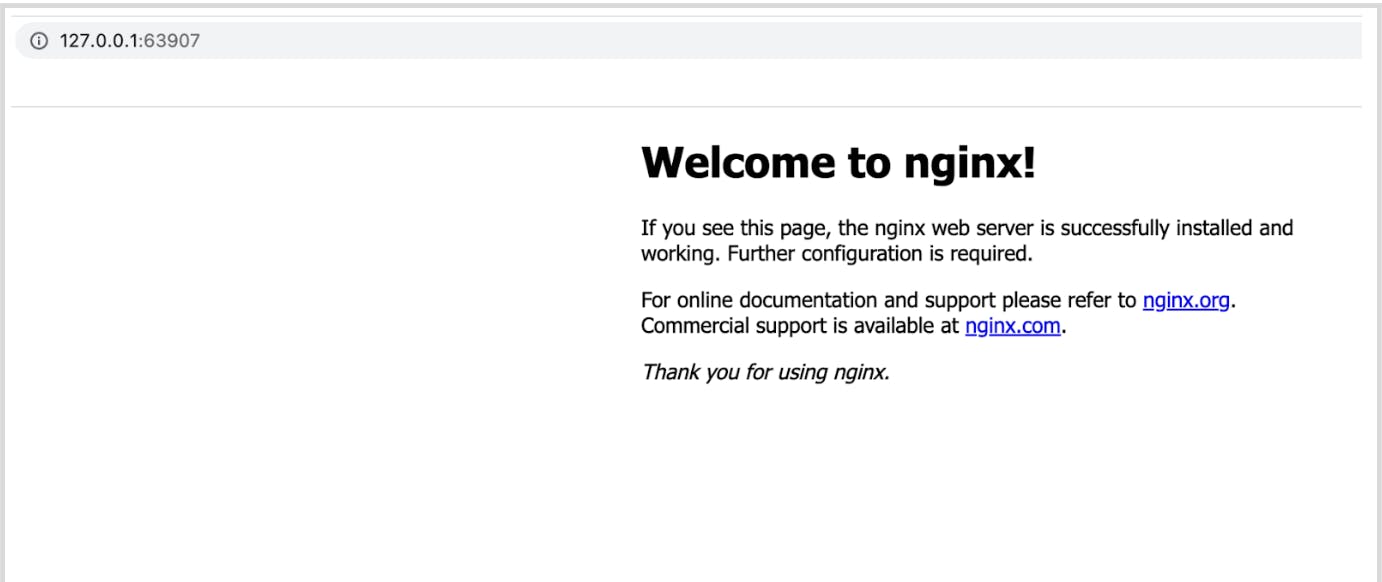
I used minikube service --url nginx-service and the output was as expected, the external URL to access our NGINX.
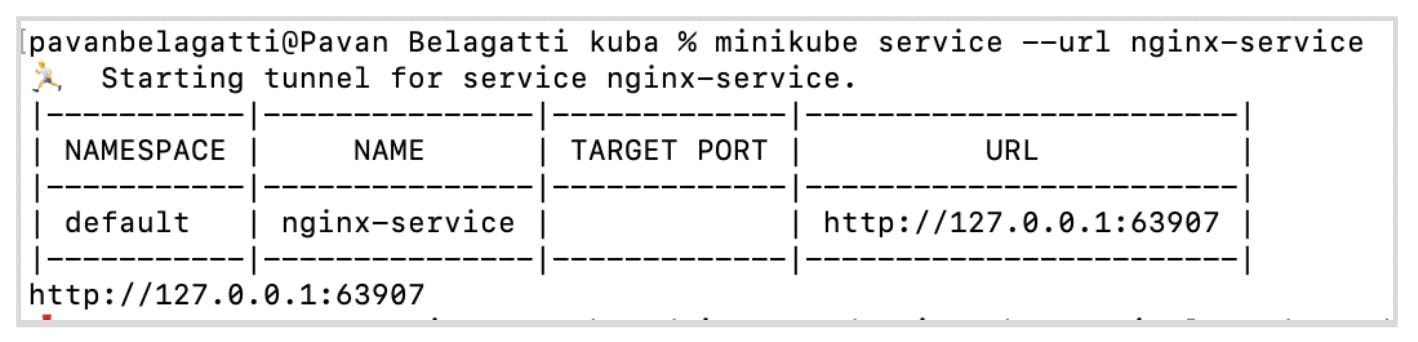
Go to the terminal and the http://127.0.0.1:63907, we should be seeing our NGINX screen.
LoadBalancer:
Update the Kubernetes manifest file again to specify the LoadBalancer type.
---
apiVersion: v1
kind: Service
metadata:
  name: "nginx-service"
  namespace: "default"
spec:
  ports:
    - port: 80
  type: LoadBalancer
  selector:
    app: "nginx"
Now, apply the following command and update the service,
kubectl apply -f nginx-svc.yaml
The output is as below,
service/nginx-service configured
Now, check this service and you should see the type,
kubectl get svc nginx-service
Note: The external IP will be shown pending as we are using Minikube and hence we need to use the following command to get the external IP address.
minikube tunnel
Now, let’s access the service with the command,
minikube service nginx-service
The output is as below,
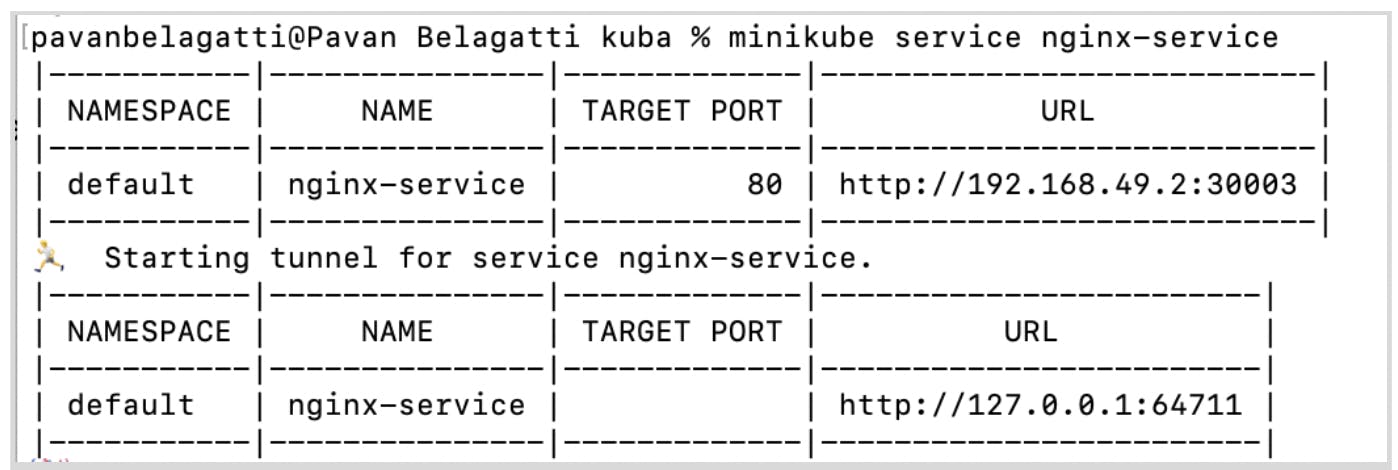
When you access your http://127.0.0.1:64711/ local, you should see the NGINX screen.
Ingress - with NGINX ingress as an example
The full tutorial on Setting up Ingress on Minikube with the NGINX Ingress Controller is clearly shown in the official Kubernetes documentation so we will not repeat the same thing again.
Or, you can follow this simple tutorial of Ingress.
You can start the Minikube with the command,
minikube start
It configures a bunch of resources required to run Minikube.
Then, the next step is to enable the ingress-controller add-on available with minikube from the following command,
minikube addons enable ingress
And the end output on your terminal should be as below,
The 'ingress' addon is enabled
Verify that ingress has been enabled with the command,
kubectl get pods -n ingress-nginx
The output should be as below,

Let’s create a deployment example with the following command,
kubectl create deployment nginx --image=nginx
The output should be as shown below, deployment.apps/nginx created
You can verify this deployment with the following command,
kubectl get deployments
You should see the nginx deployment as output.

Now, let’s expose this deployment with a service, by binding the port 80.
kubectl expose deployment nginx --type=NodePort --port=80
You should see the service exposed message on the terminal.
service/nginx exposed
You can see the details about this service created with the command,
kubectl get service nginx
The output you should see is as below,

Now, you can easily access the NGINX service on your local machine with the following command,
minikube service nginx --url
The output you should see is as below,
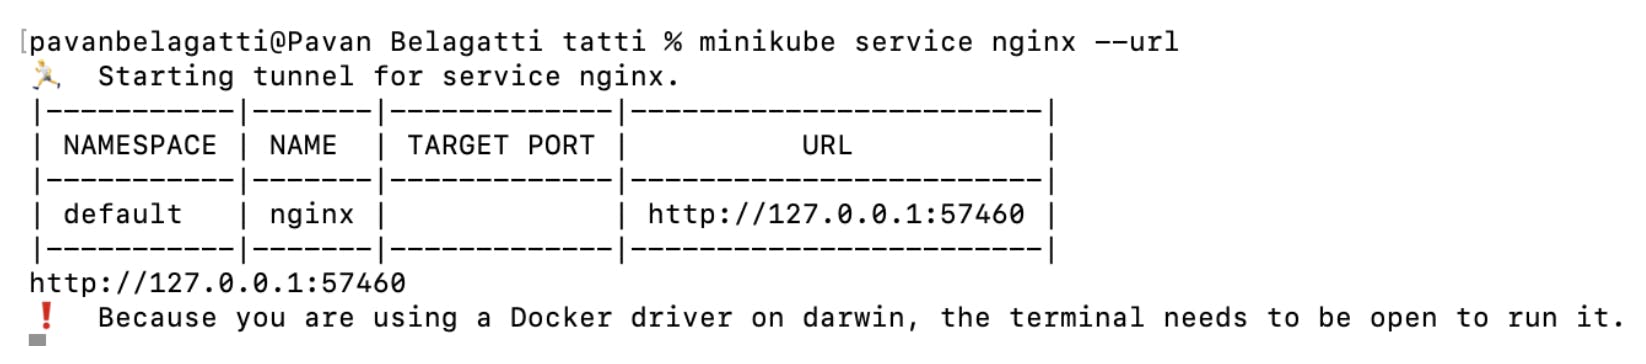
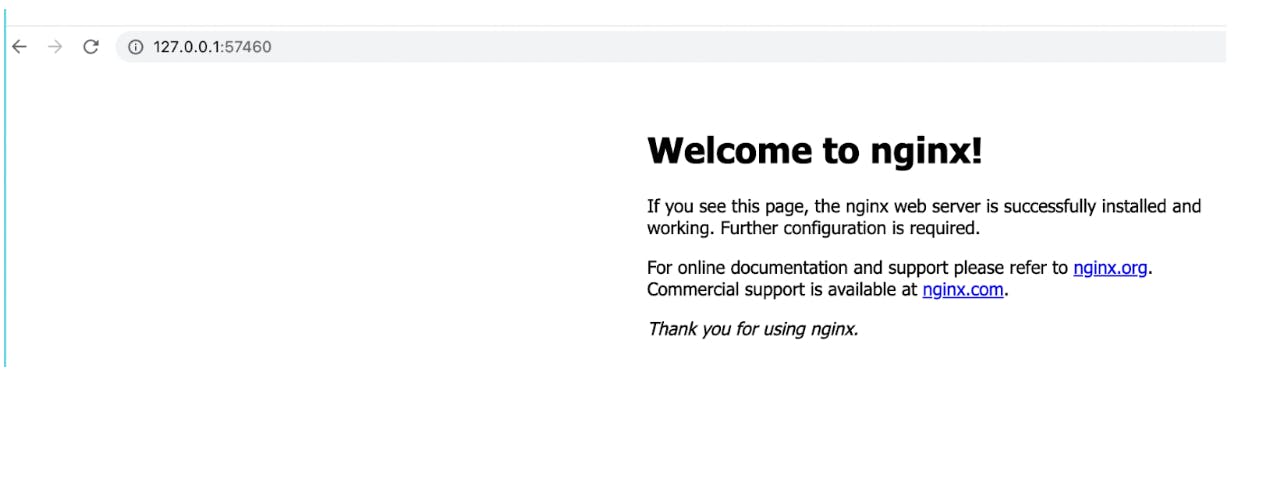
Access the url http://127.0.0.1:57460 and you should be able to see the NGINX screen.
Kubernetes is a powerful tool for automating and managing your IT infrastructure. It gives you the ability to group related parts of your infrastructure, giving them their own “node” in the cluster, making them easier to manage, monitor, and update.
As Kubernetes adoption is skyrocketing, it has become a must-know platform for developers and enterprises to be competitive in the cloud-native space.
The Harness Platform is built with all the capabilities to supercharge your Kubernetes deployments with ease. Harness has an intuitive dashboard where you can easily configure your deployment stage, target infrastructure, and execution strategy.